1. GearBlocks
  2. News

GearBlocks News

GearBlocks Demo 0.7.8420


Hi all, over the holiday period I decided to take some time out to try an experiment: attempt to add undo functionality to the game. Specifically, implement a command history, to which a command would be added for each tool action (e.g. select, move, or attach parts, apply material or paint, etc.) and then allow the player to undo or redo the commands in that history.

The game's tools were not originally built with this in mind, but the code is reasonably well structured so I thought it might be possible. The initial prototype turned out to be promising, and showed the potential improvement to usability this would bring.

Well, I couldn't resist seeing this through to completion, and so that's what I've been working on for the past few weeks. It required substantial refactoring of some of the tool code, and took a while, but the results are well worth it I think.

Here it is in action, I've exposed the command history to Lua scripting, and made a script mod that shows the current list of commands:-

https://www.youtube.com/watch?v=XN7h2X90YPw
Implementation details

Rather than store an absolute snapshot every time something changes, the commands in the history store relative deltas. A command keeps a record of the change that was made by a tool action. This means implementation was kind of an "all or nothing" prospect: all tool actions must be accounted for the command history (in the right order!) for everything to work properly.

Here are the commands I ended up with, these are added to history when...
  • Select tool: ...a tool is selected (some actions are only valid when the correct tool is active, so this must go in the history).
  • Select parts: ...any frozen parts are selected or deselected.
  • Select pivot: ...a pivot point is selected, which detaches all the selected part(s).
  • Move / resize selection: ...the selected part(s) are translated, rotated, or resized via manipulators.
  • Replace attachment: ...an attachment's type is changed.
  • Lock attachment: ...an attachment is locked or unlocked.
  • Delete attachments: ...attachments are deleted (whether directly, due to the selection being detached, or due to a part being destroyed).
  • Spawn / destroy construction: ...a part / construction is spawned or destroyed.
  • Freeze construction: ...a construction is frozen or unfrozen.
  • Swap material: ...a material is applied to a part.
  • Add / remove links: ...link(s) between link nodes are added or removed.
  • Apply paint: ...paint colour is applied to a part.

The command history has a buffer containing references to the added commands, in the order they were added. This allows for the commands to be undone in reverse order, and redone in forward order.

The history maintains an index of the last undone command, and if a new command is added, it will go into the buffer at this point. Any commands that came after the one most recently undone will be lost.

The buffer is a finite size (currently 256), if a command is added to history and it's full, the oldest command is removed.

New demo

So, the game now has full undo / redo capability (using Ctrl + Z / Ctrl + Y). This is a feature that this genre of game really should have, and I think it was worth making the effort to get it done.

There are still a couple of issues left to deal with, but it's now in a usable state, so I've just updated the demo to include it. A lot of code had to change, hopefully I haven't introduced any glaring bugs, it seems stable so far. Give it a try and let me know how you get on with it!

GearBlocks Demo 0.7.8387

Just released a demo update with new grabber tool, brakes, joystick support, building improvements, UI tweaks, bug fixes, and more. See release notes in game for full details!

Release notes:-
  • Tools:-
    • Implemented new grabber tool, for dragging and shoving objects.
    • After detaching selected parts, attachment types are now restored if those same parts are reattached.
    • Tools now only highlight parts relevant to them.
  • Part behaviours:-
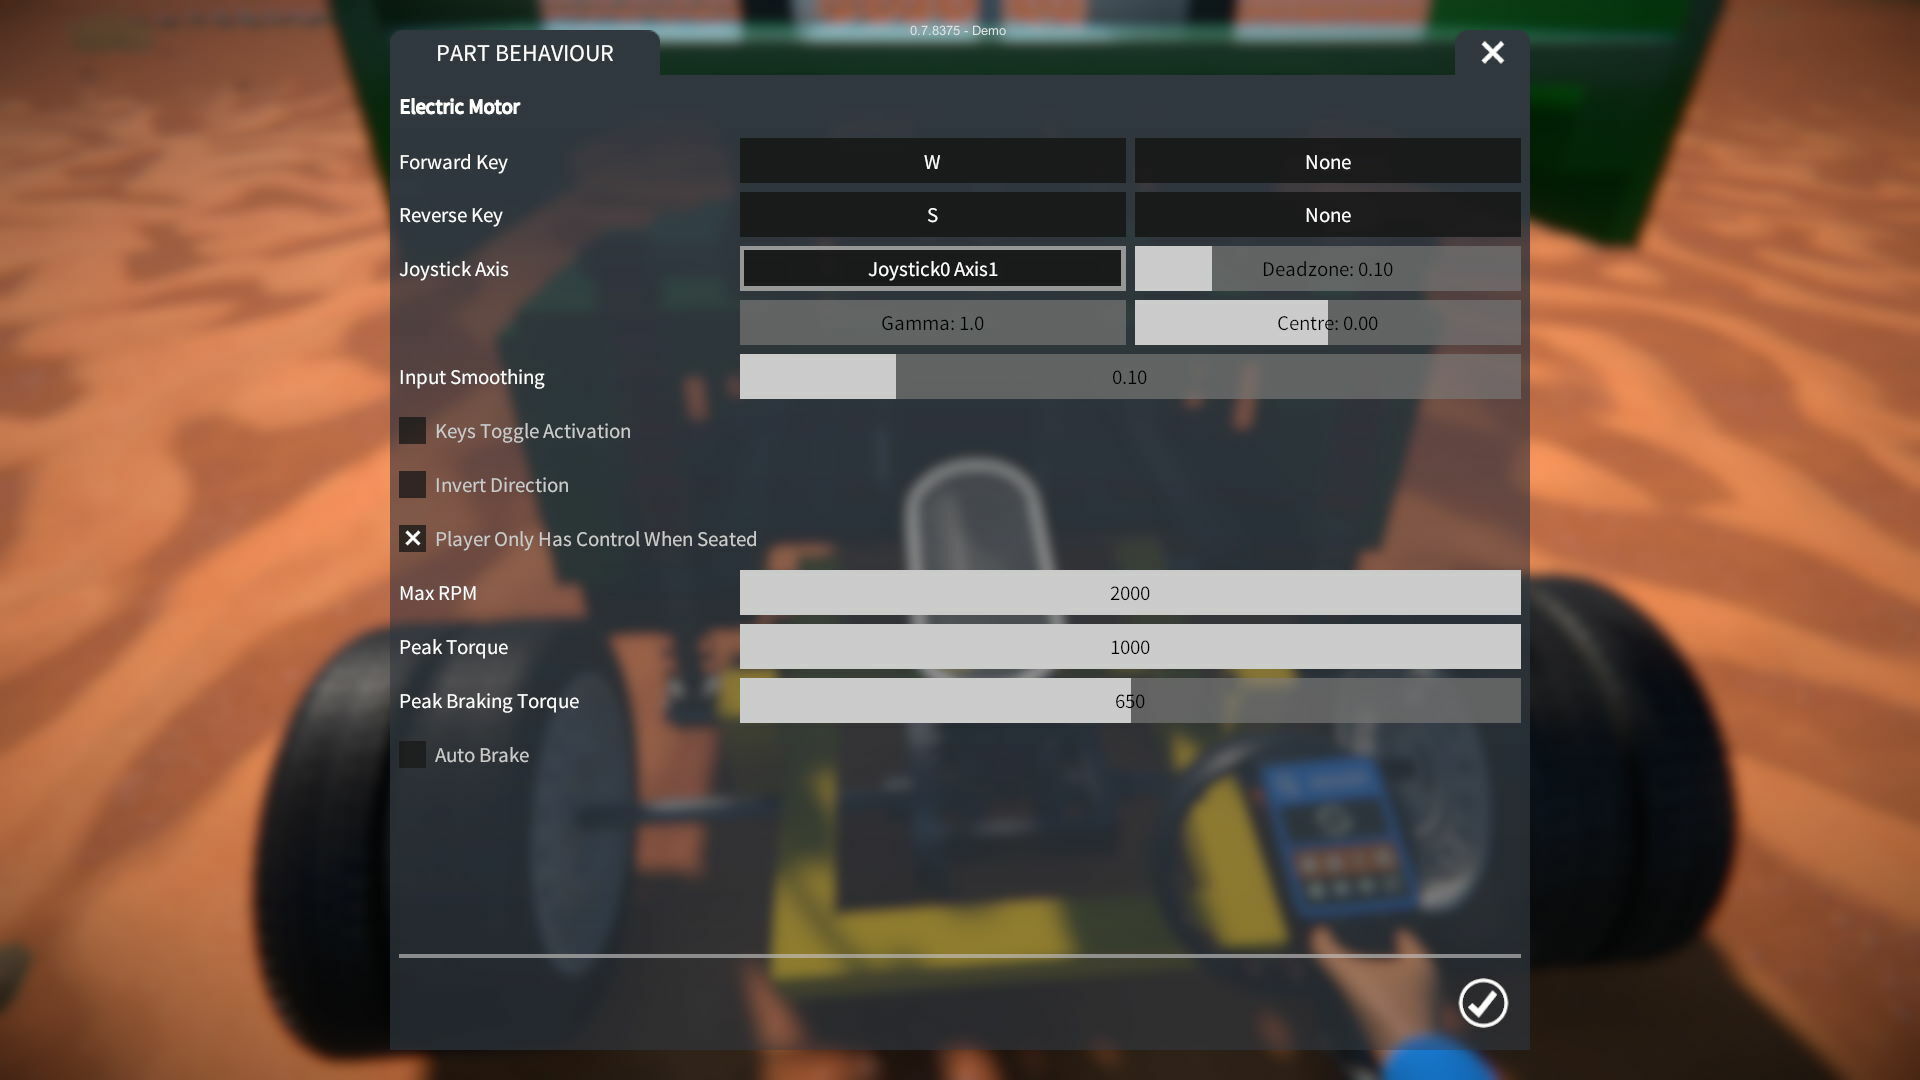
    • Electric motor modified to prevent reverse spin up after coming to a stop while braking (until control is released), also now has separately configurable braking torque.
    • Added braking to "Car Wheel" part, controllable with a bound key.
    • Differential gear's locking (i.e. slip limit) can now be turned off with a bound key.
    • Light's brightness now configurable in part behaviour settings.
    • Implemented analog joystick binding for part behaviours.
    • Activation state now serialized to saved constructions / games.
    • Added option to label a part's function in the construction controls UI overlay (see below).
  • Physics:-
    • Replaced "continuous contact detection" game option with "contact detection mode" scene setting.
    • Rotary bearings now have small angular drag (to simulate friction).
  • Player seating:-
    • Player can now leave seat with jump action (i.e. pressing Space).
    • Improved player positioning after leaving a seat.
    • Added new chase camera mode, available when player is seated.
  • UI:-
    • Added new construction controls UI overlay, shown when no tool is selected.
    • Improved and expanded help UI screen.
    • Removed player stats (speed, etc.) UI overlay, this will be replaced with a script mod in the full game.
  • Removed old "Corrugated Steel" plate part.
  • Bug fixes.
  • Upgraded to Unity 2020.3.42.

Tutorials, new features and parts

Hey all, here's an update on what I've been working on for the past couple of months.

Tutorial scenarios

The main challenge I've had lately is with the design of the tutorial scenarios, my original idea for these didn't work out to my liking. They ended up being rather boring and didn't give a very good first impression of the game. So I decided to try a new direction to create a more entertaining experience for first time players while introducing some basic concepts.

Unfortunately this will likely mean scrapping some of the work I've already done, but hopefully I can reuse some of it at least. For now I'll say no more about the new tutorial scenario design, until I'm further along with it and more confident that it's going to work out.

I found all this rather dispiriting and frustrating to be honest, so to try and keep myself motivated and move things forward, I've also been working on some other stuff!

Building improvements

Recently I've been playing the game a lot (to build content for the tutorial scenarios and trailer video), this has highlighted some bugs and other usability annoyances, which I've been fixing as I find them.

For example:-
  • When detaching selected parts from other ones, the attachment types between them would be lost, and after re-attaching them you'd have to change the attachments back to the desired type. Now, the types are saved while the selection is being moved, and restored after re-attachment.
  • Part highlighting has been improved so that tools only highlight parts relevant to them (e.g. only paintable parts for painter tool).
  • Fixed several bugs (such as parts sometimes not attaching to engaged gears, random rotation after freezing a construction, part duplication issues, and so on).
Braking

On the subject of annoyances, I built a race car to showcase on the race track map, which was fun to drive around but really emphasised the need for proper braking.

Electric motors provide regen braking by running them backwards, but this was hard to control. If a vehicle's wheels had insufficient grip they'd slip and the motor would spin up in reverse. So I made some changes to the motor part behaviour to address this:-
  • Above a certain speed a "braking direction" is now set, which is then used to prevent the motor from spinning in reverse after coming to a stop during braking (the braking direction is reset once directional control is released).
  • Added a separate tweakable value for braking torque.

Electric motor regen may not provide enough braking on its own however, and so I've now implemented a new braking part behaviour for wheels (that can be activated by a bound key). This makes driving vehicles way more controllable and enjoyable.

When braking is enabled, a brake disc is shown inside the wheel.


I plan on adding separate brake and clutch parts in the future that will also make use of this same part behaviour implementation.

Analog joystick control

After spending some time driving vehicles around, I couldn't resist implementing something that would greatly improve the experience - analog control. More specifically, being able to bind a joystick axis to a controllable part behaviour (such as a motor).


This, in combination with braking, transforms the enjoyment of driving vehicles in the game. It is optional however, and the regular bound keys are still a decent method of control.

Chase camera

Another thing I couldn't resist adding was a "chase" camera, which is now selectable when the player is seated. It's similar to the existing third-person camera except that side-to-side movement is smoothly locked behind the seated player, and the mouse can only move the camera up and down.

This camera mode makes driving vehicles in a third-person view much easier, as you don't have to manually track the vehicle by moving the mouse.

More parts and improvements

Again, after spending time driving vehicles, I wanted to improve how leaving seats worked:-
  • Rather than having to look down at a seat to leave it, you can now simply press the "jump" action (i.e. Space by default).
  • When leaving a seat, if possible the player is now repositioned at a free position in front or to the side of the seat, rather than on top. This is more better for a vehicle with a roof for example, where before the player would just be repositioned on top of the roof.

I also improved some other part behaviours (e.g. key bind for differential locking, tweakable light brightness) and added several more parts (e.g. seat, gear, steering wheel, connectors) to facilitate some of the example constructions I've been making.

Grabber tool

Finally, I decided to implement the last remaining tool in the game, the "grabber" tool. Although this wasn't a particularly high priority, it was quick to implement and I wanted to get it done so that I have the option to include it in the tutorial scenarios, without having to go back and modify them later.

The grabber tool allows constructions to be moved around as physical objects, i.e. without freezing them first.

It has two modes, "grab" and "shove":-
  • 1) Target part of a construction, then click the left mouse button and drag, to grab that part and drag the construction around by it.
  • 2) Target part of a construction, hold the right mouse button to charge up, then release to apply a shove force to that part of the construction.


The grab and shove forces are configurable, as is the ability to have free or locked rotation while grabbing.

What about the full game release?

Before the early access release of the game, there are two main tasks left I need to get done: finish the in-game tutorials and make a trailer video.

The tutorial scenarios have not progressed to where I would have liked by now, but I needed a break from them to clear my head, and work on something else. Anyway, now I really need to focus back on finishing the tutorial scenarios, finish building content for the trailer video, and get that captured and edited.

I was hoping to release the game before the end of the year, but unfortunately it's now looking like the date will have to slip by a few months.

This is really disappointing I know, but by way of compensation, I've decided to do another demo release update soon, which will include many of the improvements mentioned in this post, so keep your eye out for that!

GearBlocks Demo 0.7.8292

Hey all, I decided to put out another demo update, as I’ve fixed quite a few bugs since the last one, it also has some of the new features I mentioned in the most recent dev blog post.

Release notes:-
  • Implemented “attachment locking”, a way to prevent attachments from being modified or deleted.
  • Added a compass UI overlay.
  • Added “how to” pages to the help UI screen.
  • Various other UI tweaks and improvements.
  • First pass of localisation support.
  • Bug fixes.
  • Upgraded to Unity 2020.3.38.

Supporting features for tutorials

Hey everyone, here's a quick update on progress over the past month. I spent most of my time working on the tutorial scenarios, but also implementing some features that support the scenarios while also being beneficial to the game more broadly.

Attachment locking

For the tutorials, I wanted to be able to prevent the player from detaching certain parts from constructions in those scenarios.

So, I implemented an "attachment locking" feature, which allows attachments to be set as locked, preventing them from being modified or deleted. Parts that are connected with locked attachments are selected together.

To toggle an attachment locked / unlocked, you just target it and press Left Shift + E. The attachment's UI indicator shows when it is locked.


Also, there are now options in the selection menu for locking / unlocking attachments of all selected parts.


Now, when setting up the tutorial scenarios, it's easy to specify which parts should be non-detachable.

Besides, this feature is just generally useful while building I think. It allows for creating "sub-constructions" that can't be accidentally broken apart, but can still be detached from the rest of the construction as a single entity.

Compass HUD

For scenarios that use checkpoints, I thought it would be good to try and direct the player towards those checkpoints. I figured the same solution could also be used to help the player find "lost" constructions.

So, I decided to add a compass HUD to the top of the screen. It shows cardinal directions based on the player's facing direction, as well as the direction to any constructions in the scene.

Parts can optionally override the default icon shown, this allows checkpoints to have their own icon to be more easily identifiable.


Scenarios

As I mentioned, the bulk of my time was spent working on the tutorial scenarios. This is proving a lot more time consuming than I'd hoped, but I am making progress. I have the first five tutorials mostly done now, and I'm working on the sixth one, which should hopefully cover most of the remaining basic building concepts.

I've also started thinking about more open ended scenarios. As a test I made a "timed lap" scenario around one of the race track routes. This worked out pretty well, so I'm going to make a few more of these to include with the game.


Help screen

As a supplement to the tutorial scenarios, I've also overhauled the help UI screen to be a better user guide and reference. I added sections on various topics such as spawning a construction, spawning and attaching parts, changing attachment types, and so on.


I removed the page linking to the old tutorial videos, as some of them are out of date since the builder tool changes a while back.

Localisation

Lastly, I've started looking into adding localisation (for translating in-game text for different languages).

I decided to go with Unity's own localisation package, it seems to do everything required and I didn't see any need to go with a third party solution.

Integrating this package and setting up the locales (i.e. languages) was nice and easy. Right now I have English, French, Italian, German, Spanish, and Russian locales, I can add more later as needed.

As a test, I set up localisation just for the UI menu and screen heading text. I used Google sheets to make a text translation table (just using Google translate for now), and imported that into the game.

This process worked pretty well, but the prospect of localising all the other in-game text is a bit daunting, I suspect the translation table will end up being pretty large. I'll have to prioritise the most important stuff and do it in stages. Hopefully I can find some volunteers to help with the translations!