Devlog 56 - Gamepad Rebinds, Odds and Ends
Despite what it might seem like, I've actually been working on quite a lot of different things for Rhythm Quest recently! Let's get right into it...
[h2]Game/Music Speed Mod[/h2]
You can now change the speed of the music to make the game more or less difficult:
[previewyoutube][/previewyoutube]
Some of you might be wondering why this took so long to come to the game, considering how this has actually been a debug-only feature for a while. Changing the speed/pitch of the music isn't actually very hard, the problem is getting all of the music synchronization (and respawn, and pause) logic to work properly in tandem with it.
I'm happy to report that this has been implemented properly now! It's definitely not as simple as it might seem...every time you change the setting in the pause menu, what I'd =like= to do is to immediately increase the speed of the currently-playing pause music loop, then adjust the audio timing variables accordingly. But there's no way to do that in a way that respect the audio synchronization perfectly, since the audio timings are all running separately.
Instead I have another copy of the pause music which is set to play at the new pitch/speed. Instead of trying to play that one immediately, I schedule it to start playing 0.2 seconds from now (scheduling sounds in advance is the only way to ensure that they trigger at a precise time on the audio timeline). Unfortunately, I can't schedule a "stop" command in the same way for the first version, so instead I simply wait for roughly 0.2 seconds and then do a flip where I set the volume of the first loop to 0 and the second one to 1 at the same time. Doing all of this lets me keep the beat synchronized with all of my timers correctly.
Of course, since the whole process does take a little bit of time (0.2 seconds), I also needed to implement a simple wait, in case you trigger the button twice in quick succession -- the second music speed change doesn't occur until the first one is finished.
Anyways, this will be available in the upcoming 0.28.0 patch, so players can either use lower speeds to practice / get through difficult sections of the game, OR use higher speeds to give themselves an extra challenge.
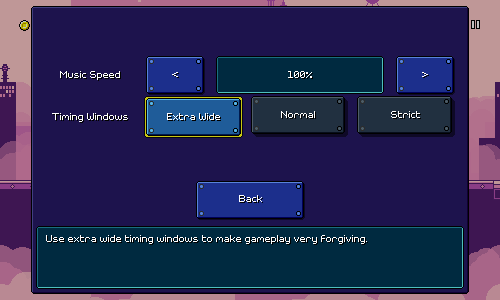
[h2]Timing Windows[/h2]
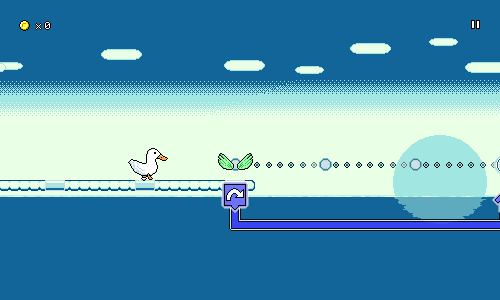
I also have a brand new setting for modifying the lenience of the timing windows for obstacles:
This affects the collider sizes of the various obstacles in the game. Here's how that looks for a basic flying enemy:
Originally I had a crazy half-baked idea in my head that to implement "extra leniency" I would actually buffer inputs for you and delay them automatically to "auto-correct" your early inputs...and for late inputs, I would just "freeze" the character in place for a split second to give you extra time to hit the correct button. I realized, though, that this would make empty jumps and attacks (the ones you do for no reason) feel really sluggish and awkward. I could try and do some tricks to correct for it, but in the end I figured that modifying the sizing of the colliders was simpler and just as effective, while maintaining the tie between your input and the game reacting immediately.
One cool thing is that the setting works for jumps too, even though you wouldn't think they have a "collider" to modify. This is because every jump (even if it's just a normal one over a pit of spikes) has an invisible trigger object (this is what spawns the blue "spinning square" visual effect). As long as you jump while you're inside of that trigger zone, my jump logic will autocorrect the length of your jump to make you land in the appropriate spot. I also already implemented "coyote time" jumps that will allow you to jump even after running off a cliff (as long as you're still within the correct trigger area), so it all just works. Here's that in action with the extra wide timing windows:
[h2]Ghost Helpers[/h2]
I got to see and/or hear about a variety of play experiences when I did my last internal playtest. I won't lie: the design of Rhythm Quest is almost entirely driven by my own sensibilities, but it's still useful to see other perspectives so I can make small course-corrections and admissions when I feel necessary.
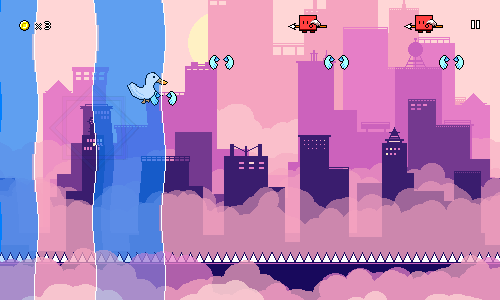
Interestingly (or maybe this shouldn't really be surprising), different people seemed to struggle more or less with different aspects of the game -- for some, the water zones really threw off their ability to read the charts, while other people mentioned the ghost enemies being difficult to read since they felt like they needed to react to each of the new positions.
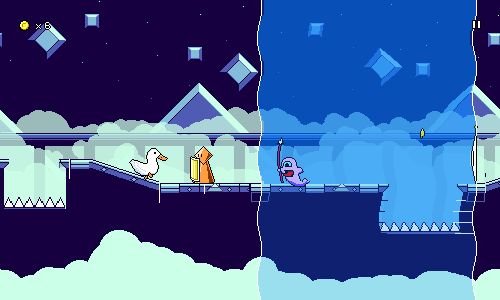
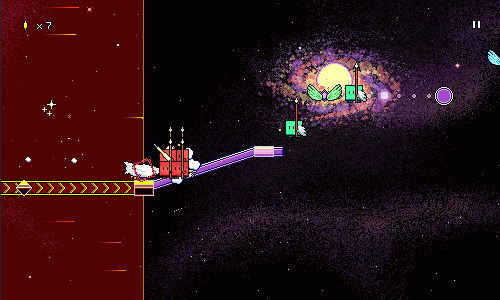
For people who struggle with the ghost enemies, I've added a new helper option that will display guidelines for the second and third positions of the ghosts:
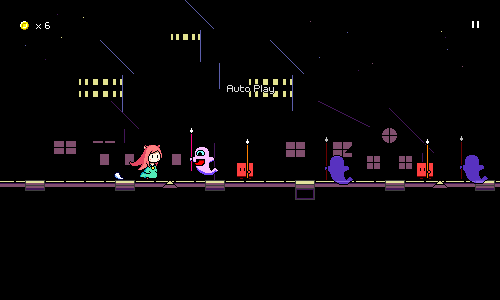
This does, of course, take away from the entire conceit of the ghost enemies to begin with (with the helpers, it's no different than three red enemies), but I really don't mind adding these sorts of modifiers when the implementation is so simple (and I'm not busy working on other things). You can play Rhythm Quest however you want!
[h2]Performance Settings[/h2]
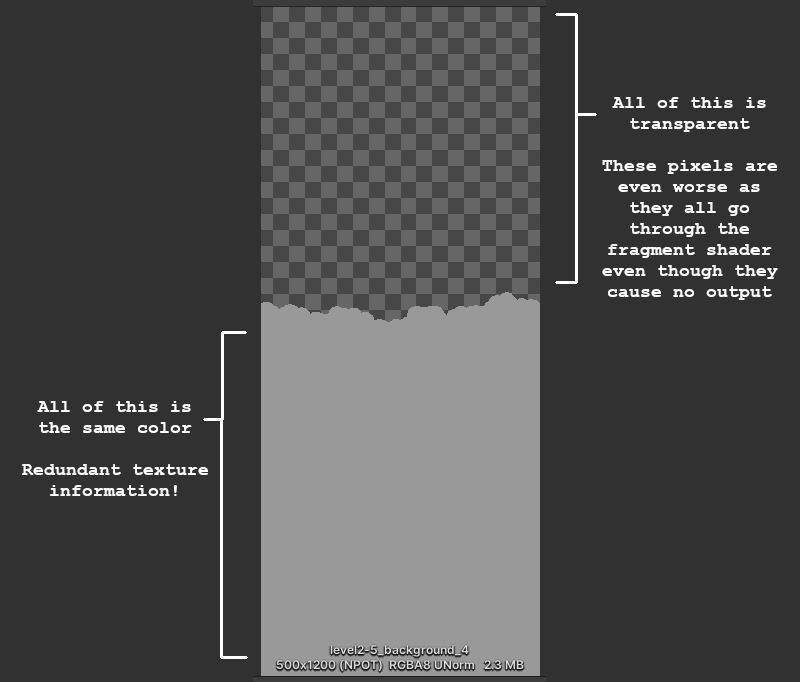
I already did a bunch of work on performance optimizations in a previous stint of work, but I'm happy to report that I've also made the rendering of the water sections more performant: previously, the render textures used to implement the "wavy" water shader were way bigger than they needed to be...now they don't extend past the height of the screen, and dynamically shift based on the camera to be more efficient.
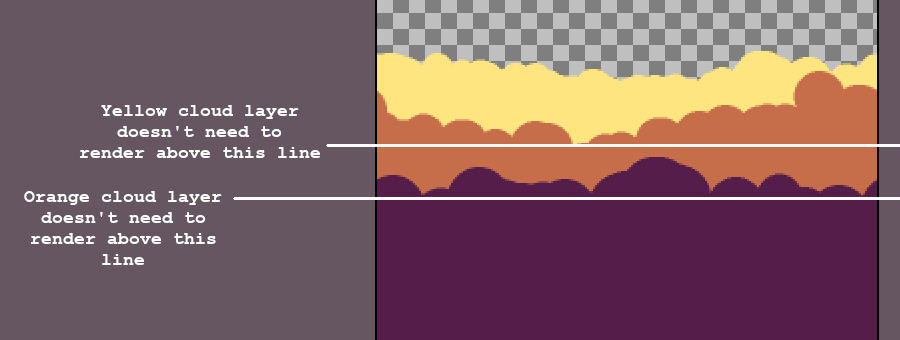
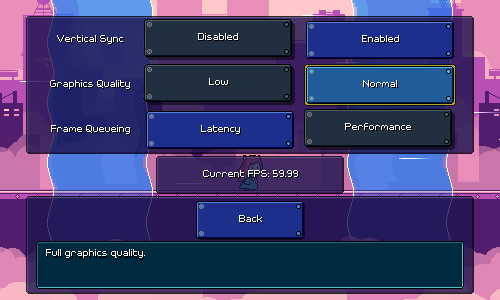
However, I also wanted to give a nod to some lower-end devices, and ended up adding a graphics quality toggle that will disable the fancy water shader entirely, as well as cut out some of the translucent backdrop layers (that I pick by hand) in an attempt to make rendering more performant. I also added another engine-level setting for controlling frame queueing. Those all live on a new sub-settings page that comes complete with a quick-and-dirty FPS counter and some water zones in the background so you can see the effects of the settings live:
[h2]Other Stuff[/h2]
Some miscellaneous other stuff was added too, like a "screenreader" command-line flag that will force the game to start in screenreader mode even if it doesn't auto-detect that one is enabled.
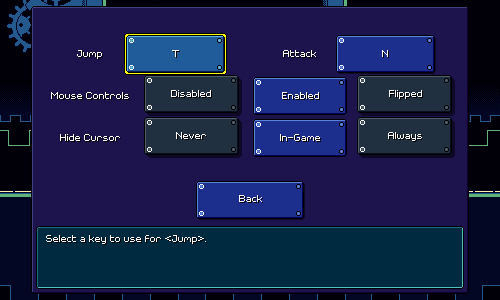
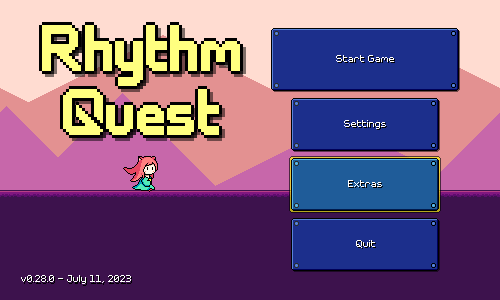
In an attempt to add a little more discoverability to the shop menu, I also made that accessible from the "Extras" menu in addition to the normal place in the level select screen. I also renamed "Cheats" as "Game Mods" since I'm throwing in all of the timing and visual modifications that I've added there. Most of those are also accessible via the in-game menu, which can be helpful if you need a temporary assist for a tough checkpoint that you're struggling on.
I think that about covers it for what I've been working on lately!
[h2]Game/Music Speed Mod[/h2]
You can now change the speed of the music to make the game more or less difficult:
[previewyoutube][/previewyoutube]
Some of you might be wondering why this took so long to come to the game, considering how this has actually been a debug-only feature for a while. Changing the speed/pitch of the music isn't actually very hard, the problem is getting all of the music synchronization (and respawn, and pause) logic to work properly in tandem with it.
I'm happy to report that this has been implemented properly now! It's definitely not as simple as it might seem...every time you change the setting in the pause menu, what I'd =like= to do is to immediately increase the speed of the currently-playing pause music loop, then adjust the audio timing variables accordingly. But there's no way to do that in a way that respect the audio synchronization perfectly, since the audio timings are all running separately.
Instead I have another copy of the pause music which is set to play at the new pitch/speed. Instead of trying to play that one immediately, I schedule it to start playing 0.2 seconds from now (scheduling sounds in advance is the only way to ensure that they trigger at a precise time on the audio timeline). Unfortunately, I can't schedule a "stop" command in the same way for the first version, so instead I simply wait for roughly 0.2 seconds and then do a flip where I set the volume of the first loop to 0 and the second one to 1 at the same time. Doing all of this lets me keep the beat synchronized with all of my timers correctly.
Of course, since the whole process does take a little bit of time (0.2 seconds), I also needed to implement a simple wait, in case you trigger the button twice in quick succession -- the second music speed change doesn't occur until the first one is finished.
Anyways, this will be available in the upcoming 0.28.0 patch, so players can either use lower speeds to practice / get through difficult sections of the game, OR use higher speeds to give themselves an extra challenge.
[h2]Timing Windows[/h2]
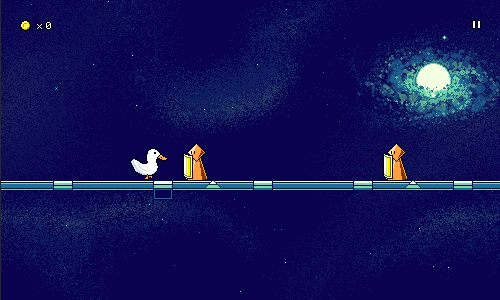
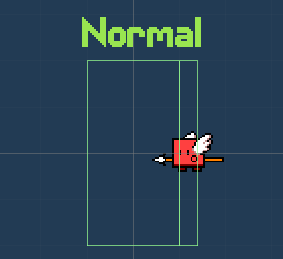
I also have a brand new setting for modifying the lenience of the timing windows for obstacles:
This affects the collider sizes of the various obstacles in the game. Here's how that looks for a basic flying enemy:
Originally I had a crazy half-baked idea in my head that to implement "extra leniency" I would actually buffer inputs for you and delay them automatically to "auto-correct" your early inputs...and for late inputs, I would just "freeze" the character in place for a split second to give you extra time to hit the correct button. I realized, though, that this would make empty jumps and attacks (the ones you do for no reason) feel really sluggish and awkward. I could try and do some tricks to correct for it, but in the end I figured that modifying the sizing of the colliders was simpler and just as effective, while maintaining the tie between your input and the game reacting immediately.
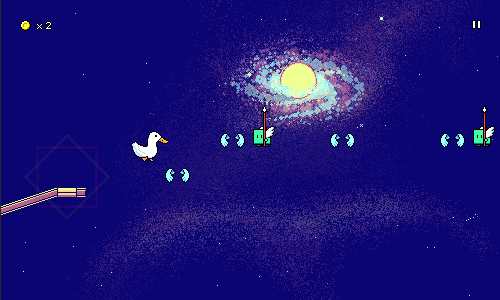
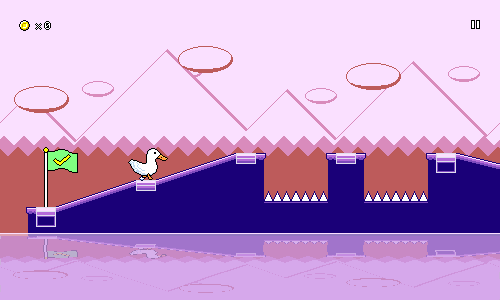
One cool thing is that the setting works for jumps too, even though you wouldn't think they have a "collider" to modify. This is because every jump (even if it's just a normal one over a pit of spikes) has an invisible trigger object (this is what spawns the blue "spinning square" visual effect). As long as you jump while you're inside of that trigger zone, my jump logic will autocorrect the length of your jump to make you land in the appropriate spot. I also already implemented "coyote time" jumps that will allow you to jump even after running off a cliff (as long as you're still within the correct trigger area), so it all just works. Here's that in action with the extra wide timing windows:
[h2]Ghost Helpers[/h2]
I got to see and/or hear about a variety of play experiences when I did my last internal playtest. I won't lie: the design of Rhythm Quest is almost entirely driven by my own sensibilities, but it's still useful to see other perspectives so I can make small course-corrections and admissions when I feel necessary.
Interestingly (or maybe this shouldn't really be surprising), different people seemed to struggle more or less with different aspects of the game -- for some, the water zones really threw off their ability to read the charts, while other people mentioned the ghost enemies being difficult to read since they felt like they needed to react to each of the new positions.
For people who struggle with the ghost enemies, I've added a new helper option that will display guidelines for the second and third positions of the ghosts:
This does, of course, take away from the entire conceit of the ghost enemies to begin with (with the helpers, it's no different than three red enemies), but I really don't mind adding these sorts of modifiers when the implementation is so simple (and I'm not busy working on other things). You can play Rhythm Quest however you want!
[h2]Performance Settings[/h2]
I already did a bunch of work on performance optimizations in a previous stint of work, but I'm happy to report that I've also made the rendering of the water sections more performant: previously, the render textures used to implement the "wavy" water shader were way bigger than they needed to be...now they don't extend past the height of the screen, and dynamically shift based on the camera to be more efficient.
However, I also wanted to give a nod to some lower-end devices, and ended up adding a graphics quality toggle that will disable the fancy water shader entirely, as well as cut out some of the translucent backdrop layers (that I pick by hand) in an attempt to make rendering more performant. I also added another engine-level setting for controlling frame queueing. Those all live on a new sub-settings page that comes complete with a quick-and-dirty FPS counter and some water zones in the background so you can see the effects of the settings live:
[h2]Other Stuff[/h2]
Some miscellaneous other stuff was added too, like a "screenreader" command-line flag that will force the game to start in screenreader mode even if it doesn't auto-detect that one is enabled.
In an attempt to add a little more discoverability to the shop menu, I also made that accessible from the "Extras" menu in addition to the normal place in the level select screen. I also renamed "Cheats" as "Game Mods" since I'm throwing in all of the timing and visual modifications that I've added there. Most of those are also accessible via the in-game menu, which can be helpful if you need a temporary assist for a tough checkpoint that you're struggling on.
I think that about covers it for what I've been working on lately!