1. Mount & Blade II: Bannerlord
  2. News

Mount & Blade II: Bannerlord News

Mount & Blade 2: Bannerlord's nautical-themed War Sails expansion gets a gameplay showcase and spills the release date, and folks, I think we're onto a winner here


Mount & Blade 2: Bannerlord is probably one of the most Fraser games around—a cross between Crusader Kings' dynastic intrigue and Total War's eye-watteringly epic battles, with the cherry on top being that you're commanding your armies within these battles, participating in the bloody scrum. And next month that bloody scrum is taking to the high seas...
Read more.

War Sails Gameplay Showcase & Release Date

[p]Greetings Warriors of Calradia![/p][p]We’re thrilled to announce that War Sails will be arriving on PC and consoles (PS5, Xbox Series X|S) on the 26th of November, 2025! The expansion will be available for $24.99 USD / €24.99.[/p][p]Watch the Gameplay Showcase to see War Sails’ naval battles come to life.[/p][previewyoutube][/previewyoutube][p][/p][p]Wishlist now to stay updated and be ready to set sail on launch day![/p][p][dynamiclink][/dynamiclink][/p][hr][/hr][p][/p]
Dev Blog: Naval Warfare
[p]War Sails turns waters into battlefields. Wind, oars and the naval readiness of your crew are essential, and the ship you bring to a fight only becomes dangerous if you handle it well. This blog focuses on the naval combat experience: how you steer, how boarding works, how rams land, and how a battle moves from opening volleys to the clash on the ropes and planks.[/p][p][/p][h2]Hoisting the Sails[/h2][p][/p][p]Before the fight begins, the Order of Battle phase allows you to organize your forces — just as you would on land. In naval engagements, however, each formation represents a single ship and its crew. Here, you’ll select your flagship, the vessel you’ll personally helm, while assigning the remaining ships to companions or allied nobles.[/p][p]The number of ships armies can deploy in an engagement is determined by their members' perks, with each side being able to launch up to eight ships. If your fleet includes more than that, you can review the roster and decide which ships to bring into the fray. For those who prefer a quicker start, you can also choose Auto-Deploy and immediately set sail against the enemy.[/p][p][/p][p]Order of Battle[/p][p][/p][p]Once the battle begins, you take direct control of your ship from the helm. Smaller vessels are steered by hand at the rudder, while larger ones demand authority from the quarterdeck, where you guide your crew through the stormy waves.[/p][p][/p][p]Ship Control Points: Smaller ships, Bigger ships[/p][p][/p][p]The opening moments of a sea battle are all about feeling the wind and setting your approach. Your sails impact both your speed and maneuverability — unfurl them to harness the wind’s strength and build momentum, or furl them when you need sharper handling with oars.[/p][p]Your wind dial shows the wind’s direction relative to your ship: green marks a favorable angle, while red warns that your sails will fight against the wind instead of working with it. Each rig type behaves differently. Square sails catch a smaller wind coverage but deliver powerful bursts of speed when aligned. Lateen sails offer broader coverage, letting you carry pace across wider directions, while hybrid rigs balance the strengths of both. Hybrid sail rigs have one unique advantage — you can choose to furl the square sail while keeping the lateen one unfurled, giving you a wider coverage but stripping you of some power in the process.[/p][p][/p][p]Wind dial, left to right: Square, Lateen, Hybrid[/p][p][/p][p]When the wind falters, oarsmen become your lifeline. Rowing serves as a secondary means of thrust in naval battles, letting ships move even when the sails hang still. Oars can be used directly by the player as well, and the troops will retract them when ships draw alongside to prevent shearing against nearby hulls. While regular hull contact won’t harm them, a direct ram strike can — oars caught near the impact may snap under the force.[/p][p]If you align a strong sail rig with a favorable wind angle and build speed, oars add little once you’re already moving fast — and knowing that may be crucial. Every man on a rowing bench is one less bow on deck.[/p][p]You can issue three levels of rowing commands:[/p]
  • [p]Stop using oars – benches are empty, and every crewman is ready to fight.[/p]
  • [p]Use oars at half power – half the benches are manned, giving steady thrust while keeping some hands free for combat.[/p]
  • [p]Use oars at full power – every bench is filled, maximizing speed but leaving fewer fighters on deck.[/p]
[p]With oars, you can maneuver without wind, pivot on the spot, or even row in reverse.[/p][p]
[/p][p]Oar Power Commands[/p][p][/p][h2]The Battle Begins[/h2][p][/p][p]Each ship functions as its own formation, following your orders. While you helm one vessel directly, you can still orchestrate the wider fight — not by directing allied soldiers but selecting their ships to issue formation orders: move, follow, skirmish, engage, or target a specific enemy. Should you choose to delegate command, AI captains can skirmish if they hold missile superiority, support pressured allies, avoid collisions, or close in to ram and board when the moment is right.[/p][p]Moving on from those first moments, most battles open at range. If your ship carries a ballista, you can take control of it from the helm. Line up your shot and depending on the ballista type — unleash bolts, stones or fire pots before proceeding with your next maneuver. And should you find yourself away from the helm, you can operate the weapon directly — much like in siege battles.[/p][p]Archers and javelin throwers trade volleys across the waves, drawing from nearby supply crates to keep the pressure going longer. With braziers, those volleys turn into raining flames — fire arrows that can burn sails and set hulls ablaze. A ship with its sails burned is left without one of its main drives.[/p][p][/p][p][/p][p]Ballista Exchange[/p][p][/p][h2]Close Quarters[/h2][p][/p][p]As the distance closes, other methods of destruction come into play. Effective ramming is only available to ships equipped for it, but when used on a battered ship, it can decide the battle in a single strike. Angle, speed, ship weight, and impact point all shape the damage dealt — the perfect hit comes from a fast, perpendicular collision into the enemy’s midsection. Nose-to-nose clashes do little, but a clean side impact can crush hull planks, kill nearby crew outright, or send soldiers sprawling across the deck. On a perfect strike, the shock can shake the entire ship and the troops’ morale.[/p][p][/p][p][/p][p]Ramming[/p][p][/p][p]The above-mentioned ship weight is a double-edged trait in naval combat. Heavier hulls take more time to get moving and to turn, but they ram harder and overcome bigger waves with more stability. You’ll feel the difference between the ship classes: a heavy one cuts through stormy waters that a light hull struggles with.[/p][p]Hulls also break where they’re struck. Damage isn’t abstract — a ship partially sinks from the wounded side. If a ship’s Hit Points get depleted, it sinks completely. In case a fire takes hold, the crew will abandon their stations and tools, helpless until the ship succumbs to the flames. And the scars of battle remain: without repairs, ships carry their wounds into the next fight.[/p][p][/p][p][/p][p]Ship Sinking[/p][p][/p][p]When the distance closes and the moment comes to board, give the command. You and your crew can throw grappling hooks toward the enemy ship — a single connection is enough to draw the two hulls together and form a rope bridge. Multiple hooks hasten the pull and allow more bridges to form for the assault. Once connected, you can direct your crew’s stance: Defend, Follow, Charge, or Hold/Fire at Will.[/p][p]As the clash intensifies, clusters of chained ships often form — islands of locked hulls where crews fight across decks and rope bridges. If your ship is connected indirectly through another, your Charge order will send troops surging forward across every link in the chain to reach the enemy. But if the fight turns against you, you can return to the control point and command your crew to cut the bridges loose — or cut them yourself. Choosing the right moment to do this is important — any troops standing on the bridge when it is cut loose will fall into the water, including your own.[/p][p][/p][p][/p][p]Boarding[/p][p][/p][p]Units won’t slip from a bridge mid-fight unless it’s cut, but the player can fall or jump off. Even then, all is not lost — you can swim, dive, and climb back aboard using the climbing nets every ship carries. Troops, however, can only swim for a limited time. Their endurance depends on tier, mariner background, and armor weight — once spent, they begin to take damage and will eventually drown. When a ship sinks, its surviving crew will attempt to swim toward the nearest friendly deck, struggling for safety before the sea claims them.[/p][p][/p][p][/p][p]Swimming & Climbing[/p][p][/p][p]Commandeering an enemy ship mid-battle is also possible — abandon your initial hull, clear the enemy deck, seize the rudder, and continue the fight aboard the new ship. This can prove invaluable when your own ship is too damaged to continue the fight or lacks upgrades such as a ram or ballista that could help turn the tide of battle.[/p][p][/p][h2]The Last Stand[/h2][p][/p][p]Fresh troops keep the fight alive, and this is where reinforcements come into play. Each ship manages its own reinforcements, determined by its individual attributes.[/p][p]A ship’s Deck Capacity defines how many troops can be on deck and fighting at once. Most vessels have matching Maximum and Deck Capacity, but some ships carry more crew than can stand topside. These extra soldiers remain below deck, waiting to take the place of the fallen. As casualties rise, they spawn to reinforce the fight and keep the deck manned. If a ship’s morale breaks, those reinforcements stop coming, even if the hull is still afloat. [/p][p]Victory can be secured by destroying every enemy ship (even if survivors remain in the water) or by eliminating all enemy troops, whichever comes first. [/p][p]You and your allies may be able to claim defeated ships as prizes, adding them to your fleet. Your skills and perks — along with the condition of the captured hulls — determine which vessels you can take and which must be left to the depths.[/p][p][/p][hr][/hr][p]
We’re thrilled to be nearing the launch of War Sails, and we can’t wait to set sail alongside you. Wishlist it now, follow our social channels for developer updates, and prepare to hoist your sails when the winds of release arrive.[/p][p][/p][p][dynamiclink][/dynamiclink][/p]

Mount & Blade II: Bannerlord's War Sails naval warfare expansion takes to the high seas in late November

To the boats, sword stabby and arrow shooty folk! Well, to the boats as of November 26th, which is when Mount & Blade II: Bannerlord's War Sails expansion finally arrives. Until then, maybe practice climbing some rigging, hosting mainsails, or scrubbing a deck in preparation for the naval warfare the DLC's unleashing.


Or just do whatever you've been doing for the few months which've passed since the expansion's original June release date passed by. Developers TaleWorlds clearly needed more time to shift some coastal villagers around like pebbles on a war-torn beach.


Read more

Dev Blog: Ships

[p][/p][p]
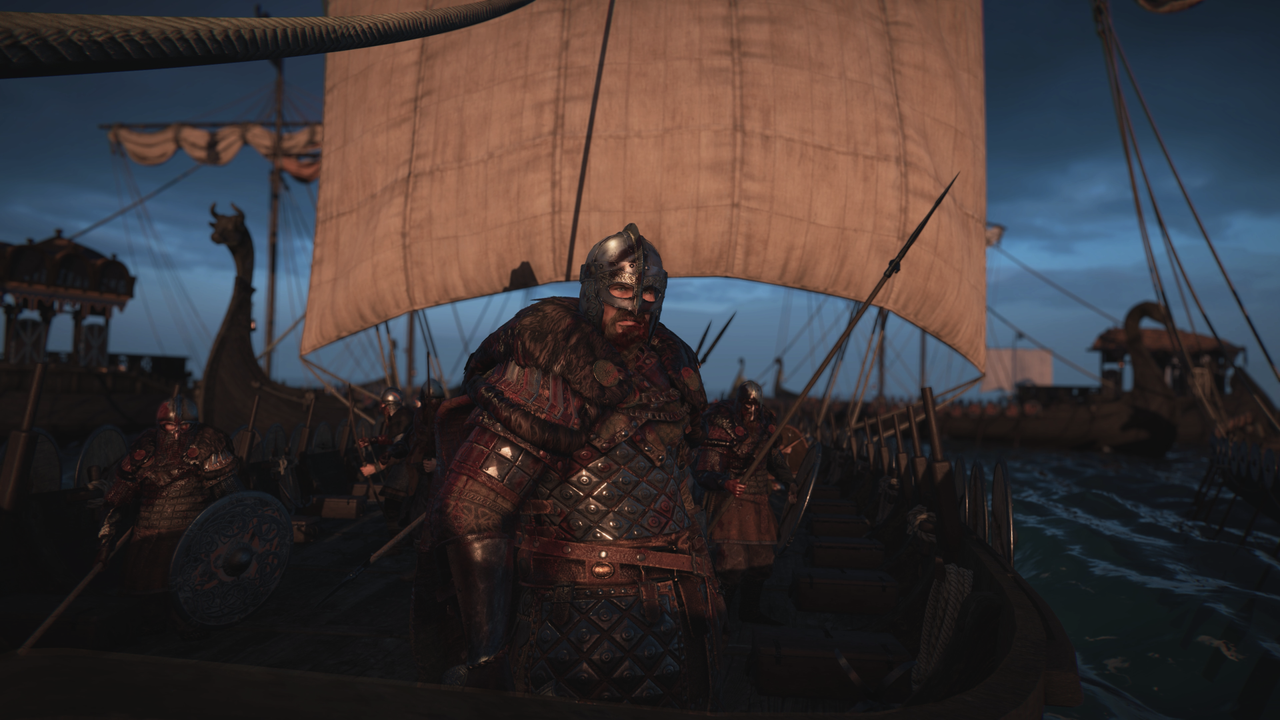
Greetings Warriors of Calradia![/p][p]As Calradia’s coastlines open to trade, raiding, and full-scale naval warfare, it’s time to step aboard and take a closer look at the ships you’ll command in War Sails. This developer blog will dive into the variety of vessels, their design inspiration, their performance on the high seas — and how you can customize them to suit your own strategy.[/p][p][/p][h2]Ship Classes & Sails[/h2][p][/p][p]Ships in War Sails fall into three core classes — Light, Medium, and Heavy — each tuned for a different role in naval engagements.[/p][p]Light ships are affordable and tend to excel in acceleration as well as maneuverability — making them the choice for flank attack. However, their lower crew capacity and hit points make them easy targets when caught off guard. Their smaller size also makes them less stable in rough weather and results in fewer potential upgrades.[/p][p]Medium ships strike a balance between price, durability, deck capacity, and upgrade potential. They are versatile and able to adapt to a range of roles without specializing in any one area. [/p][p]Heavy ships are built for staying power. Wide decks, large crew capacity, thick hulls, and a wealth of upgrades to pick from allow them to dominate in prolonged engagements — though all of this comes at a hefty price in denars. Their larger size tends to make them less responsive when changing direction, but enables them to power through rough seas in the heat of battle.

Alongside these, some ships carry the Trade designation, a secondary characteristic that applies to vessels built for commerce and logistics rather than combat. Trade ships differ from warships in several key ways: they carry fewer troops, offer more inventory space, and require smaller skeletal crews to operate, making them the preferred choice for merchant convoys.
[/p][p][/p][p]Trade Cog[/p][p][/p][p]A ship’s performance at sea is also shaped by its sail geometry, which governs how it handles under varying wind conditions. Square sails offer quick acceleration and perform well in calm winds, but struggle against the wind. Lateen sails catch wind from more directions, enabling higher peak speeds and better versatility, though they result in slower acceleration and lower responsiveness. Hybrid rigs blend both types for steadier control in changing winds. A ship’s sail type is fixed to its design and can’t be swapped, but sail upgrades improve performance within those limits.
[/p][p][/p][p]Rig type, left to right: Square, Lateen, Hybrid[/p][p][/p][h2]Ships[/h2][p][/p][p]Ships in War Sails are inspired by real-world vessels that match the cultures of Calradia. From square-sailed cogs and roundships in the west to lateen-rigged galleys and sailboats in the east, each ship draws inspiration from historical designs. Every faction fields at least one unique ship reflecting its identity, while drawing the rest of its fleet from shared regional pools — bringing the total to 20 unique ships. However, not all factions have access to every ship class. For instance, the Empire employs vessels across all sizes, while the Nords use light and medium ships geared for boarding.

Access to these ships depends not just on location, but also on infrastructure. Ports must be upgraded via settlement projects. A low-level shipyard might offer only a few light ships, while higher levels unlock medium and heavy ships, with more vessels for sale.

The Empire’s navy is the most well-rounded in Calradia. Their fleet includes the Liburna, a medium vessel with a compact hull and sharp contours, built to withstand hits and even deliver ramming strikes. The Dromon, their heavy flagship, is a broad, high-decked vessel with hybrid sails and tall sides, evoking the form of historical dromons. It’s designed to serve as a command ship, with ample space for crew and inventory, offering endurance and control in large-scale engagements.
[/p][p][/p][p]Liburna and Dromon[/p][p][/p][p]Aserai ships combine sleek sailboat hulls with galley-like decks. Their heavy vessel, the Ghurab, features a lean frame with high decks and a sharply rising bow, relying primarily on sail power for speed while offering modest oar support for repositioning. Though slower to accelerate, its latten sails allow for higher speed with excellent wind coverage.

[/p][p]Ghurab[/p][p][/p][p]Battania draws from riverine and woodland traditions, producing vessels reflecting this. Inspired by the real-world birlinn, a ship used in medieval Scotland. The Battanian Birlinn is a light, square-sailed ship with a narrow hull and modest height, designed for speed and agility in calmer waters. Its open deck layout supports ranged combat well, though limited crew capacity makes it more vulnerable to boarding and less effective in longer engagements.

[/p][p]Birlinn[/p][p][/p][p]The Khuzait bring their nomadic speed and skirmishing tradition to the sea with ships like the Qalguk. This heavy flagship has a wide, long hull equipped with lateen sails. Its high speed, paired with solid deck space and archer positions, makes it ideal for long-range pressure. However, like most lateen-rigged ships, it suffers from lower acceleration and lacks strong oar support.

[/p][p]Qalguk[/p][p][/p][p]Sturgia’s ships focus on strength, oar power, and cold-water resilience. Their heavy ship, the Lodya, blends the structure of a galley with the profile of a longship — featuring a long hull and open deck that emphasizes deck capacity. It is built for pushing through volleys and closing the distance for decisive boarding actions. It boasts strong oar power while retaining decent sail capability.

[/p][p]Lodya[/p][p][/p][p]Vlandian fleets draw inspiration from the sturdy cargo vessels of northern Europe. Their heavy ship, the Roundship, features a tall, boxy hull with elevated decks — ideal for ranged support. It has modest oar power but makes up for it with strong defensive structures and commanding lines of sight. With its height and layered platforms, it resembles a floating fortress.

[/p][p]Roundship[/p][p][/p][p]The Nords field longships built for decisive, close-quarters combat. Their flagship, the Drakkar, is a medium, open-decked vessel with a narrow, elongated hull and pronounced prow — designed for acceleration. It relies heavily on powerful oars and boarding. While its exposed design offers little protection against missiles, its aggressive profile and fast acceleration allow it to close the gap fast, overwhelm the enemy with numbers, and claim the deck before arrows become a concern.

[/p][p]Drakkar[/p][p][/p][h2]Ship Customization[/h2][p][/p][p]Pulling into port is where a bare hull becomes your ship. It starts with a name — a single word or phrase that marks the vessel as your own, setting the tone for every voyage to come.

But naming is only the beginning. From there, the real tinkering begins. Ships come with a variety of upgrade slots, such as the aft, hull, sides, sails, and more — though not every vessel supports them all. Dromons, for example, can be fully decked out, while smaller hulls omit those parts that don’t fit. Most upgrades progress through tiers, steadily enhancing performance: some improve troop melee damage, add quivers for archers, expand cargo space, or boost seaworthiness. A select few provide meaningful branching choices — parts that alter how a ship performs in specific situations.

Ships with a fore slot, for example, can mount a ballista for added ranged power. Alternatively, they can be fitted with a battlement — a fortified platform that increases crew capacity, adds weight, and boosts durability, ideal for vessels heading into the thick of close-quarters boarding.

[/p][p]Balista vs Battlements[/p][p][/p][p]The sides are another key area of customization. You can install rows of shields to protect your deck crew during ranged exchanges, or equip braziers instead — sacrificing defense for fire arrows that can threaten enemy sails.[/p][p][/p][p]And like other upgrades, even decorative elements can carry weight in combat. Figureheads blend visual flair with tactical value, similar to banners on land. A Khuzait ship may sail with a horse prow that improves its travel speed, while an Aserai vessel might be seen with a hawk or viper for better ranged precision or faster ballista reloads. Some figureheads improve the attached ship’s crew battle morale, others enhance ramming or boost throwing weapon damage — giving you the freedom to match form and function across your fleet.

[/p][p]Figureheads[/p][p][/p][p]Ship upgrades also require matching port levels, and can differ from culture to culture. For example, you might choose to acquire a Dromon from the Empire region, but you will need to make your way to a Battanian port in order to install boarding weapon upgrades.

And that wraps up another War Sails developer blog! Drop any questions you might have in the comments below, and join us on our socials where we continue to share development updates.

Also, if you havent yet - make sure to wishlist the War Sails expansion on Steam.[/p][p]
[dynamiclink][/dynamiclink][/p]

Mount & Blade Sale!


September Savings are here! As the season begins to turn, so do the discounts. Get Mount & Blade II: Bannerlord 40% off and enjoy 75% off all previous Mount & Blade titles. Don’t miss your chance to dive into Calradia at a special price!

And if you haven't yet - make sure to wishlist the upcoming War Sails expansion for Mount & Blade II: Bannerlord!

https://store.steampowered.com/app/2927200/Mount__Blade_II_Bannerlord__War_Sails/
https://store.steampowered.com/app/261550/Mount__Blade_II_Bannerlord/
https://store.steampowered.com/app/2240110/Mount__Blade_II_Bannerlord_Digital_Companion/
https://store.steampowered.com/app/321300/Mount__Blade_Warband__Viking_Conquest_Reforged_Edition/
https://store.steampowered.com/app/48705/Mount__Blade_Warband__Napoleonic_Wars/
https://store.steampowered.com/app/48720/Mount__Blade_With_Fire__Sword/
https://store.steampowered.com/app/48700/Mount__Blade_Warband/
https://store.steampowered.com/app/22100/Mount__Blade/