1. The Riftbreaker
  2. News

The Riftbreaker News

The Schmetterling Engine: Pros and Cons

Hello Riftbreakers!


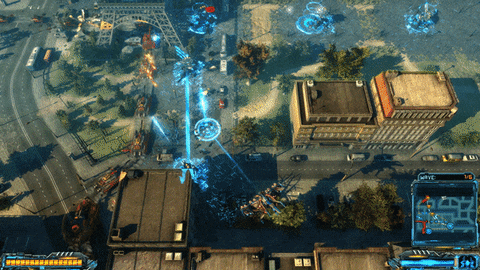
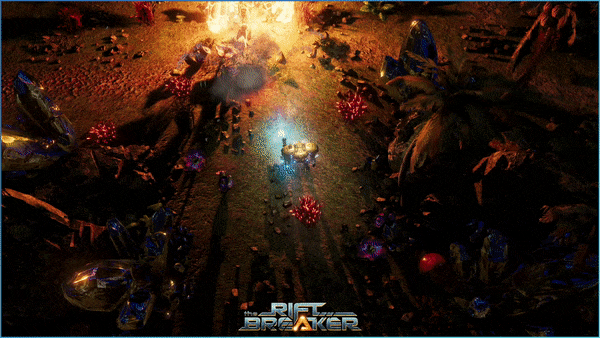
Our game engine is the main focus of today's article. It is one of the reasons why we can throw THIS amount of enemies at you and not worry about the game blowing up.

The game development industry has recently gone through an earthquake of a cataclysmic magnitude. A major game engine provider recently announced changes to their pricing model, which caused an upset in the gamedev community. It left many studios wondering about how to proceed with their work in the future. Luckily, we were not affected by that since EXOR Studios’ games are made using our own engine - The Schmetterling. It is one of the advantages of working with your own technology. You are independent but, on the other hand, solely responsible for the state and features of the engine. Still - we enjoy working with our tech and decided to give you our personal view of the pros and cons of working with The Schmetterling.

[h3]The Good[/h3]

[previewyoutube][/previewyoutube]
The humble beginnings of The Schmetterling engine were captured in this making-of video for Zombie Driver.

When we started working on our first standalone project, Zombie Driver, back in 2008, we did not have the means to afford any of the ready-made solutions available on the market. We had no choice but to look for open-source solutions to make our first game a reality. Our plan was not to build an engine but to somehow piece the game together. In the process of Zombie Driver’s development, we learned what kind of tools work for us and which ones don’t quite make the cut. Over time, we started reducing the bloat of the software we were using and forming a semblance of what our engine is today. It was a naturally occurring process, and it shaped The Schmetterling engine to have all the necessary tools and features we need to make our own games in the isometric camera view. It was a set of answers to our needs at that time, which is one of the reasons why we have kept working with it ever since.

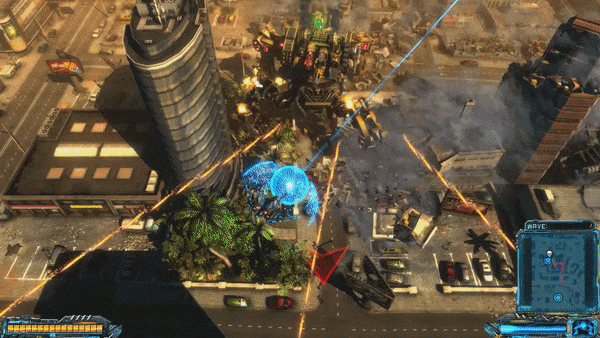
Destructible environment was one of the key features of X-Morph: Defense. We don't know if achieving this level of destruction would be possible for us in any other engine at that time.

As the tech in games evolved, The Schmetterling needed to keep up with the times and evolve as well. This is where the second advantage of the engine became apparent. Because we have the entire codebase for the engine and know it in and out, we can expand the engine with any kind of feature that we can develop within reasonable time. Whether it’s a new physics model, like in the case of X-Morph: Defense, or a new rendering technique, such as real-time raytraced shadows introduced in The Riftbreaker - if we want a new feature in our engine, it is only a matter of time and dedication before we get our hands on it. Our programmers get the experience of working with the new tech, and the designers can unleash their vision, not limited by artificial constraints.

The aforementioned "artistic vision not limited by artificial constraints." We're not quite normal.

Many of the features of our engine have been implemented with designers in mind - most files are human-readable and, as a result, can be edited by anyone with access to notepad. Thanks to how easy it is to create entities, prepare logic files, create scripts and edit databases, most developers in the studio can create entirely new game assets from scratch without ever asking programmers for help. This is also thanks to the simple Entity Component System, which works like a set of building blocks. Each component in this system adds a set of functions to a game entity. By picking and choosing the right components, we can give game assets the desired properties and have them function in-game as intended.

Tweaking sensitive values gets much easier when no baking is necessary. It allows us to fine-tune visual (or physical) effects much easier.

Another aspect of The Schmetterling engine that helps us with development is that there is no baking necessary and most assets, scripts and effects can be edited in real-time. Baking is the common name for the preprocessing of game assets. It is done to make sure that all assets load and function well and do not cause issues in-game. Since our assets are game-ready right away, we can skip this step, drastically reducing iteration time, as all our changes take effect immediately. This allows us to catch mistakes and test new solutions in a very quick manner.

Automated tests won't catch all bugs but they are a great help. We have a feeling this Gnerot will be back.

There is also a bunch of quality-of-life solutions within The Schmetterling that positively affect our workflow. Our automated crash reporter allows users to send us the data necessary to fix many errors with the game. The reporter also gives us basic stats on error occurrences, helping us prioritize the most common crashes. The engine also allows us to automate game tests and performance benchmarks. This helps us identify many issues before anyone has really had a chance to notice them in the first place. Our toolset is also very modular and easily expandable. If we’re missing any features or test setups, it is usually a matter of just a couple of days of work to add them.

[h3]The Not So Good[/h3]

You need to know what you're going for and how to achieve it. If something is possible within The Schmetterling, it's usually a matter of adding the proper components. But first, you need to know which ones will do the trick for you.

Naturally, The Schmetterling is not perfect. One of the most difficult aspects of working with the engine is the fact that there is no documentation available. You can’t refer to the manual for a list of the available features or examples of how to use them. We rely on the knowledge we gained working with the engine over the course of all these years. Programmers tell us about the new features they deliver, and designers often refer to their previous work as a makeshift ‘cheat sheet.’ However, for a person without access to any of that knowledge, the entry barrier is very high. Mastering the ways of the Schmetterling requires dedication and some reverse engineering.

When we were implementing raytraced shadows, we had to carve the path and figure out solutions to all the issues ourselves. At times, it was tough, but the end effect was well worth it.

Another thing worth mentioning is that nobody is coming to help if something is broken. You can’t count on an engine update magically being published by the developer because YOU are the developer. When there is a bug in the engine, you have to ask the person responsible for that part of the codebase to fix it for you. This can be seen both as an advantage and a disadvantage. On the one hand, you directly impact the state of the engine and can request a quick fix if you’ve encountered a critical error. However, it also means a lot of additional responsibility for our programmers, which they (probably) wouldn’t be dealing with had we chosen a ready-made solution.

[h3]The Downright Ugly[/h3]

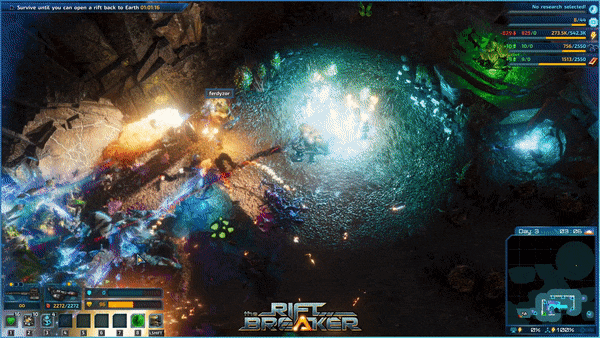
The engine wasn't made with multiplayer in mind. Neither was the game. But it's not going to stop us.

Now, we come to the worst part of working with our engine: it is well optimized for the games that we make. It’s not well-suited for anything else. We have all the tools and features necessary to make single-player games in isometric view. However, if we want to achieve something beyond that scope, we must devote long hours of research and development to build the new features from scratch. This is, unfortunately, why developing online co-op is taking so long. We have to essentially build the entire engine for the multiplayer version of the game from the ground up. While this is probably the most hardcore task we could have taken on, we would face similar challenges if we wanted to introduce other drastic changes to the engine and move the camera to the first-person view, for example.

Testing network play on a small PvP map allows us to progress with the work on the multiplayer portion of the game much faster.

Knowing our situation, we knew going into this that adding co-op mode to The Riftbreaker would be a monumental task. Still, we want to assure you once more that we are indeed working on it. We read all your comments. We know you’re frustrated and angry that you’ve been waiting so long. However, rushing things is not the answer here. In order to develop a good multiplayer mode, we need to make sure all the engine work with each other well. A lot of manhours have gone into assuring that we won’t have problems down the line. There is no going around these things, and the unfortunate thing about that is that more often than not, we do not have much to show our progress.

The next progress report will focus on the network connections and the issues we faced while working on the multiplayer.

We hope that we can give you something playable sooner rather than later. We hope that we can meet your expectations. But until then, we need to ask for your patience. We will publish a full-length Co-Op Progress article in the coming weeks. Stay tuned for that.

If you missed any of our previous co-op progress updates, you can catch up here:


https://store.steampowered.com/news/app/780310/view/3381659291157676103
https://store.steampowered.com/news/app/780310/view/3701435238673426124?l=english
https://store.steampowered.com/news/app/780310/view/3657536564724315072?l=english

[h3]Conclusion[/h3]

The Schmetterling is not very universal, but it's VERY good for our use cases.

Developing our own engine has had a lot of benefits for us. It has given our developers lots of invaluable knowledge. We have benefitted from The Schmetterling’s flexibility and adaptability multiple times. However, maintaining and expanding the engine has been an additional, significant responsibility for our team - a responsibility that does not always show obvious benefits and can get frustrating at times.

There is a lot of craftsmanship involved in working with a custom engine. If we were to use an analogy, it is a bit like brewing your own beer. You can learn all the theory, pick your style and ingredients, and control the entire process. On the other hand, you can go to the supermarket and pick up a bottle of your favorite brand. Both will hit just as good as you wind down after a hard work day, but you won’t feel the extra satisfaction of enjoying the fruit of your work from start to finish.

The bottom line is that there are no silver bullets. Each engine has its strengths and weaknesses. Whether it’s a ready-made solution or a custom-built engine, you will have to face some issues along the way. The most important thing is to make an informed decision in the first place. In our case, we’re glad we have The Schmetterling and don’t think we will switch anytime soon.

EXOR Studios

Designing New Creatures

Hello Riftbreakers!


The development of the third World Expansion for The Riftbreaker is well underway. We stream our progress previews on Twitch from time to time, testing the new survival mode setup and the basics of the new biome’s gameplay - follow www.twitch.tv/exorstudios to catch us live! As you know from one of our previous articles, the development of an update or an expansion is a lengthy process. It’s full of trial and error and involves a lot of iterations over various elements we want to include in the game. Today, we would like to tell you what it looks like in the case of 3D graphics. We will take a look at a couple of new creature models, what they looked like initially, why they were rejected, and what kind of improvements our artists made to make them viable. Today we’re looking at the technical side of things only - these cute little creatures will get a proper introductory article when the time is right. With all that out of the way - let’s see what the process looks like.

Some of the new creatures are quite menacing, but aren't aggressive.

Please note that there is much more to creating new creatures than we can cover with just one article. After designing and modeling the creature, we need to create textures, animation rig, create animations themselves and program the unit’s behavior that will make use of those animations. After that, we add a whole bunch of effects. All blood splats, projectiles, and any other visuals produced by the creature are custom-made for that unit. Same goes for sound effects - they are all created on a per-unit basis. Then, after all the technicalities are done, we can finally playtest the game including the new unit, tweak its behavior and balance it in the context of gameplay as a whole. This article will only cover the process of getting from the concept phase to the final, high-poly model.

...unless you come too close for their comfort.

The work starts with the concept. During the pre-production phase, after we have decided on the general theme of the new biome, we run a series of design meetings where we come up with ideas for the fauna and flora you’re going to find in the area. While plants and other props are designed to support the general theme and serve as decoration, creatures need to fit both thematically and functionally. We gather tons of references, looking at our favorite works of science fiction, other games, and all other media that could be even remotely relevant to the theme of the biome. We come up with several designs and decide what kind of units we need for the new area when it comes to function. We usually need a light ground unit to appear in large numbers, a medium-sized ranged unit, a tank, and a couple of special units with unique mechanics. Our designs for the large tank and the small cannon-fodder came first.

Stickrids are so delicate you can just stomp them.

Fungor is the first of them. The initial design for the creature was to make a tall, menacing hybrid of an animal with a mushroom. Fungor’s design is supposed to make you ask yourself ‘what is going on here?’, as the creature tries to rip the mecha-suit apart and consume you with its giant jaws. Our artists came up with several propositions, trying to solve the issues of Fungor’s proportions, anatomy, movement, and attack mechanics. These are the first concepts they came up with.


Ahhh, sweet man-made horrors beyond comprehension. Everything immediately fell into place after these concepts were presented to the team. We chose elements that we liked from each version. What we wanted was a fungal abomination that moves in an upright position using massive tentacles. We also decided to add another tentacle to the back of the creature that it can use as a weird whip/hammer hybrid. With these assumptions, the artists got back to work. A couple of days later we got this beauty:

Fungor in its ‘rigging pose’ - all the appendages are extended as far as they go and add the animation rig to the model. Essentially, Fungor is T-posing here.


Designing Fungor was rather straightforward. There was no need to go back and do a couple of redesigns - when a clear vision clicked in our heads, it was only a matter of time before our art team could make it a reality. The scale, anatomy and form all match the desired function of the creature. However, things do not always go so smoothly. This little guy is called a Stickrid:


Hey, this is a Stickrid, too…


And this one as well…

The notes next to the arrow say: [top] the tail fin is helpful when living in a swamp. and [lower, next to the hand] fangs so that the creature can climb.

Here, we got three wildly different concepts. After some discussions and looking deep into the beautiful googly eyes of number 1 and number 3, we decided that number 2 was the only one we wanted to kill. However, number 2 had its fair share of problems. First of all - it resembled a spider a little bit too much and we are aware that not everyone would jam with this idea. Second - the spider-like anatomy meant that the creature’s body would be very low to the ground. In the case of the swamp biome, that’s not really what we wanted, as the critter would not be visible to the player most of the time. We decided to merge some ideas from number 1 and number 2 into one model and lengthen the legs. This way the creature would resemble a grasshopper more and its body would stick over the surface of the water.

Stickrids' design allows us to place them directly in bodies of water.

Another thing is the creature’s function. Even though it falls into the ‘cannon fodder’ category - it’s small and always comes at the player in relatively large numbers - it is different from the other small creatures in the game. Instead of melee attacks, Stickrid prefers ranged combat. It will run away from its target to a safe distance and try to take it down with a barrage of small projectiles. If you try to come closer, the creatures will scatter around, trying to keep their distance from you. This feature means that the creature needs to look like it’s able to launch projectiles. Unfortunately, this eliminates the cute number 3. Goodbye, Frogozaurus Rex.


This was the first attempt at merging the first two concepts. The legs have changed significantly, but we were still not very happy with the overall body shape. We decided that the abdomen, also known professionally as the ‘spider butt’ should be slimmed down. We thought that the creature would look beter in a ‘cigar’ shape.


After all of these changes we arrived at this concept. All our goals have been met:
  1. It has an elongated body and no longer resembles a spider
  2. Long legs ensure that the creature will not hide beneath the surface of the swamp
  3. The gaping mouth is ready to shoot projectiles at you and your base
  4. It’s not cute anymore and we have no problems killing it.

All that’s left is to add some detail and final polish to the model. Here’s the final version:


If you compare the last two versions of the Stickrid we presented, you will easily see the difference between the sketch and the final hi-poly model. When going for the ‘final quality’ model, artists pay a lot more attention to the anatomical details of the creatures they model. The legs have been beefed up, and their joints have been moved slightly to make the model more lifelike. The legs themselves no longer stick out of the abdomen. Now, both these elements flow naturally from one to another. Stickrid’s body has also become more compact, ensuring it behaves as intended in large groups, which is the intended use case. Apart from these touch-ups, the creature also received a lot more details. Ribbed carapace, sharp feet, and striped antennae on the head - we have to skip all these things when coming up with low-poly concepts.

One Stickrid is not that threatening...

Artists at EXOR have complete freedom when choosing references and style for their models. The design team only gives them broad descriptions of what kind of creature they think will work well gameplay-wise. Everything else is up to the artist. Our way of creating game art is not for everyone. Some people prefer to make models based on concept art, since that more-or-less guarantees that nothing they create goes unused. However, we believe that when artists can interpret the creature description freely and create something from the ground up is our strength. It always leads to interesting results and gives them a chance to put a personal touch on their work.

...but there is never just one!

So there we have it - an overview of the first steps that our models take, from the humble beginnings to the final hi-poly model. Let us know if you would like to hear about all the other stages of creature development - texturing, animations, particles, sounds, and everything else! We’ll gladly share more info on this. Remember to join our Discord at www.discord.gg/exorstudios for more news and daily changelogs. Also join our streams at www.twitch.tv/exorstudios - we haven’t streamed our co-op progress for a while, so it might happen soon…

See you next time!
EXOR Studios

Tools of the Trade

Hello Riftbreakers!


Last week, we showed you what our organization of work looks like when it comes to larger-scale projects, like expansions or major patches. It takes hundreds of hours of work from individual people to eventually create something that is much more than just a sum of its elements. Today, we would like to tell you what kind of tools and technologies we use daily to make our jobs a) possible and b) easier. Some of the tools we use are quite specialized and unpopular. Others - you might very well have them installed on your PC. Let’s take a closer look, going from team to team.

[h3]GRAPHICS[/h3]

Blender. Throughout this article, you will see what we're working on at the moment. Pay attention to details!

Blender - This open-source 3D modeling software is the bread and butter of the graphics department at EXOR Studios. The vast majority of the hard-surface objects are modeled in this program. It is used for all stages of asset production, from basic sketches through detailed high-poly models to simplified low-poly versions ready for use in-game. We make animations in Blender as well! Thanks to Blender’s open nature and plugin-based expandability, our designers always have the freedom to look for new tools and add-ons to help them with their work. The best part is that the software is completely free, and with a large number of courses available online, anyone can learn it and start their journey with graphics design!

Zbrush. New creatures are coming to life right as you're reading this!

Zbrush - As good as Blender is, it is not perfect for all tasks. When it comes to modeling organics, such as creatures or plants, Zbrush is the tool of choice for our team. This program allows the artists to sculpt models with fine details as if they were working with a real-life material such as clay. Using a range of virtual brushes, our designers can intuitively create lifelike models with relative ease.

Substance Painter is where all models get their colors. And materials. And basically, everything else that makes them not look like an unpainted Warhammer mini.

Substance Painter and Designer - We use Painter to create textures for our models. It allows our artists to create highly detailed textures using a range of smart tools. It simplifies the texturing process by automatically wrapping the model and allowing the artist to observe the effects of their work in real-time. Designer, on the other hand, allows us to create materials for our in-game models using procedural generation.

Photoshop. Layers, keyboard shortcuts, 20 gigs of RAM usage. Photoshop in a nutshell.

Photoshop - When it comes to creating 2D graphics, nothing beats good old Photoshop. Apart from the more obvious use cases, such as creating concept art and loading screen art, we also use Photoshop to create the elements of the Graphical User Interface, or GUI. All buttons, frames, and menus have started their lives in Photoshop. They are later cut into individual elements for the engine to use across all the different screens in the game.

After Effects. Even the animations you can see in the game's main menu were born in After Effects.

After Effects - the layered 2D graphics created using Photoshop can also be used to create basic animations. By applying simple movements to some elements of the artwork made by our team, additional particle effects, and a dash of post-processing, we can prepare in-game animatics on our own. Of course, they may not be as spectacular as fully-rendered 3D movies, but they serve the purpose of conveying story elements quite well. Additionally, we can make changes to them quickly and avoid the need to rent costly render-farm hardware.

[h3]PROGRAMMING[/h3]


Visual Studio and Visual Studios Code. For non-programmers out there: spot 5 differences.

Visual Studio and Visual Studio Code - our programmers’ weapons of choice. The Riftbreaker’s game and engine code is written using C++. Our Programmers use Visual Studio as their development environment and debugger. However, the code is only a part of the game and works in tandem with the game’s content. This is where Visual Studio Code comes in. Our programmers use it to navigate the game’s scripts and content. It also gives us a LUA debugger that we can attach to the game’s process. Additionally, there is a number of different shader languages (depending on the platform), various tools written in Python, Powershell, C#, or whatever new tech the programming team finds useful at the time.

SVN keeps track of all changes ever made to a file. You can't hide your mistakes, even if you really want to!

SVN - A free and open content versioning system that can be integrated with the Windows interface through e.g. TortoiseSVN. It allows us to distribute the working copy of the game to all developers in the studio, keep track of changes made by each user, and fall back to any revision of The Riftbreaker in the history of the project. It serves both as a tool for organizing our work, as well as one of our many backups.

TeamCity. This list goes on and on, as we have multiple configurations for all platforms and all our games there.

TeamCity - This piece of software allows us to automate a lot of things around the office. It directly controls our four dedicated build machines - the main job of these computers is to compile game code quickly. TeamCity maintains the building queue, distributes tasks between the build machines, as well as helps us automate some tedious tasks, like deploying new game builds to the repository, running benchmarks, and automated game tests.

[h3]SOUND[/h3]

REAPER. After a little while you stop seeing weird shapes and start seeing sounds. Is this synesthesia?

REAPER - We choose to work with this Digital Audio Workstation because it is simple, robust and lightweight. Its functionality can easily be expanded with VST plugins, as well as plenty of free JavaScript addons created by users. REAPER offers a huge amount of customization and has never let us down in our day-to-day work. We use it mostly for working with dialogues - cutting long recordings into samples, and applying post-processing effects. You can read more about how we work with audio here.

[h3]MISCELLANEOUS[/h3]

Notepad++. You can edit the majority of the game's files in this program. Very much recommended.

Notepad++ - the #1 most popular computer program in EXOR Studios. Used for editing LUA scripts, editing entity files, and, of course - taking notes. It has a multitude of features that help us with our daily jobs, such as finding all instances of a phrase in multiple files at once, the ability to open many text files in several tabs, and saving your work regardless of not clicking the ‘save’ button yourself. Much recommended.

Paint dot net. Photoshop for people without talent or skills. Or both!

paint [dot] net - For those of us who do not need or can’t use Photoshop, paint [dot] net is a sufficient alternative. The programmers and designers use it to quickly edit textures and mark them as temporary - something that is often needed when creating prototypes of new game features. It has a simple interface and offers just a bit more functionality than regular Paint, with layers and transparency support, for example. Also - sorry for the weird spelling. Steam recognized the name of this program as a link, and the link did not lead anywhere we would want to lead you.

Paint - the most legendary and classic tool available. Used by those who can’t grasp the complexities of paint [dot] net (wait, what!?). You might think this is a joke, but it was even used to create EPIC cutscene mockups:
[previewyoutube][/previewyoutube]
You know what? EPIC doesn't even cut it for this video.

The Riftbreaker World Editor Suite - last but not least important. All the props, creatures, items, and all the other game pieces that we create using the tools mentioned above are put together into one using our editors. We use the map editor to create map tiles for all the game’s biomes. The model editor allows us to attach particle effects to models and add events to specific points in the animations of those models. The Riftbreaker Editor gives us access to all the databases of the game - loot tables, damage values, and many others. Mission Editor allows us to create campaigns, missions and in-game events using a simple, block-based setup. These programs, combined with some of the ones we mentioned earlier, give you everything you need to create great mods for The Riftbreaker.

You can read about these tools here:
https://store.steampowered.com/news/app/780310/view/3109170041988719336?l=english

That’s probably not all the individual pieces of software we use daily, but we have certainly covered the most important ones. Are you surprised by some of our choices? Did you expect to see something different? Or perhaps there are some omissions that you’d like to ask us about? et us know here in the comments! You can also get in touch with us on our Discord at www.discord.gg/exorstudios - we’re always happy to share our insights!

See you soon!
EXOR Studios

Path to Update: How we create new content for The Riftbreaker

Hello Riftbreakers!

One of the goals of the articles we share with you every week is to bridge the gap between us, the developers, and you, our community. We love showing you what goes into making new features a reality and explaining why we do certain things. Today, instead of taking a detailed look at one feature (like last week’s article about Volumetric Lighting, which you should totally read), we are going to take a step back and show you what the production process looks like for The Riftbreaker when it comes to larger pieces of content. Here’s the story of how Into the Dark came to be.

[h3]THE IDEA[/h3]

Fun Fact #1: The promo art for this biome featuring Drilgor arrived when we were quite deep into the development process, when we had the creature's appearance finalized.

After we finished work on the Metal Terror expansion, we gave our design team a task to come up with several concepts of new biomes for Galatea 37. We didn’t want these designs to be too specific. Instead, we asked for a general overview of the look and feel these biomes could have - the color palette, types of props we could expect there, and some ideas for plants and creatures that would inhabit the biome. Designers compiled all that info in the form of a presentation for each biome concept that all members of EXOR could read and form an opinion. Then, we held a vote to see which ideas resonated with us best. Crystal Caverns dominated the vote, and we got to work.

[h3]CAVE-DIGGING[/h3]

Fun fact #2: the first destructible rocks were reused props from the Metallic Valley biome.

The first thing that came to our minds when brainstorming ideas for this biome was digging tunnels. We had no plans for such a feature before this, but it seemed interesting enough to try out. One of our programmers, Łukasz, decided to make a quick prototype of the feature. He took a couple of regular rocks that the artists made for other biomes and allowed the player to destroy those rocks with regular weapons. This solution was far from optimal and didn’t feel great just yet, but the potential was there. We decided to greenlight this feature and make it a key point of this biome.

We began iterating on the digging mechanics, moving away from using weapons to carve your way through the limestone (leaving it only as an option) in favor of using Mr. Riggs’ drilling arm. It quickly became apparent that filling the map with thousands of physical, destructible elements was a performance nightmare for our engine. The programmers decided to drastically reduce the number of destructibles by only spawning the rocks that the players could interact with - essentially, just the edges of the removable masses of limestone. The empty space behind the face of the wall would be covered with a texture that gives you the impression that you’re facing a solid wall. Sounds quite simple, but we kept tweaking this aspect of the game until release. You can read more about it here.

[h3]FIRST GAMEPLAY[/h3]

Survival gameplay is never an afterthought - in fact, we have survival ready before the campaign starts to take shape.

Simultaneously, we started designing the flora and fauna of the Crystal Caverns. Given that creatures living underground often take weird and, frankly, disgusting forms, we took some liberties when it came to the design of their appearance and abilities. The goal was to make them eerie and almost unnatural. So, we got Crawlogs who can traverse walls and ceilings and come back from the dead. Gulgors spit shards of razor-sharp crystals. Crystaroses siege your defenses with incredible efficiency. However, there was a problem - if the map was filled with rocks the player had to dig through, how would the creatures get to your base? We created Drilgor to solve this problem. This monstrous creature has just one purpose - it will find the shortest path to your base and dig a tunnel for other creatures to follow.

Even playing with a limited and prototypical creature set can give us valuable insight into what we want the biome to look like.

This set of creatures, along with the cave-digging mechanics, gave us just enough elements to set up a simple survival mode setting that would serve as the base of the gameplay moving forward. The level designers created a couple of test map tiles using props from the other biomes in the game. This allowed us to get a feeling of what the gameplay would look like with the cave-digging mechanic. We also realized what kind of problems players would face, energy production being the main one. Before we started introducing new elements, we decided to start doing preview streams to gather some initial feedback from the community.

At this stage we also learn how to build new map tiles.

One example of a lesson learned from this early gameplay prototype was the need to handle attack waves in a different manner than we’re used to. Since there were few solid obstacles in Crystal Caverns, players would have problems setting up proper defenses, as they did not know where to put up walls and limit the expansion of their bases. We solved that by letting them know where the attack would come from ahead of time. Thanks to this early bit of information, they knew which parts of the base they should focus on and prepare for the incoming attack.

[h3]CAMPAIGN PROTOTYPE[/h3]

There's always going to be a massive battle at some point during the campaign. The big question is - how do we get there?

With some conclusions from the survival playtesting, the campaign started to take shape. The initial draft is always written in paper form (not really; we use a doc for that, but you get the idea). The campaign designer comes up with a number of missions, their objectives, and how they are connected with each other. Only after the paper design is approved we move on to work on it in-game. We always start by creating a ‘skeleton’ - a series of very simple missions you can progress through in a few minutes. We mean REALLY simple: go to point A, go to the next map. Load into the next map, wait 30 seconds, and go to the next map. This logic structure is a foundation we can later fill with actual content.

We design and test various objectives. The ones that are potentially problematic are discarded to make place for better ones.

Naturally, it’s not as straightforward as we might like. As the missions take shape, we often discover that we lack the necessary logic blocks in the engine or other features that require help from the programmers. It must be noted, however, that we try to bother them as little as possible not to drag them away from their work on co-op, which runs parallel to the content creation. We also often work with placeholder assets while we’re waiting for the graphics team to finish the final models or animations. This is also the part when the story starts to take shape. There is no denying that The Riftbreaker does not rely on a strong narrative to drive players forward. However, we still like our story to be coherent and sensible. Iterating on the story often involves recording placeholder dialogues multiple times, which can sometimes be pretty funny.

[h3]NEW WEAPONS AND TECHNOLOGIES[/h3]

Some new tech items have to wait for the proper treatment a little longer than others. Here you can see the Acid Spewer Towers in their final form. However, the traps around the base are just recolored Acid traps.

While the campaign is being developed, another part of our team starts working on all the tech items that we want to include with the expansion. As usual, we try to build working prototypes with the elements we already have in the game. We build new weapons using the existing meshes, sounds, and particle effects. The same applies to buildings. We do all this prototyping work to check whether the new tech we’re planning makes sense and if it’s fun gameplay-wise. That’s the thing with designing things on paper - sometimes things might sound good at first but turn out to be complete duds when it comes to playing with them. Testing things early allows us to correct our mistakes before investing precious production hours into something unusable.

Fun Fact #3: Drilgor had a bug that rendered it unable to hit more than one target at a time. It became a killing machine that wrecks your walls only after it was described as 'weak' in playtesting.

We tend to create way more prototypes than the final number of technology items that actually end up in the final release version. There are two main reasons for that. The first is time - we simply do not have enough time to implement everything we want properly. Items that did not receive the final polish are archived so that we can try to use them again when an opportunity arises. The second reason that new items are cut is that they do not feel right or do not fare well in gameplay of the new biome. Then, they will simply have to wait for a more opportune moment.

[h3]TESTING TESTING TESTING[/h3]

Fun Fact #4: The 'Brittle' achievement used to be possible only with Level 1 Crystal Walls. Luckily, we caught that pretty quickly.

Needless to say, testing is a huge part of the development process, and it’s not a “one and done” deal. Neither is it a one-person job. All developers report problems with the new features and new missions as they work on their parts of the expansion. We try to fix our bugs the moment they are reported, but some slip through the cracks. This is where the QA department comes in. Our testers complete the game on all platforms in many configurations of equipment/game progress for several weeks leading up to the release. This part of development also continues way past the release date as we fix problems reported by you.


The Riftbreaker is available on a lot of various platforms - many PC storefronts and the two next-gen consoles. Each platform we develop the game for has different requirements and rules we must comply with. These generate unique problems that we need to iron out for each platform individually. Unfortunately, this means that sometimes we need to delay things. Into the Dark was not released simultaneously on all storefronts, as we needed some extra time to deal with memory, performance, and save file size issues that plagued some of the builds.

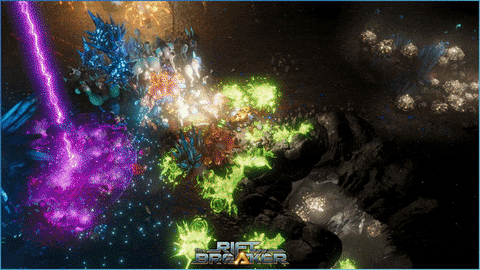
No bugs in this GIF, only a lot of explosions.

In addition to manual testing, we run automated tests several times a day. These tests run the latest available build of the game, and load saves that we prepared beforehand. In total, we run more than 150 saves - a collection made at different points of The Riftbreaker’s story campaign in various versions of the game. Each time we release a new patch, we add a couple of saved states to the test list to ensure compatibility. Not only does the test load save files, but it also saves the game again and checks whether the newly saved game still works. Automated testing allows us to catch a lot of problems before they have even had time to affect us, let alone any users.

[h3]MAKE SOME NOISE[/h3]

If you make a good game, but nobody hears about it, did it really happen? Marketing is another ongoing process that has no clear endpoint. It begins with the moment we announce we’re working on the expansion and lasts for the entire production cycle. The entire point is to make gamers aware of the new content coming to the game - a difficult task considering how many new games and updates are released weekly. In our case, each marketing campaign has a pretty slow start as we usually have very little to show - some promotional artwork, a couple of screenshots, and a vague description based on the features we’re planning to include. The tempo ramps up as more features reach their final levels of polish, culminating with the release of the trailer on the launch day.

The work on the trailer video begins when the first gameplay prototype is available. We write a screenplay with a detailed description of the scenes and what new features they show. We also choose a suitable soundtrack for the trailer at this point, since it’s much easier to edit your video to match the music, not the other way around. Then, it’s time to record sample scenes. These are recorded using whatever is available at that time, even if some of the features are incomplete. Thanks to this approach, we can approve the initial edit of the video early on and replace the placeholder scenes with actual footage, drastically reducing the workload at launch. Here’s an example: an early placeholder version of the trailer for Into the Dark:

[previewyoutube][/previewyoutube]
Do you recognize the big guy at the end?

And the final version, for comparison:

[previewyoutube][/previewyoutube]

Another important part of getting the attention of the players is trying to get media coverage. We try to get in contact with game journalists, bloggers, and influencers - but again, so does every developer on the planet. At this point, it is a numbers game - you reach out to as many people as possible. At least ninety percent will not respond to you, and seven percent won’t be interested or won’t have the time. You have to do as much as you can with the remaining three percent of people willing to work with you. This is why it’s really important to start early.

[h3]FINAL POLISH[/h3]

The addition of Volumetric Lighting came in the final weeks of the project. It added a lot of character to the biome.

As we near the release date, more and more features reach their final form. Bugs are fixed. Models are finalized. Sound effects take shape. Dialogue lines are improved and recorded by voice actors. Everyone starts to feel the pressure of the release date drawing near, and we begin the mad dash to the finish line. All placeholders must be removed and substituted for the final assets. At this point, every placeholder that is noticed by the QA is marked as a bug and fixed immediately. Trailer scenes are rerecorded, and the video is edited into the final cut.

A LOT of character. We even rerecorded the entire trailer, even though some scenes were good already.

Sometime before day zero, we release an experimental update for volunteers. The truth is that you can test the game for months, but the moment you release it to the public, you are going to find bugs that you had no idea could even happen. This is due to the differences in hardware, system software, drivers, and even individual playstyle. Releasing an experimental build helps us catch a lot of things that would otherwise greatly impact the final quality of the game. If you take part in our beta periods and report bugs - thank you from the bottom of our hearts!

[h3]RELEASE AND POST-RELEASE SUPPORT[/h3]

We usually have a release candidate build locked in when the release day approaches. It’s a build of the game that is well-tested and good enough for public scrutiny. However, we always plan ahead and usually schedule a couple of patches ahead of time. We also actively monitor the community channels and our crash reporter dashboard in search of the most common problems that we have to prioritize. We include fixes for those with the scheduled patch releases and start over. This loop usually continues for the next couple of weeks. When the number of reported errors dies down, we gradually reduce the hours spent on the project and focus on the next milestone.

The cycle started anew, with World Expansion III now in the works. You can help us by dropping a wishlist here:

https://store.steampowered.com/app/2506610/The_Riftbreaker_World_Expansion_III/

The milestones we currently have in our sights are World Expansion III which you can add to your wishlist now, and, of course, the co-op multiplayer mode. As we stated before, the work on these two runs in parallel and we try to give the programmers as much freedom as they need in order to get this feature to you. As always, if you want to be ahead on the news on The Riftbreaker and all other things related to EXOR Studios, follow us here and join our Discord: www.discord.gg/exorstudios. We also started streaming previews of WE III on www.twitch.tv/exorstudios. See you there!

EXOR Studios

Volumetric Lighting Explained

Hello Riftbreakers!


As you might already know, The Riftbreaker runs on our own game engine, which we call the Schmetterling. Although working with your own tech is not always easy, it gives us the freedom to implement any number of new features and techniques to make the game look and feel better. During the development of the Into the Dark expansion, we realized we needed one key rendering feature to significantly improve the biome’s atmosphere. The effect in question is volumetric lighting. Today, we will tell you what role volumetric lighting plays in graphics, how games tried to emulate its effect in the past, and how we implemented this new feature in The Schmetterling engine.

[h3]Light scattering phenomenon[/h3]


Atmospheric scattering is a phenomenon that affects everything we see around us. Even though we don’t often think about it, the air around us is a mixture of various particles that can interact with one another. They are also large enough to interact with photons - particles (and waves, but let’s not get too deep here) that carry electromagnetic radiation, including light. As a result of these interactions, some light gets scattered, some is absorbed and transformed into kinetic energy, and some passes through. Thanks to this, we can observe the blue sky above us and atmospheric fog when looking into the distance and many other beautiful effects.


The same principles apply on a smaller scale. Imagine entering an old, dusty house on a sunny day. As you enter, the microscopic dust particles covering the floor are set in motion and suspended in the air for a while. You look up to the window and see a beam of light cutting through the mix of air and dust. The light illuminates the room, but you can see that it is dispersed unevenly, as the varying density of the air-dust mixture creates a mesmerizing spectacle of light and shadow. The same thing happens during concerts when spotlights cut through the thick smoke. Or when a single beam of light cuts through a hole in the clouds. Or when your car’s headlights create a ‘wall of light’ effect when driving through fog.


The point is - it is rare for light to get from its source to the final point of its journey without encountering any obstacles. Each interaction with other particles along its way will change the light’s color, direction, or intensity. The result would look ‘flat’ and artificial without considering all this when rendering computer graphics. However, when appropriately implemented, the light and objects on the scene work together to create a cohesive and natural-looking image.

[h3]How it's emulated in computer graphics[/h3]


Several techniques have been developed to replicate the scattering effect and achieve realistic results at an acceptable performance cost. Some developers used particle effects to emulate this (we do this too). Still, it was a very tedious process - the particle had to be created with a specific, static scene in mind and didn’t work in any other circumstances. Other developers used post-processing shaders that added lighting effects based on screen-space information. Those could adapt in real-time, but only as long as the light source was on the screen. In The Riftbreaker, we limited ourselves to exponential distance fog - a simple algorithm that created a fog that got denser the further it was from the camera. We could change its color to adapt it to the time of day. It worked okay in open areas, but we needed something better in Crystal Caverns.


The technique we decided to use is called Volumetric Lighting. It can emulate the previously mentioned effects based on a couple of relatively simple steps. Instead of painstakingly calculating light scattering for individual pixels by casting rays, the scene is simplified by dividing it into larger volumes. We conduct calculations for all of these volumes individually and later combine the results into the final rendering output for the visible scene. This dramatically reduces the workload while giving us an approximation that is good enough for in-game use.

[h3]Volumetric Lighting explained[/h3]


The scene is sliced up into cubical volumes calculated from the camera frustum perspective. Their exact number depends on the game’s rendering resolution, which we divide by 8. If we take 1440p as an example, we get 320 volumes by width and 240 volumes by height. When it comes to depth, the resolution is fixed - it’s always 64 layers, which, given The Riftbreaker’s isometric camera placement, gives us roughly 300 meters of depth to work with.


At this point, the volumes are empty, and the light would travel through them unobstructed, like through a vacuum. We must add a transfer medium to the equation for the desired result. As we mentioned earlier, the air serves that function in the real world, along with all the suspended particles. We generate a 3D texture to simulate this phenomenon. It uses the exponential height fog at its core, generating a dense mist at the deepest points of the scene that becomes thinner as the distance from the ground increases. The texture carries information about density, which varies slightly from point to point. A new texture with different values is generated every frame. We can control its density and variability using a set of parameters to get the desired artistic effect.


We can now move on to the next stage of the process. Using the density volume grid from the previous step, we can calculate how light would behave while traveling through each volume. When we combine the air density data and the light parameters, we approximate how the light would scatter in that area. We perform these calculations for the entire grid, creating a 3D map of light scattering on the visible graphics scene.

A sample scene we used for development. It features multiple sources of light, which sets a good benchmark for us.

64 layers of the light scattering model data generated from the sample scene. They are presented one by one, going from the bottom to top.

To present these results to the player, we need to perform one more step called light scattering transmittance accumulation. During this operation, we sum up how much light is transmitted through each of our 64 layers of volumes and what the final result should look like from the perspective of our game camera. Starting from the camera’s position, we take the light scattering values for the first volume and add them to the layer beneath it. Then, we add the sum of our first two layers to the third one, considering the air transmittance value. Rinse and repeat until we reach the bottom of our 64-layer grid.

The same data presented after the light scattering transmittance accumulation step. You can see the influence that the underlying layers have on their neighbors.

The simplification we applied earlier, treating the scene as a lower-resolution grid, now causes some issues. Since we have taken average values for larger areas, the resulting image would be full of solid-color squares with sharp edges visible where different volumes meet. This image artifact is called banding. The unpleasant phenomenon can be fixed by applying temporal techniques. First, we add a slight jitter to our calculations. For every frame, the lighting for each volume is calculated at a different point within its bounds. This guarantees that the result will be different in every frame. Then, we can use a couple of frames of data to get an average of volumetric lighting within a time period. This allows us to achieve a soft image without aliasing, banding, or other artifacts, apart from slight ghosting, which is unfortunate but far better than the alternatives.


A sample scene before and after the temporal techniques are applied. You can clearly see the lighting artifacts on the light shafts, which disappear completely after introducing jitter into our calculations.

[h3]Performance results[/h3]

We conducted some performance tests to see what kind of impact Volumetric Lighting has on The Riftbreaker at various points of the day and night cycle. We chose sample scenes in various biomes and measured the performance results at 0:00, 8:00, 16:00, and 21:00 in-game time. We conducted these tests on a Ryzen 5 5600X CPU, 32 GB DDR4 RAM, and RTX 3080 GPU machine running Windows 11. The game was running at 4K resolution, with all settings at maximum, raytracing enabled, and no upsampling or resolution scaling.

Sample scene from the Jungle biome.

Jungle
0:00
8:00
16:00
21:00
On
80 FPS // 12.4ms
60 FPS // 16.6ms
66 FPS // 15.1ms
55 FPS // 18.1ms
Off
88 FPS // 11.4 ms
67 FPS // 14.9 ms
72 FPS // 13.8 ms
60 FPS // 16.3 ms


Sample scene from the Magma biome.

Magma
0:00
8:00
16:00
21:00
On
72 FPS // 13.7 ms
57 FPS // 17.3 ms
62 FPS // 16.1 ms
58 FPS // 17.2 ms
Off
80 FPS // 12.5 ms
62 FPS // 16.0 ms
67 FPS // 14.7 ms
62 FPS // 15.9 ms


Sample scene from the Caverns biome.

Caverns
0:00
8:00
16:00
21:00
On
89 FPS // 11.1 ms
70 FPS // 14.4 ms
62 FPS // 16.1 ms
58 FPS // 17.2 ms
Off
96 FPS // 10.2 ms
78 FPS // 12.7 ms
68 FPS // 14.5 ms
62 FPS // 14.5 ms


Sample scene from the Acid biome.

Acid
0:00
8:00
16:00
21:00
On
83 FPS // 12.0 ms
64 FPS // 15.4 ms
69 FPS // 14.5 ms
61 FPS // 16.2ms
Off
90 FPS // 11.0 ms
73 FPS // 13.6 ms
76 FPS // 13.0 ms
70 FPS // 14.3 ms


[h3]Conclusion[/h3]

Volumetric Lighting is not a new technique. It has been used in games for years, and you have most likely seen it in dozens of them. The introduction of the Crystal Caverns biome into The Riftbreaker seemed like a perfect opportunity to add this feature to The Schmetterling Engine. It makes the graphics scene more realistic and adds significance to what used to be empty space. It also gives our artists additional tools to create atmospheric ambiances, with delicate fog and lights playing a significant role in creating the game’s mood.

We hope you enjoyed learning about this technique as much as we enjoyed the R&D process behind it. What other aspects of game development would you like to learn about? Let us know in the comments and on our Discord at www.discord.gg/exorstudios. Volumetric Lighting is undoubtedly not the last feature we will expand our engine with. When we decide to add something new, you will certainly hear about this on our Discord first. You will also see the previews during our Twitch streams at www.twitch.tv/exorstudios every Tuesday and Thursday. See you there!

EXOR Studios