1. World of Tanks
  2. News

World of Tanks News

Experimental Equipment: Stats Revised, Giveaway to Resume February 8


Commanders,

Experimental Equipment stats have been updated. The giveaway and the repeatable daily mission for components will resume on February 8.

[h2]Stats Changes[/h2]

The purpose of introducing Experimental Equipment into the game is to give you more options to fine-tune your vehicles. No single tank configuration is perfect, but Experimental Equipment can help you find the one that suits your playstyle by allowing you to prioritize different stats.

Efficiency-wise, Experimental Equipment at Upgrade Level III should be well below Improved Equipment and just above Bounty Equipment. According to the data, it performed above our projections and we have modified its parameters accordingly, as shown in the table below.

The first value shown is the original one, and the second represents the modified one.

[h3]Fire-Control System[/h3]


PARAMETER ADJUSTMENT

LEVEL I

LEVEL II

LEVEL III

Aiming speed

+6% / +6%

+8% / +7%

+9% / +9%

Dispersion during vehicle movement and on hull and turret traverse

-7% / -7%

-9% / -9%

-11.5% / -11%

[h3]Mobility Improvement System [/h3]


PARAMETER ADJUSTMENT

LEVEL I

LEVEL II

LEVEL III

Engine power

+6% / +5%

+7.5% / +6%

+9% / +8%

Turret traverse speed or gun traverse speed for vehicles with stationary cabins

+5% / +4%

+6% / +5%

+7% / +6%

Hull traverse speed

+5% / +4%

+6% / +5%

+7% / +6%

Dispersion during vehicle movement and on hull and turret traverse

-5% / -4%

-6% / -5%

-7% / -6%

Top speed, km/h

+4 / +4

+4 / +4

+5 / +5

Reverse speed, km/h

+2 / +2

+3 / +3

+3 / +3

[h3]Survival Improvement Suite[/h3]


PARAMETER ADJUSTMENT

LEVEL I

LEVEL II

LEVEL III

Vehicle durability

+8% / +6%

+9% / +7%

+11% / +9%

Ammo rack, fuel tank, and engine durability

+50% / +50%

+70% / +70%

+100% / +100%

Suspension durability

+30% / +30%

+40% / +40%

+50% / +50%

Suspension repair speed

+10% / +10%

+15% / +15%

+25% / +20%

Loading speed penalty and loss of engine power upon the damaging of modules

-30% / -30%

-40% / -40%

-50% / -50%

We have not made any changes to the resource cost of Experimental Equipment upgrades and the resource yield of its disassembly.

[h2]Giveaway Renewal[/h2]

The Experimental Equipment giveaway that started on January 20 encountered technical issues and was paused. With these issues sorted out, the giveaway will resume on February 8 after a micropatch is applied, and will last until March 31. Only the players who have not claimed their six pieces of Experimental Equipment and 700 components previously are eligible to receive them.

We have increased the overall yield from the repeatable daily mission, allowing you to earn more components (up to 1,500 instead of up to 1,400). The mission, claimable until March 31 and doable until April 7, can be completed up to five times by any player irrespective of whether they completed it once before the giveaway was paused.

Objective:
  • Deal 2,500 points of damage in Random Battles
Restrictions:
  • 1 time per day
  • 5 times maximum
Reward:
  • 300 components

Also, every player (including those who claimed six pieces of Experimental Equipment and 700 components before) will receive 300 more components on their first log-on into the game between February 8 and March 31.

[h2]Further Plans[/h2]

We are keen on making Experimental Equipment fully correspond to its intended function and niche in the game: we will continue to monitor data and player feedback, and make further adjustments to the system if we see they are necessary. In the latter case, we will inform you in advance about the changes planned.

Thank you for your input and see you in the game!

The Assembly Shop: Catch the Lion!


The Assembly Shop is returning to World of Tanks, Commanders!

From February 2 through February 9, you’ll be able to craft the Lion, a brand-new Tier X Italian medium tank. Only 65,000 (EU) / 15,000 (NA) / 10,000 (ASIA) of these limited-edition vehicles will be available for assembly, and the first ~22,000 (EU) / ~5,000 (NA) / ~3,000 (ASIA) tanks will receive the amazing Marked One 3D style with an individual style number. Get ready to become number one and add the sharp-shooting king of steel beasts to your collection!

[h3]Assembly Shop[/h3]
EU: From February 2, 2023, at 18:00 CET through February 9, 2023, at 23:59 CET (UTC+1)*
NA: From February 2, 2023, at 17:00 PT | 19:00 CT | 20:00 ET through February 9, 2023, at 21:00 PT | 23:00 CT | 23:59 ET*
ASIA: From February 2, 2023, at 20:00 (UTC+8) through February 10, 2023, at 00:00 (UTC+8)*

*Please note that the event may finish early if all vehicles are assembled before the end of the event.

[previewyoutube][/previewyoutube]
[h2]The Assembly Shop: How it Works[/h2]
  • Invest various game resources—including blueprint fragments, Free XP, credits, gold, and bonds—to craft the brand-new Lion. It’s up to you to decide how much of each resource to invest.
  • There will only be 65,000 (EU) / 15,000 (NA) / 10,000 (ASIA) tanks available for assembly. The first ~22,000 (EU) / ~5,000 (NA) / ~3,000 (ASIA) players will receive not only the vehicle itself, but also the spectacular Marked One 3D style for it, which includes an individual style number. These individual numbers will be assigned to vehicles sequentially, from smallest to largest. With its 3D style applied, the Lion appears to be visually upgraded to the legendary OF-40.


    [expand]


    [/expand]
  • Once all of the numbered styles and accompanying vehicles have been purchased, another 43,000 (EU) / 10,000 (NA) / 7,000 (ASIA) tanks will still be available for delivery. They will come in their standard configuration—without the 3D style and individual style number—and will be available for assembly until the end of the event, or until they run out.
[h2]Combine and Spend Resources in Different Ratios![/h2]

To catch the Lion, you need to spend any of the following five game resources:


*Blueprint fragments can be used to complete up to 36% of the total vehicle assembly progress: 22% with national fragments, and 14% with universal.

Combine and spend them in different ratios throughout the event. Remember that you don’t need to wait and can spend everything at once. There are plenty of combinations to fill the progression bar up to 100%—you just need to understand which option suits you best. Everything depends on the resources you have.


[h2]How to Spend Your Resources Wisely[/h2]

To make the most of your available resources, we recommend adding them in the following order:
  • Free XP is one of the most efficient resources, so consider using it first and for the bulk of your progression. It can be converted from Combat XP using gold or simply earned in battles.

  • Gold is the most convenient resource. If you don’t want to spend too much time assembling the Lion, you can use gold to quickly fill up the progression bar.

  • Blueprint fragments. Got a big stash of these lying around? In total, you can fill up to 36% of the progression bar with these (14% with universal, 22% with national blueprint fragments).

  • Bonds are a valuable resource for assembling your vehicle, so you can use them to fill up a significant part of the progression bar as well.

  • Credits. Compared to the other resources, credits are the least convenient currency. It only makes sense to use them in two cases: if you have A LOT of credits, or if you have already spent all of your other resources.
Resources are deducted as soon as you add them to the Assembly Shop, but you can reclaim or redistribute them at any time by clicking the Return Resources button. You can track your progress on a special bar in the game event section of the Store. Once its progress reaches 100%, the vehicle will be credited to your account.

If you don’t manage to craft the Lion by the end of the event, all of your spent resources will be returned to your account automatically.

[h2]The Lion: When 4 Actually Means 3[/h2]

This brand-new special Tier X Italian medium tank is a historical vehicle. Its prototype was built in the late 1970s, when Italian engineers were trying to create their own version of the German Leopard.


[expand]


[/expand]
In terms of gameplay, the Lion has a similar playstyle to the Leopard 1, but with an Italian auto-reloader gun. It also resembles its researchable counterpart, the Progetto M40 mod. 65. The Lion features a 105 mm gun with a modified 4-shell autoreloading system, which is unusual for Italian autoreloading tanks. The shell reload times are 20.1/7.7/9.6/12.5 s, and the reload time between shots is 4.5 s.

The parameters displayed are valid for the vehicle with each crew member trained to 100% major qualification level. Some vehicle characteristics can be further improved with the Commander's bonus to major qualification level, crew perks, and skills, as well as special in-game items.


[expand]


[/expand]
Due to the unusual reload times, the recommended strategy is to fire the first three shells, but hold off on firing the fourth shell until the magazine reloads. That way, you can get the maximum DPM of 3,285 HP/min.

At first glance, you might think there are 4 rounds in the Lion's magazine. But in fact, there are really 3 of them, plus an additional one that should only be used in the most exceptional cases. “In case of emergency, break glass”—now you see what we mean?

The penetration is 258 mm for the main AP shell. Accuracy is 0.33 and aiming time is 2.7 s, which makes the Lion a menacing long-range sniper. It sacrifices armor and survivability for greater dynamics and is perfect for supporting allies from the flanks or the second line of fire. With a top speed of 60 km/h, decent acceleration, and good concealment values, it can quickly change directions and turn up where it is least expected.

[h2]How to Play the Lion[/h2]

The Lion offers several options for firing:
  1. Magazine-based gameplay, for dealing 420 HP of damage every 4.5 seconds. It is best to play with three shells in the magazine and save the fourth in case of emergency combat situations. And never forget that you can always make the most of its unusual autoreloading system!
  2. Autoreloading-based gameplay, which depends on the game situation and when you can deal damage. Keep in mind that you’ll deal the maximum DPM when playing up to the second-to-last shell. This option will be a win-win in the case of a positional duel during the battle.
  3. Combined gameplay. You can start by dealing 420 HP of damage, and then begin using the DPM of the third shell to deal an additional 420 HP of damage every 8 seconds.
The Lion is not limited to a single playstyle. Instead, it can be used in different ways, depending on the combat situation—this is its superpower. But most importantly, try not to fire all four shells at once!

A few more tips to help you be more effective in battles:
  • Use the fourth shell when planning tactical actions, such as when you want to reset a base capture or finish off an opponent that is low on HP. Make sure you're safe or in cover, because after the fourth shot, you'll be vulnerable for 20 seconds.
  • Its mobility is good for patrolling the battlefield. You can always either take a position to support your allies with fire from afar, or be an active flanker. Just remember that its reverse speed is only 15 km/h, so choose your positions carefully and make sure you don't over-expose yourself to enemy fire.
  • Despite its high accuracy, the vehicle’s gun stabilization is mediocre, so try improving this parameter using equipment or the Field Modification feature.
The Lion is a vulnerable, yet incredibly versatile, support tank that you probably already know well. On the one hand, it's the mighty Progetto juggling shells in the autoreloading magazine. On the other, it’s a cold-blooded Leopard that hits the enemy with powerful shots for 420 HP of damage. But all in all, the Lion is a combination of these gameplay styles. It adapts to the situation when hunting and makes optimal decisions based on its combat potential, which is truly impressive.

Get a limited-edition Tier X tank with a unique individual number, Commanders!

Follow Us and We’ll Boost Your Progress!

Thanks to everyone who has already subscribed to follow our news. Today, we will reward current subscribers and give everyone who hasn't subscribed yet one more great reason to do so.


We’ll start sending out the rewards today for those who are already subscribed and new subscribers will receive theirs a few days after the end of the event.

NOTE: To receive the reward in this event, you need to play at least 10 battles on your account.
       
Please note that we will send the goodies to the account that’s associated with your Steam one!

PeacefulSoldier, WoT Steam Community Manager
       
[h2]Rewards [/h2]
  • x2 Personal Reserves: +50% to credits earned in battle for 1 hour
  • x2 Personal Reserves: +50% to Combat XP earned in battle for 1 hour
  • x1 Personal Reserves: +200% to Crew and Free XP earned in battle for 1 hour

[h2]How do I subscribe? [/h2]

       
It's really simple: you just need to click the "Follow" button!

PeacefulSoldier, WoT Steam Community Manager
  • You can do that either on the Store page
  • or the Community hub


Follow us and boost your progress!

Experimental Equipment: An Important Update 


Commanders,

Communicating with and listening to our players is a top priority as it helps us make the game better. However, sometimes our efforts to improve and expand the game don't go as smoothly as planned.

We introduced Experimental Equipment as a way for players to have highly flexible vehicle customization options. Making it available for bonds like Improved Equipment would not work as obtaining the latter requires several Tier X vehicles. Therefore, we made Experimental Equipment available at three Upgrade Levels and usable from Tier V and above to:
  • make it accessible for both new and experienced players.
  • have lower efficiency than Improved Equipment, but somewhat higher than that of Bounty Equipment.
During the initial giveaway of Experimental Equipment technical issues emerged, giving us more time to review the feedback and data we received. We are now working on modifying the stats and the resource cost of Experimental Equipment. We will share more information in a separate article in the coming days before resuming the giveaway.

Any Experimental Equipment already claimed by players will remain on their accounts.
The introduction of Experimental Equipment into the reward rosters of in-game events is on hold until we are sure that it works as intended.

Thank you for your patience and understanding.

Steel Hunter Returns!


Are you ready to prove that you are the best of the best, Commanders? Welcome to Steel Hunter—a large-scale game event with heaps of rewards and unique gameplay mechanics. Read up on all the details of this engaging battle royale mode!

[h3]Steel Hunter 2023[/h3]
EU: 30 January 2023, 04:00 – 13 February 2023, 00:00 CET
NA: 30 January 2023, 07:00 – 13 February 2023, 04:00 EST (UTC-5)
ASIA: 30 January 2023, 07:00 – 13 February 2023, 04:00 (UTC+8)

[h3]Daily Ceasefire:[/h3]
EU 1-3 server: 00:00–04:00 CET
EU 4 server: 22:00–02:00 CET
NA: 06:00-07:00 EST (UTC-5)
ASIA: 03:00 - 07:00 (UTC+8)

[previewyoutube][/previewyoutube]
[h2]Event Summary[/h2]
  • You are one of 20 players fighting for victory. It’s every Hunter for themselves!
  • Choose to fight solo or join forces with a mate in a Platoon showdown.
  • Your main goal is to survive at all costs. Destroy all enemies and be the last Hunter standing.
  • Collect special objects (loot) that randomly spawn on the map. These objects contain resources, Combat XP, and Combat Ability charges. You can also pick up loot from destroyed vehicles (Spoils of War).
  • The most valuable loot type is the Airdrop. Many players will want to get their hands on Airdrops, so you'll have to push yourself to the limit to get to them first.
  • Eight special vehicles with unique abilities will join the hunt. You will have access to three from the start, and others will be available for rent.
  • Steel Hunter has its own in-game currency—Steel Seals—for renting mighty event vehicles.
  • You'll be able to upgrade your vehicles while in battle and get stronger with each new tier.
  • Battles will unfold on three huge maps, the playable areas of which will shrink with time. Escape the Destruction Zones that will gradually cause damage until your vehicle is destroyed.
  • The total battle time is 15 minutes. Before each battle, you can choose from several spawn points on the map.
  • You will receive various rewards for completing special daily missions.
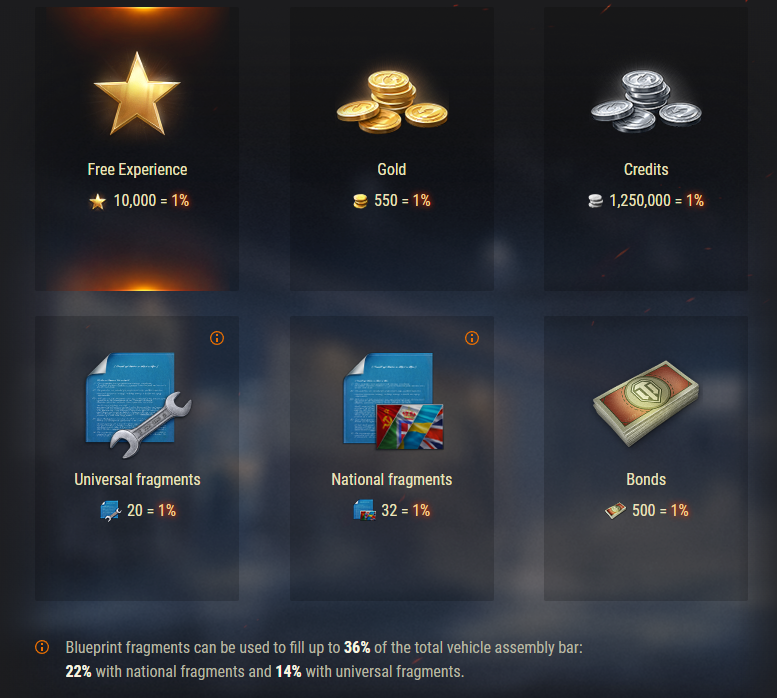
[h2]Rewards[/h2]

Collect Steel Hunter Tokens by completing special daily missions during the event and unlock valuable rewards, from bonds and credits to directives, crew retraining orders, and much more. See for yourself!


[h2]How to Start Playing[/h2]

To switch to the Steel Hunter event, click the mode selection menu to the right of the Battle! button and select Steel Hunter.
You can also enter battles as a two-player Platoon.


[h2]Special Vehicles[/h2]

All eight special vehicles available in Steel Hunter have different tactics, gameplay, and Abilities. Each of them can be upgraded from Tier I to Tier VII while in the heat of battle. Three vehicles will be in your Steel Hunter Garage from the start of the event, and the remaining five will be available for rent.

[h3]Combat Abilities[/h3]

Each vehicle has one regular and one ultimate Combat Ability unique to it:

[expand]


[/expand]
Additionally, there are two Combat Abilities that are common for all vehicles, as follows:

Recovery: Gradually recovers a fixed percentage of the vehicle’s HP, but stops working if you take damage.
Repair Kit: Repairs vehicle modules (analogous to Large Repair Kits) and reduces stun duration.

[h2]Vehicle Upgrade System[/h2]

To upgrade your vehicle, you need to earn Battle XP by picking up loot and damaging enemies. Each level offers two modules to choose from. They change the characteristics and appearance of the vehicle right in the middle of the battle.


You can choose from various upgrades to suit a wide range of different playstyles.
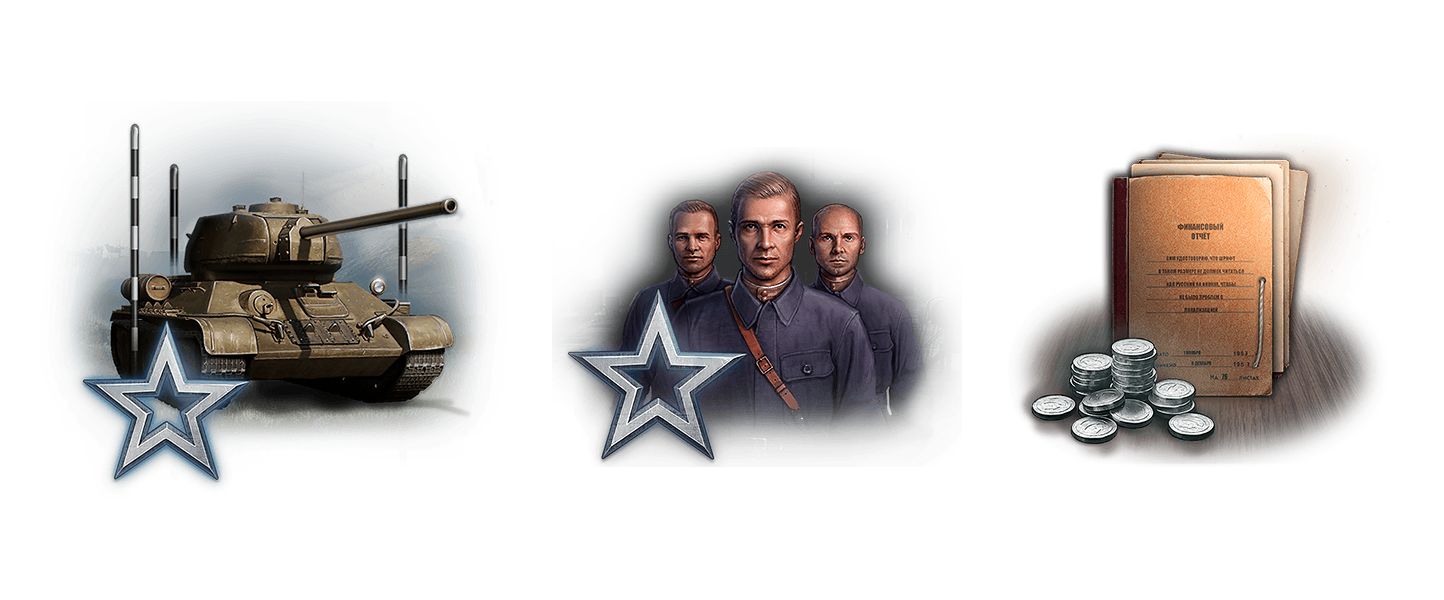
[h2]Crew[/h2]

Crew members are exclusive to the vehicle they come in and can’t be dismissed, injured, or sent to the Barracks. They do not earn Crew XP, and they each have Sixth Sense as a zero perk. Also, the commander of each vehicle has access to the following set of skills and abilities:


[h2]Maps and Danger Zones[/h2]

The hunting will take place on three maps—Dreamland, Arzagir 4.04, and Firnulfir—each with a different setting and unique game atmosphere. The scale of the battlefield is way bigger compared to Random Battles.

Dreamland is a dangerous abandoned town with plenty of space for hiding. Arzagir 4.04 is a vast desert laced with sand dunes and dried-out rivers. Firnulfir is a picturesque Scandinavian tundra that will enchant you with its northern landscapes, frozen ponds, and small abandoned settlements.

Dreamland minimap
Arzagir 4.04 minimap
Firnulfir minimap

All three maps shrink with time, leaving less space to play and survive. If you’re in an area that turns orange, that means it is about to become a Danger Zone and you need to leave it as soon as possible. The fewer players on the battlefield, the less time you’ll have to escape the Danger Zone.

When a Danger Zone turns red, it becomes a Destruction Zone. You will have very little time to escape from it, as shown in a countdown. Once the countdown ends, your vehicle will receive continuous damage until it is destroyed or until you have left the Destruction Zone.


[h2]Looting[/h2]

To upgrade your vehicle, you need to search for special loot points on the map. Once you reach these points, you will be able to collect loot that may contain Battle XP, shells, and charges for your Abilities.

There are four types of loot available, as follows:

Supplies
Airdrops
Spoils of War
Consumables
Repairs damaged modules. Contains Battle XP and either a Repair Kit or one Combat Ability.
Contains a larger amount of Battle XP, restores durability, and repairs modules. Provides shells and one charge for each Ability.
Contains half of the resources of a destroyed vehicle. Repairs all damaged modules and part of the durability.
Restores HP. Provides Battle XP, ammo, and, with a certain probability, Recovery charge.

You can collect two or more pieces of loot at the same time.

[h2]Vision/Aiming Mechanics[/h2]

The vision system uses Vision Cones. Here’s how it works:
  • Enemy vehicles only become visible when they appear inside your Vision Cone, which is depicted on the minimap. Activation of the Sixth Sense doesn't mean you will notice enemies—they must be inside your Vision Cone.
  • If enemies are within 50 meters of you, they will automatically become visible.
  • When enemies are within sight, their markers and HP bars are displayed.
  • When aiming at an enemy, the vehicle’s silhouette is also displayed.


[h2]Steel Hunter Economy[/h2]

Steel Hunter has its own in-game currency: Steel Seals. These can be earned based on your position in the post-battle ranking or for completing special daily missions. You can use Steel Seals to rent special vehicles. The higher you place, the more Steel Seals, credits, and Combat XP you earn. And don’t forget that you can convert Combat XP into Free XP!

Steel Hunter will also have a permanent bonus to credits and Combat XP from WoT Premium Account and allow you to earn 50% more Steel Seals. Additionally, you can now take advantage of the following:
  • Personal and Clan Reserves for extra Combat XP and credits
  • A 15% bonus to credits and XP when playing in a Platoon
Three of the eight event vehicles—the Varyag, the Raven, and the Arlequin—will always be available in your Steel Hunter Garage. You can rent the others for free for a day, but each subsequent rental will cost you a certain number of Steel Seals. The rental time is five days.

VEHICLE
RENT COST (Steel Seals)
WALKÜRE
350
HARBINGER MK. IV
350
BÁI LÁNG
600
HURAGAN
600
BEOWULF
600
Players will have access to Steal Seals earned during previous event. However, the accumulated Steal Seals will be nulled after the event ends.

[h2]Special Daily Missions[/h2]

Special daily missions are also available in Steel Hunter and can only be completed once per day. Successful missions will reward you with credits, Steel Seals, and Steel Hunter Tokens.

You can complete missions fighting solo or in a Platoon of two.


On the hunt for more rewards? Keep collecting Steel Hunter Tokens to get your hands on a whole lot of valuable goodies. The more Steal Hunter Tokens you collect, the juicier the rewards will be.

Below is the full list of items you can get during the progression.


[h2]Steel Hunter Statistics[/h2]

You can track your battle effectiveness in Steel Hunter via the Service Record → Statistics tab in your Garage. Select “Steel Hunter” from the dropdown menu of available game modes to see the number of vehicles you’ve destroyed, as well as your average damage per battle, number of wins, and other stats.


Your previous Steel Hunter event results won't be included in the Statistics tab.

[h2]Performance in Steel Hunter[/h2]

Steel Hunter will require more system resources than regular Random Battles. This is due to several key factors that are specifically related to Steel Hunter, including the large map sizes and the significant number of objects on them. Players with 32-bit operating systems and low RAM may experience some performance issues while running this mode. To avoid any problems and ensure you play with maximum comfort, change the graphics settings of your game client in accordance with the capabilities of your CPU and graphics card.

[h2]Known Issues[/h2]

Simplified vehicle outlining is not availble in the Steel Hunter mode.

Good hunting, Commanders! Platoon up with your friends or go solo, and be the last hero standing!