1. Stoneshard
  2. News

Stoneshard News

Devlog: City of Gold Release Date & The Latest News


Hello everyone!

Let’s start with the release date: as many of you might already know, the City of Gold update was moved to November due to a number of reasons. And today we’re ready to announce its exact release date - November 18. This date is final, so make sure to set up a reminder!

Now to the latest news. We’re currently working on bringing the city to life, setting up NPCs and implementing side quests, many of which will have multiple paths and long-term consequences. Even though we would be happy to give you details, it’s not possible without getting into spoilers, so we’ll let you discover the secrets of Brynn streets by yourself.

Here’s a teaser just to get you started. And in return we’ll tell you about many other things that will be added with the City of Gold:

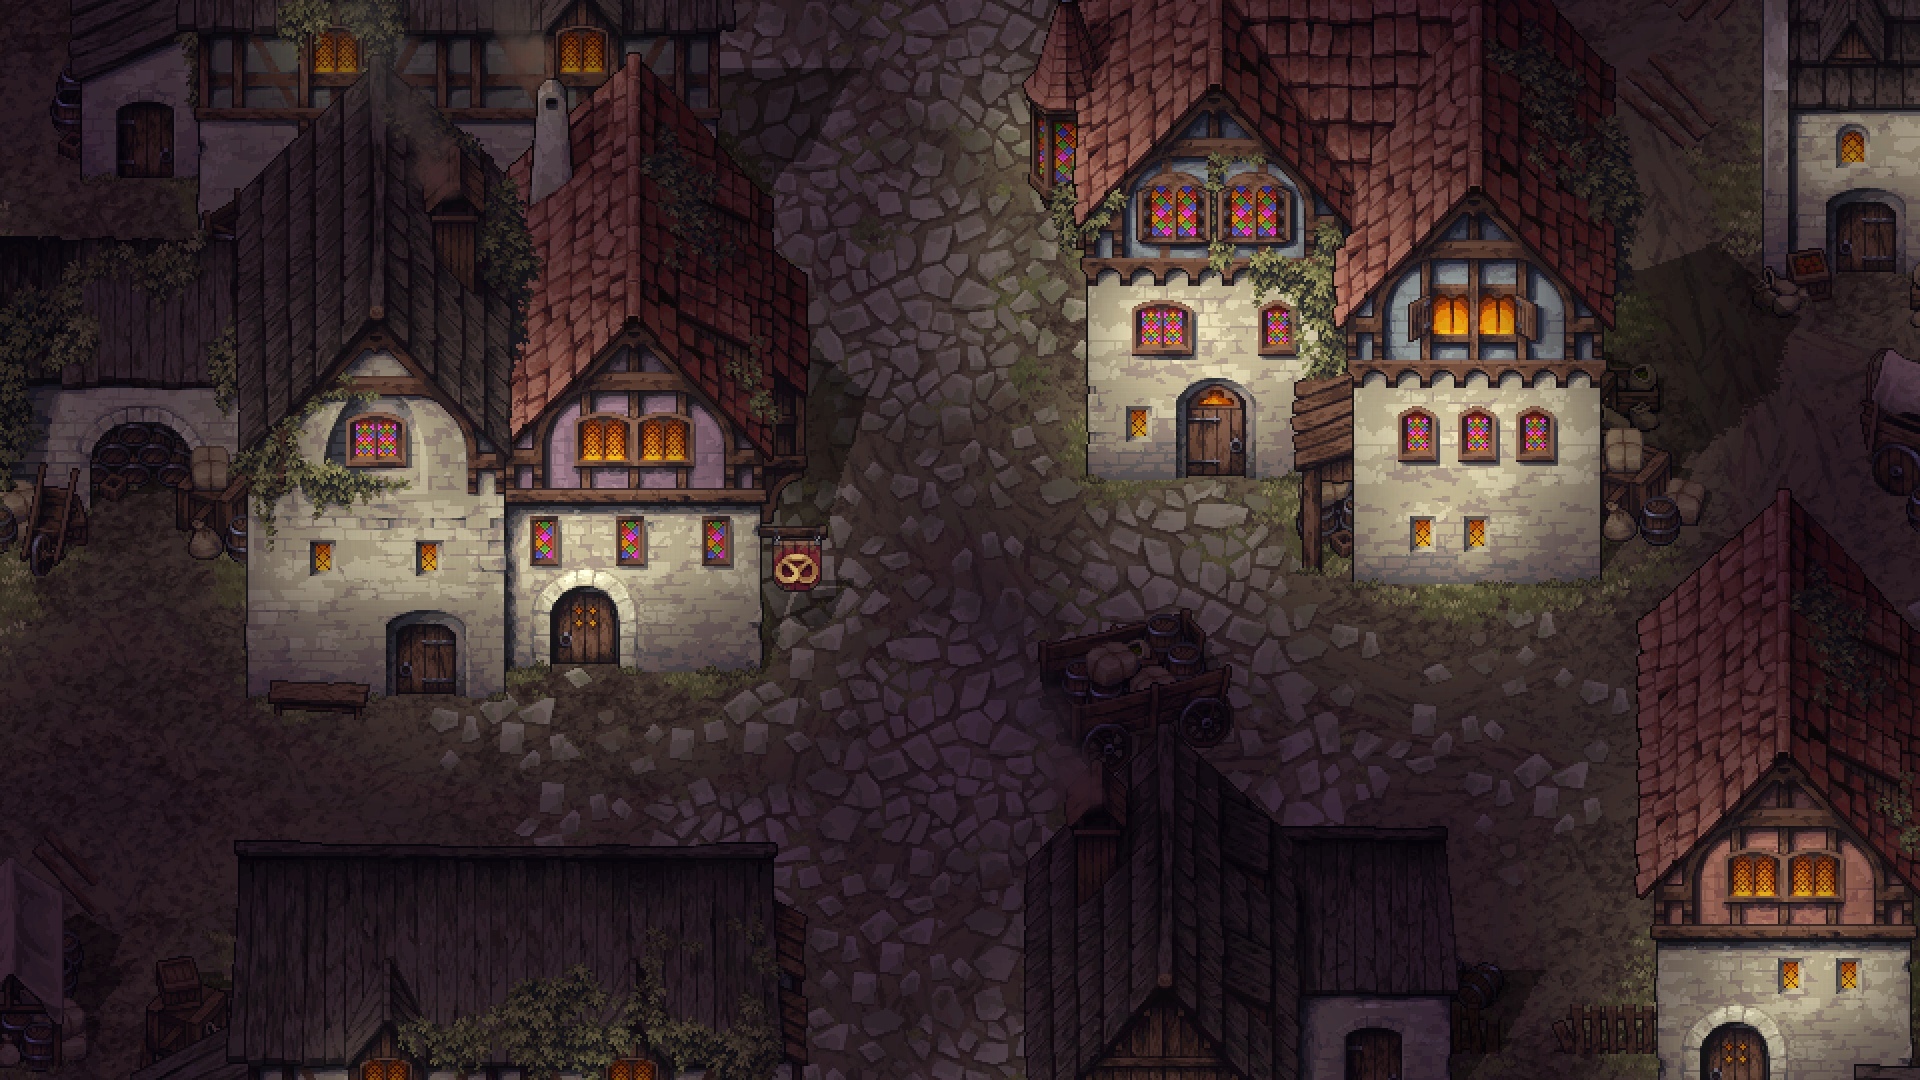
We haven't yet finished setting up NPCs, so you can expect the end result to be much more lively.

[h2]NEW ENEMIES[/h2]

The bestiary of Stoneshard will see many new additions: other than mid-tier Proselytes (this topic deserves its own devlog), there’ll be a few other dangers to watch out for when exploring the world.

[h3]Deathstingers[/h3]


“Deathstingers are the scourge of the local woods. A large enough swarm of these sizeable insects can make short work of pretty much anything or anyone”

Deathstingers are large and very aggressive insects that form swarms around their hives in certain points of interest. Their primary strength lies in numbers - until a Deathstinger hive is destroyed, it will periodically spawn new swarms, maintaining their number.


But even a single Deathstinger swarm can cause a lot of grief: these things are hard to hit, and even successful strikes don’t deal much damage. On top of that, the less Health a swarm has, the higher its chance to dodge future attacks, although its own attacks will deal less damage as well.

[h2]Crawlers[/h2]


“Crawlers make their burrows in deep woods, where they hunt small wildlife. Other predators do their best to stay away - crawlers' blood and bites are venomous, and their ability to almost instantaneously heal their fragile carapaces turns any encounter with them into a battle of attrition”

Needless to say, we had no choice but to introduce giant spiders into the game - therefore, meet Crawlers. You’ll be able to encounter them in the woods, but fortunately for you they won’t stray far from their burrows. Crawlers are dangerous predators for quite a number of reasons.


First of all, they are capable of spitting liquid webs, immobilizing and weakening their victims. Just as with Mancatchers’ nets, it will be possible to untangle yourself from them by skipping turns.

Crawlers’ huge size makes them rather frail - to compensate for this shortcoming, they have an ability to quickly regenerate any damage done to their chitinous carapace. Each turn Crawlers restore some of their Armor Durability, which also grants them additional Resistances. At the same time, they don’t have much Health, so the best weapon for hunting Crawlers is something with good Armor Damage and Penetration.

And finally, their blood is corrosive. Fighting Crawlers in melee will get you sprayed with it, dealing Caustic and Poison damage. This damage is also increased by each Injury or Bleed affecting a Crawler.

[h2]Harpies[/h2]


“Initially, harpies inhabited only the ridges of Aldorian foothills, but now they can be encountered across the entire realm. Their habits haven’t changed in the slightest though: these perpetually ravenous beasts are still the source of constant nuisance, attacking livestock and lonely travelers”

Harpies are enormous scavenger birds that can be found across most of Aldor. Hunting them requires a strategic approach: make sure that you bring a net or two with you or have a way to quickly cripple their wings - Harpies get significant combat bonuses while they are in the air.


Upon spotting their prey, Harpies swiftly close in to intercept it, so archers and mages will have a hard time keeping their distance - until a Harpy’s wings are injured, their mobility skill has no cooldown.
Harpies usually attempt to intimidate and confuse their victim with deafening screeches, then surround it from all sides, trying to peck out the eyes. Harpies’ heinous stench also doesn’t make fighting them any easier, causing coughing and the urge to throw up.

Despite all that, Harpies are incredibly cowardly: when threatened by defeat, they immediately try to take off and fly away a few turns after beginning their retreat, leaving you without valuable feathers and other trophies.

[h2]NEW THROWABLES[/h2]

No one expects you to face new dangers without new tools, so we added a few bombs with different effects.

[h3]Nistrian Flame Flask[/h3]

“The recipe for Nistrian flame, the flasks of which occasionally find their way to Aldor, still remains a secret despite the efforts of many talented scholars. Alas, no one has yet invented an alternative that burns at least half as well”


[h3]Deathstinger Jar[/h3]

“The only reason why this deadly weapon is barely ever used is that any attempt to encase a swarm of enraged insects in a fragile container is incredibly dangerous”


[h3]Spider Blood Flask[/h3]

“Certain alchemical procedures can prevent crawler blood from curdling, allowing it to be stored in glass containers for prolonged periods of time. This creates many new possibilities ranging from using it in further alchemical experiments to throwing it in combat”


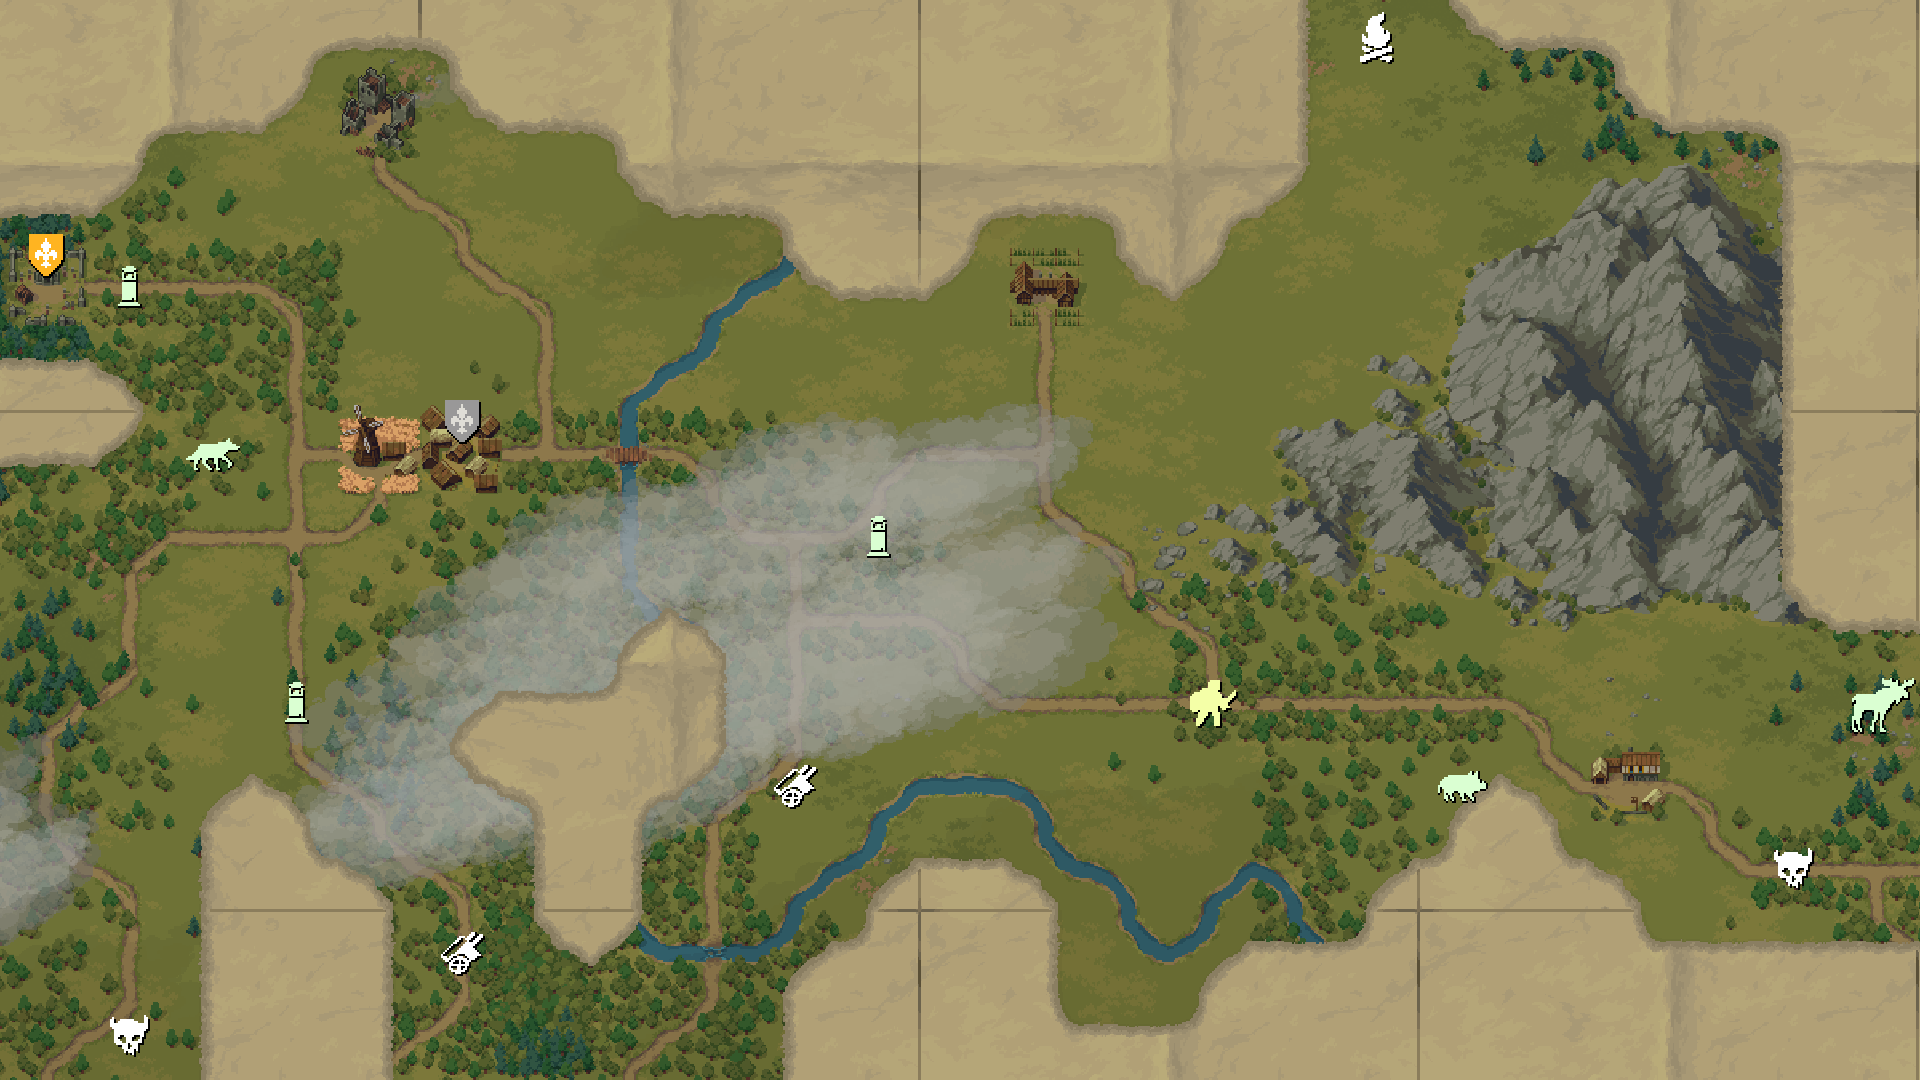
[h2]BODIES OF WATER[/h2]

And finally, the first look at rivers and lakes:


Bodies of water have a whole lot of mechanics tied to them, ranging from the basic option to fill a waterskin to swimming, combat, and special interactions with some abilities.
When your character is in shallow water, moving to another tile takes two turns. The distance of dashes is affected as well.

Upon entering deep water, the character begins to swim. The main thing to keep in mind is that swimming requires Energy - each traversed water tile will consume some of it. If Energy reaches zero, your character will drown, dying instantly. Swimming Energy Cost is affected by many factors: certain active effects, Injuries, and also whether you have heavy armor equipped.

On top of that, you can’t use weapons when in deep water - all attacks will count as unarmed, stats like Block and Counter chances will be disabled, and taking damage will burn Energy.

The same rules will apply to your enemies too. Some of them will be unable to swim at all, actively trying to avoid entering deep water.

Once we get closer to implementing Alchemy and cooking, we also plan to add a fishing system, but for now it’s way too soon to get into any details.

================================

That’s all for now. Until the next devlog!

Devlog: Changes to Mechanics


Hello everyone!

The City of Gold update is going to be the largest one yet not only in terms of content, but also the overall mechanics. The introduction of the global map will greatly affect the progression and will be the first step in making it work as originally intended - and that’s where tweaks to the mechanics come into play. Today we’ll address some of them in this devlog and tell you about every important change to the combat system.

[h3]Splitting Protection[/h3]

Let’s start with the most important change: splitting the Protection stat between different body parts. The current Protection system is a remnant of those times when Stoneshard was envisioned as a simpler and shorter game. Every piece of armor increased the unified Protection stat by a certain amount, affecting all incoming strikes and allowing, say, plated boots to protect the entire body.

This resulted in a number of issues: the stacking of resistances and heavy armor was way too effective, allowing to almost entirely shrug off most enemies’ attacks. We decided to abandon this system: Protection, as well as Damage and Bleed Resistances, granted by each individual piece of armor, now affect only their designated body parts. Helmets only protect the head, cuirasses - the torso, and gloves - just the hands.


This makes middle and late game combat noticeably deadlier, strengthens the role of individual pieces of equipment, and allows more flexibility in armor progression - before the City of Gold, heavy helmets only granted 2-3 more Protection than the mail coif, but now the difference is quite substantial.

Finding the balance between the offensive and defensive playstyles will become more important than ever: the heavy plate is safer, but takes a toll on Energy; on the flip side, light and medium armors provide less defense, but allow using skills more liberally.

The shown numbers are subject to change

Protection, just like Block Power, now also affects the incoming Magic and Nature damage, but only with 50% effectiveness: you’ll need 20 Protection to fully soak 10 Fire Damage.

[h3]Changes to Block[/h3]

As you may have guessed, the Blocking mechanic was affected as well, gaining some extra depth. Meet the new stat: Block Power Recovery.

Before the rework, it didn’t really matter how hard or how many times you got hit on the shield: if your Block Power was high enough, you were completely invulnerable to enemy attacks. Now, however, Block Power is expended by blocking, representing the exertion and the loss of balance, and then slowly being recovered each turn.

Let’s say you have 25 Block Power and 20% Block Power Recovery. An enemy strikes you for 25 Damage: you block it, spending 25 Block Power, so you’re left with zero. After that, 20% Block Power Recovery replenishes you 5 Block Power: if you block another attack during the next turn, you’ll receive 20 Damage.

This way prolonged fights, especially against multiple opponents, will quickly drain your Block Power, so you’ll have to use your resources more strategically or rely on specialized skills.

Naturally, shields were affected by this change the most. They lost their innate Protection and gained higher Block Chance and Block Power to compensate for it. Other than that, shields were roughly split in three categories: light, medium, and heavy.

The shown numbers are subject to change.

  • Light shields have the lowest Block Chance and Power, boasting a large bonus to Block Power Recovery instead: they block limited amounts of damage, but they do so with reliable effectiveness. Certain Shield skills also grant them additional bonuses.
  • Medium shields are a jack of all trades: they have decent Block Chance and Power, but lack the bonus to Recovery, making them a balanced choice for defensive playstyles.
  • Heavy shields have a huge bonus to Block Chance and Power and can withstand some of the most devastating attacks. But woe to you if you run out of Block Power in the middle of a fight - heavy shields Recover incredibly slowly, so unless you invest into the specialized skill tree, you risk handicapping yourself with an unwieldy, heavy piece of equipment.


[h3]Accuracy Calculation[/h3]

In the current version of the game, the hit chance formula is very simple:

 Hit Chance, % = The attacker’s Accuracy - The target’s Dodge Chance 


We decided to change it by splitting dodges and misses into two distinct categories: there’ll be two independent checks for the attacker’s chance to hit (depends on their Accuracy) and the target’s chance to perform a dodge.

At the same time, Accuracy over 100% still reduces the target’s Dodge Chance, and the negative Dodge Chance contributes to the attacker’s Accuracy.

[h3]Changes to Dodge[/h3]

Now to the next important change - the new Dodge system.

Initially, Dodge Chance was a completely secondary stat, and we didn’t plan making dedicated Dodge builds a thing. This changed with the introduction of the Dual Wielding skill tree, when we tried adding some dodge-focused gear and the “Berserk Tradition” passive that granted a huge Dodge bonus to characters without armor.

That experiment wasn’t very successful. The issue with its current implementation lies in the “all or nothing” conundrum: you either take no damage or you take it all. Dodge builds revolve entirely around stacking Dodge Chance, running a very thin line between invulnerability and being borderline unplayable: sometimes it’s possible to consistently avoid all damage only to have your character annihilated by a single instance of bad luck..

To sum it up: Dodge builds ignored a large portion of available gear, mindlessly stacked a single stat, and were overly reliant on two key skills (Elusiveness and Berserk Tradition) - none of it worked with the rest of the game.

That’s why we listened to our community and changed Dodge in accordance with the suggestion made on our Discord server by @WatcherOfArabia, that was also supported by other players: instead of simply negating all damage, performing a dodge turns successful attacks into fumbles, and fumbled attacks into misses.

This way Dodge becomes more nuanced, functioning as an important stat with numerous applications. It can be combined with light and medium armors (their lower Protection is more manageable with the 50% Damage penalty on fumbled attacks) or with more aggressive playstyles that focus on applying Stagger and Fumble Chance debuffs with skills, passives, or certain consumables.

The “Berserk Tradition” passive was remade as well - it no longer requires you wearing no armor and has different mechanics and bonuses associated with it.

[h3]Other Changes[/h3]

The rest of the changes aren’t that massive, but they are still worth mentioning:

  • Most conditions and injuries were rebalanced to make them more distinct and to increase the influence they have on gameplay.
  • Being knocked back into an occupied tile now applies Daze instead of Stun. This was done to prevent stunlocks and counteract the strategy of abusing doorways and corners, which is way too effective in the current version of the game. Stun now grants a significant bonus to Control Resistance, which should also make stunlocks much less frequent.
  • Some effects received a rework: Wetness, for instance, now has stacks that depend on the overall duration of the debuff. The longer you stay under the rain, the stronger the effect. Rain now also causes metal items to slowly degrade :)
  • Skill trees received short descriptions with keywords, meant to help new players to quickly understand their theme and possible synergies..
  • There were also some changes to main Attributes, but more about them later...


That’s all for now! Stay tuned: we’ll begin revealing the upcoming update’s content starting with the next devlog.


Until the next time!

Devlog: Global Map


Hello everyone!

It’s been a while since the last announcement! During this time, we’ve been working on lots of stuff: new enemies, locations, mechanics, quests, changes to combat, and other features - we’ll tell you about it all in a series of devlogs prior to the “City of Gold” release, planned for this October.

The first devlog will showcase the largest of the new systems: the global map.

[h2]GENERAL OVERVIEW[/h2]

The global map is one of the most ambitious mechanics that we have ever worked on. It’s vital for implementing the proper scale and introducing the intended progression system, so that’s why it took the longest to make.

We experimented with multiple map sizes, settling on a size smaller than what we had originally intended - this way the map will be denser with points of interest and random events. In the “City of Gold” update you’ll be able to explore Brynn and its surrounding areas - it’s about 20% of what we plan Aldor to be on full release and ten times larger than the existing map.


The map generation uses a mixed approach: some elements are static, while others are randomized with each new playthrough. The static locations are mostly tied to lore, they include cities, villages, some story locations, mountain ranges, the coastline, and rivers (although rivers will also be randomized in the future; we’ll talk about them in greater detail in a separate devlog).

Most points of interest, dungeons and their types, forests, some bioms, and roads are procedurally generated, preserving the spirit of exploration even after multiple playthroughs.

In the future it’ll also be possible to use the caravan to travel across the global map, but it won’t be just an unlimited fast travel option. It’s more of a means to occasionally cross large distances rather than something you use to ride to a dungeon and back.

[h2]NAVIGATION[/h2]


In a sense, the global map records your journey, only marking the locations you personally visit or hear about. The rest is concealed by the fog of war.

That’s why instead of replacing paper maps, the global map will complement them. You’ll still need to purchase paper maps in order to find points of interest and to navigate through new zones, comparing the information you learn from them with the global map.

Naturally, there’ll be other ways to learn about interesting locations (rumors, for instance), but paper maps will remain the most readily available and reliable option to do so. They will more or less work as notes - the large part of their function, such as pop-ups with tile descriptions, was moved to the global map.


This function was greatly expanded as well: most locations now have lore descriptions, letting you better understand the game world. Abandoned carts, roadside shrines, graves, and other minor landmarks now have their own map marker. So does the player character, as it’s way too easy to get lost on such a large map without a character marker, especially after taking a long break from a playthrough.

Our ultimate goal is to make exploration exciting and unpredictable, and the world - vivid and more detailed. That’s why we also added many new points of interest as well as places where you can rest and regroup for a fair fee, such as lonely homesteads or roadside inns.


[h2]SYSTEMS[/h2]

The global map has a few hidden systems under the hood, meant to improve the player experience and make the world more logical and believable.

The most important of them is the reworked progression of dungeons. Now that we aren’t limited by the map’s size, we can place many more dungeons on it. As a result, there’ll be only beginner level dungeons around Osbrook, which will prevent sudden difficulty spikes and will make levelling smoother and more measured.


The dungeon respawn system was also reworked. First of all, it will take significantly longer for them to respawn: you’ll have to move between settlements upon completing all their contracts, otherwise you’ll waste a huge amount of time waiting.

The level of enemies you encounter in dungeons is no longer static - it can shift with subsequent respawns, making enemies stronger or weaker. However, it’s still limited by the zones’ level: even by the time you reach the endgame, you won’t be able to encounter rogue knights around Osbrook.

Some dungeons can only be found far from settlements - you’ll have to search for them on your own, as they don’t have contracts leading to them. The payoff is usually more than worth it: there you will find not only the strongest foes, but also the most valuable loot.

Another important factor is the Wildness of an area. This hidden parameter influences many things: it increases the overall amount of animals, the chance of them spawning, and also reduces your chances to run into a random bandit group in the middle of the woods. This parameter is much lower next to cities and dungeons, so it will be a rare occurrence to come face to face with a bear or a huge wolf pack upon stepping outside of Osbrook. The wilderness factor also affects the chance of being ambushed: there’ll be less ambushes on distant roads and more of them near brigand Bastions.


There’s one more important addition - a new type of points of interest that can be called “dens” or “habitats”. These locations attract specific animal types, guaranteeing that you will encounter them there. Most large animals will have such locations: wolves, bears, moose, boars, etc. The habitats also increase the spawning chance for these animals in the surrounding map tiles, so discovering them can make hunting much easier. On the other hand, it’s best to exercise caution in your search - sometimes instead of a deer trail you can find a ghoul den or something even worse...

==================================================

That’s all for now. Until the next devlog!

Brynn Lore: Part II - Leaders


Hello everyone!

Today we’ll share some of the lore coming with the “City of Gold” update, planned for the end of this summer. This time it’s about the most influential people of Brynn, whom you will have a chance to encounter. To better understand the context, we recommend checking out the previous lore entry.

[h2]Denvar Brie, the Guildmaster[/h2]


Unlike the rest of the Brynn elites, Denvar Brie is neither of noble birth nor possesses incredible riches. He was born in the family of a successful, yet common artisan, which makes the journey to his current standing even more remarkable.

Denvar has always been energetic and assertive. These qualities, in addition to his reputation as an outstanding weaponsmith, allowed him to claim the venerable title of the Grandmaster in the Blacksmith Guild, one of the most influential guilds in Brynn.

Despite his position of power, Denvar never forgot his roots. Although his lavish spending habits set him apart from simple craftsmen, he put a lot of effort into making their lot easier, something which no one in Brynn had ever done before. As a result, he gathered widespread support among common citizens.

The events of spring 427, when the freshly-formed Magistrate attempted to subjugate independent guilds by merging them into a single, easily controllable entity, only increased Denvar’s popularity, solidifying his place among the city leaders. Right now he’s the man representing the interests of every craftsman in the city, so both the local merchants and the nobility have to reckon with him.

Denvar is well-aware that he’s surrounded by enemies, and he’s also not too eager to openly confront other factions. No one knows what plans are brewing in his ambitious mind, but one thing is certain: he’s waiting for an opportune moment to strike a painful blow against his opponents, leaving them no chance to recover. For now his main weapon is a threat of mass strike, which he uses to gain further influence.

An otherwise enlightened man, Denvar has an open distaste for elves, whom he sees as the main threat to both his position and the prosperity of Brynn. Thanks to Jeon Ballar’s protection, elven goods recently took the city’s market by storm – there isn’t much that can rival their quality, and their price, while still fairly high, continues to drop with every weekly shipment of Ahjat weapons and Jibean jewelry unloaded in the Docs. If nothing changes in the next few months, many of the Guild’s craftsmen might lose their job.

Therefore, Denvar considers the House of the Azure Thread, the trade representative of the Jacinth Kingdoms in Brynn, his personal enemy. Many are afraid that if he ever becomes a ruler, he will not rest until Aldor is free from all traces of elven influence, even if it unleashes Jacinth armies upon the realm...

[h2]Jeon Ballar, the Comprador[/h2]


Throughout his entire life, Jeon Ballard has been incredibly lucky, starting with him being born in the wealthiest family of Brynn. A silk-cushioned childhood, a carefree adolescence, rowdy university years, an easy, profitable job in the merchant League – while others fell victims to intrigues and hardships, Jeon always appeared unscathed by misfortune.

The period of political infighting and instability, which followed King Etbert’s untimely death, brought ruin to many, but Jeon only benefited from it: if anything, that’s when his swift rise to the top began.
Brynn had long been discontent with the Crown, and the King’s death gave the conspirators, Jeon being one of them, a free rein. The meticulously planned overthrow was a success: the freshly-formed Magistrate seized the power, and Jeon managed to become its leader in just a few weeks, greatly assisted by the sudden murder of the previous burgomaster, something which he vehemently denies any connection to.

Knowing nothing of the military matters, Jeon was smart enough to delegate the control over the army to experts. Unfortunately, the sudden outbreak of the Crimson Plague robbed the Magistrate of its victory, leaving Jeon surrounded by power-hungry military commanders. Still, Jeon’s remarkable ability to drop meaningful hints and make promising concessions allowed him to firmly remain in his seat.

This can’t go on indefinitely though. The truce becomes shakier with each passing day, and it won’t be easy to finish off the Council, which had enough time to recover from its defeat. Perhaps this fear of an encroaching demise was exactly what forced Jeon to seek the help of the elves, whom Aldor has an age-long grudge with. For now their support isn’t very noticeable, but Jeon has big plans - after all, establishing closer ties with elven allies is where the profit is at. This trend, however, unnerves the rest of the Magistrate – very few people are willing to share money and power with outlanders.

Jeon’s luck might soon run dry… But who knows how many more tricks this genius of intrigues and compromises still has up his sleeve?

[h2]Arno di Berro, the General[/h2]


Poet. Warrior. Strategist. Leader. Duke Arno di Berro is an embodiment of true aristocracy, making it even more remarkable that he found himself a part of the republican Magistrate.

A scion of a noble family, which fled from the Bronze Isles, Arno di Berro was born and raised in Aldor. At the same time, he still feels like an outsider, making him as demanding to himself as he is to others. Some ill-wishers claim that Duke di Berro’s main goal in life is to become a better Aldorian than actual Aldorians – although one has to admit that if that is true, he has been quite successful so far.

Until recently, very few people knew the name of di Berro: he had an excellent education in the University and participated in many of King Etbert’s wars, but otherwise he was a completely unremarkable Brynn nobleman. After the monarch’s death, he became a major player in the Magistrate – the sudden cooperation between the haughty Duke and merchants and craftsmen, whom he had previously openly despised, came as a surprise to many, even his new allies. At the same time, no one in Brynn can deny that upon taking control over one of the city’s armies, Arno proved his loyalty to the Magistrate with his actions.

Under the skillful leadership of their decisive and fearless commander, the Magistrate forces successfully captured pro-royalist Maen and, after the Council launched an attack on the Southern front, marched back to Brynn, breaking the siege. All this earned the Duke a reputation of a war hero and the savior of the Magistrate. During the truce Arno also made great strides in reforming the military: under his command a ragtag army of mercenaries and militia transformed into a powerful force, ready to follow their leader to the end of the world.

Unsurprisingly, both the League and the Guild wish to garner Arno’s favor, however he believes himself to deserve much more than that. Too prideful to compromise and share power, the Duke doesn’t want to join forces with other Magistrate leaders, counting only on himself and his soldiers. At the same time, there is an increasing number of mysterious ships being met in the Docs by the Vanguard troops under the cover of night, so perhaps the usually straightforward Duke plays his own game, just like everyone else in Brynn.

Arno continues to proclaim his unwavering support for the Magistrate, and yet, judging by the fiery speeches he gives to his soldiers, his vision for the realm is much more different than what the Guild or the League have in mind. Proud and power-hungry, the Duke wishes to unite the land under a single banner, with him leading Aldor towards great victories. And even though Arno di Berro continues calling this new order a republic, will it actually be any different from the monarchy, which so many in the Magistrate died fighting against?

Now available in Korean!


Hello everyone!

We’re happy to announce that Stoneshard is now also available in Korean!

This highly requested localization is the twelfth and the final one on our list, though we might add some additional language options further down the road.

Stay tuned for more updates!