1. Steel Division 2
  2. News

Steel Division 2 News

Steel Division 2 - Death on the Vistula Aces Detailed and New Units Highlighted

Hello commander!

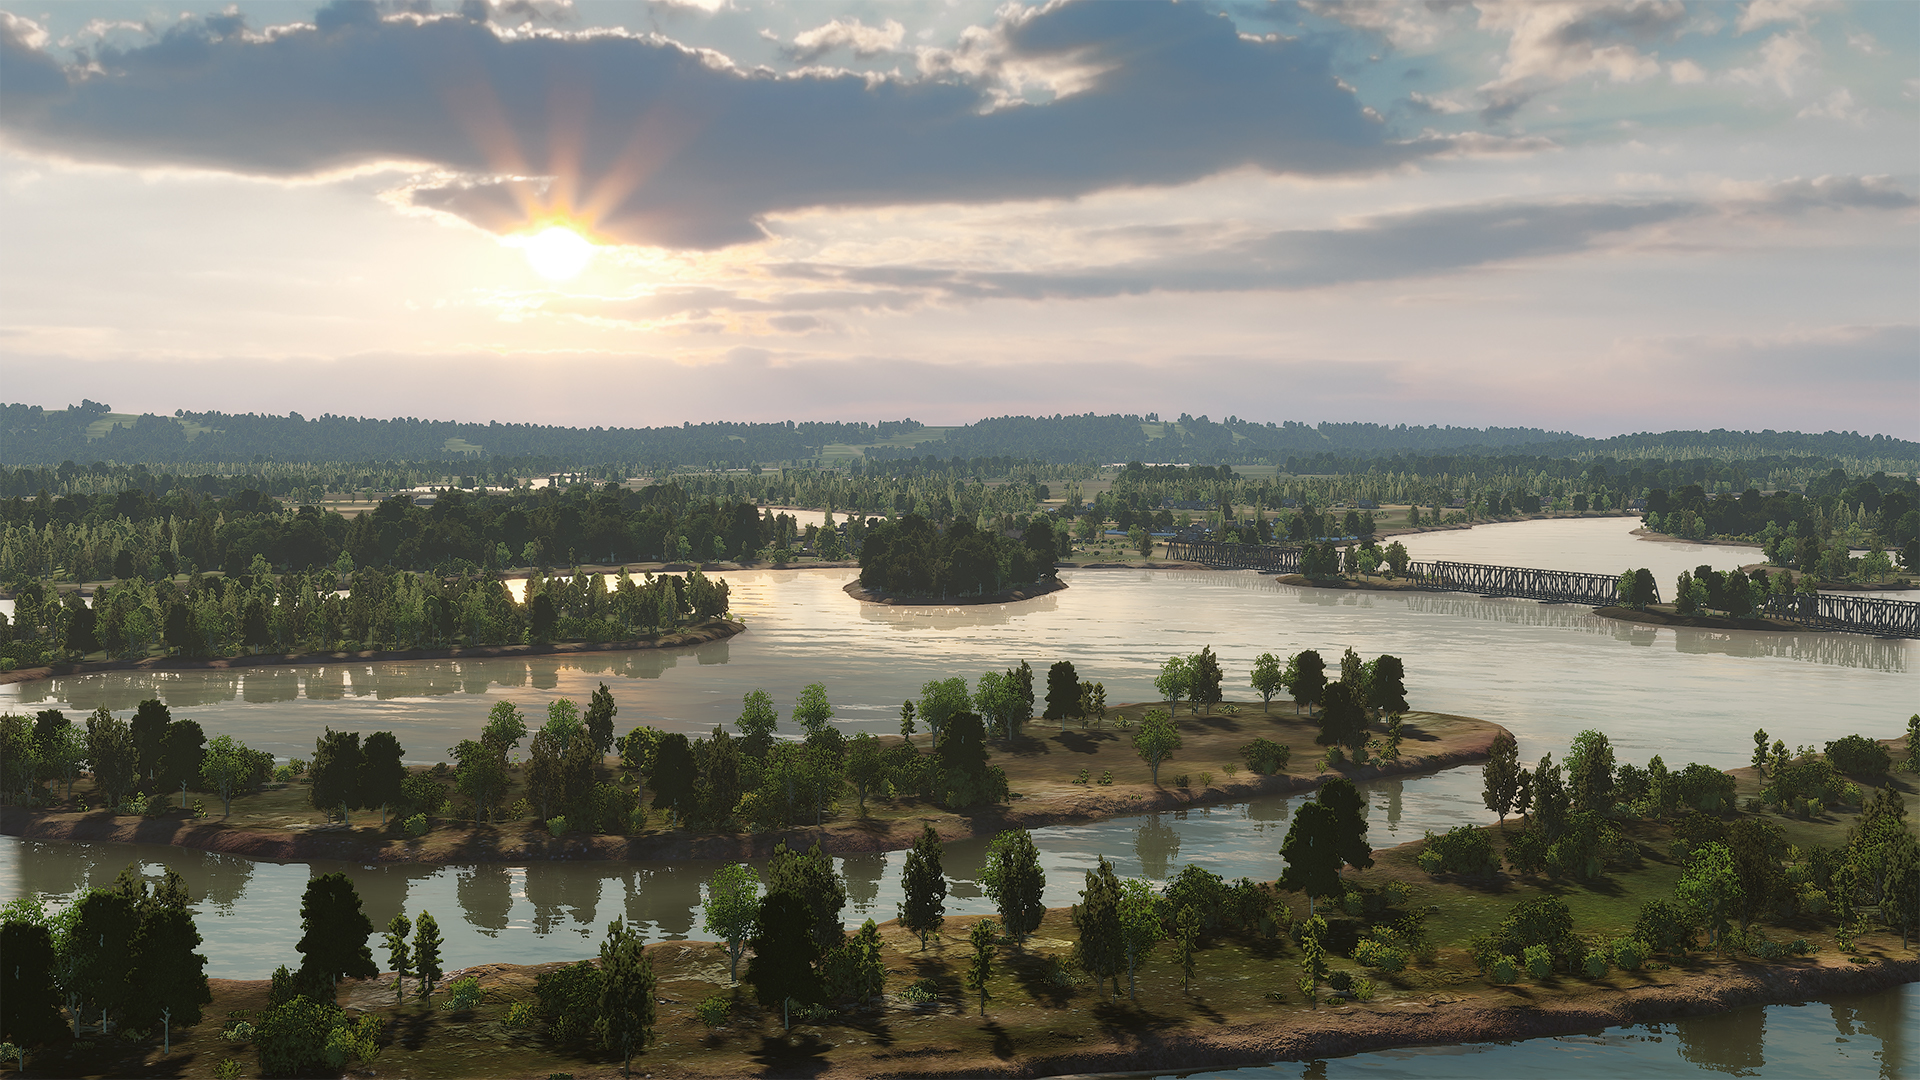
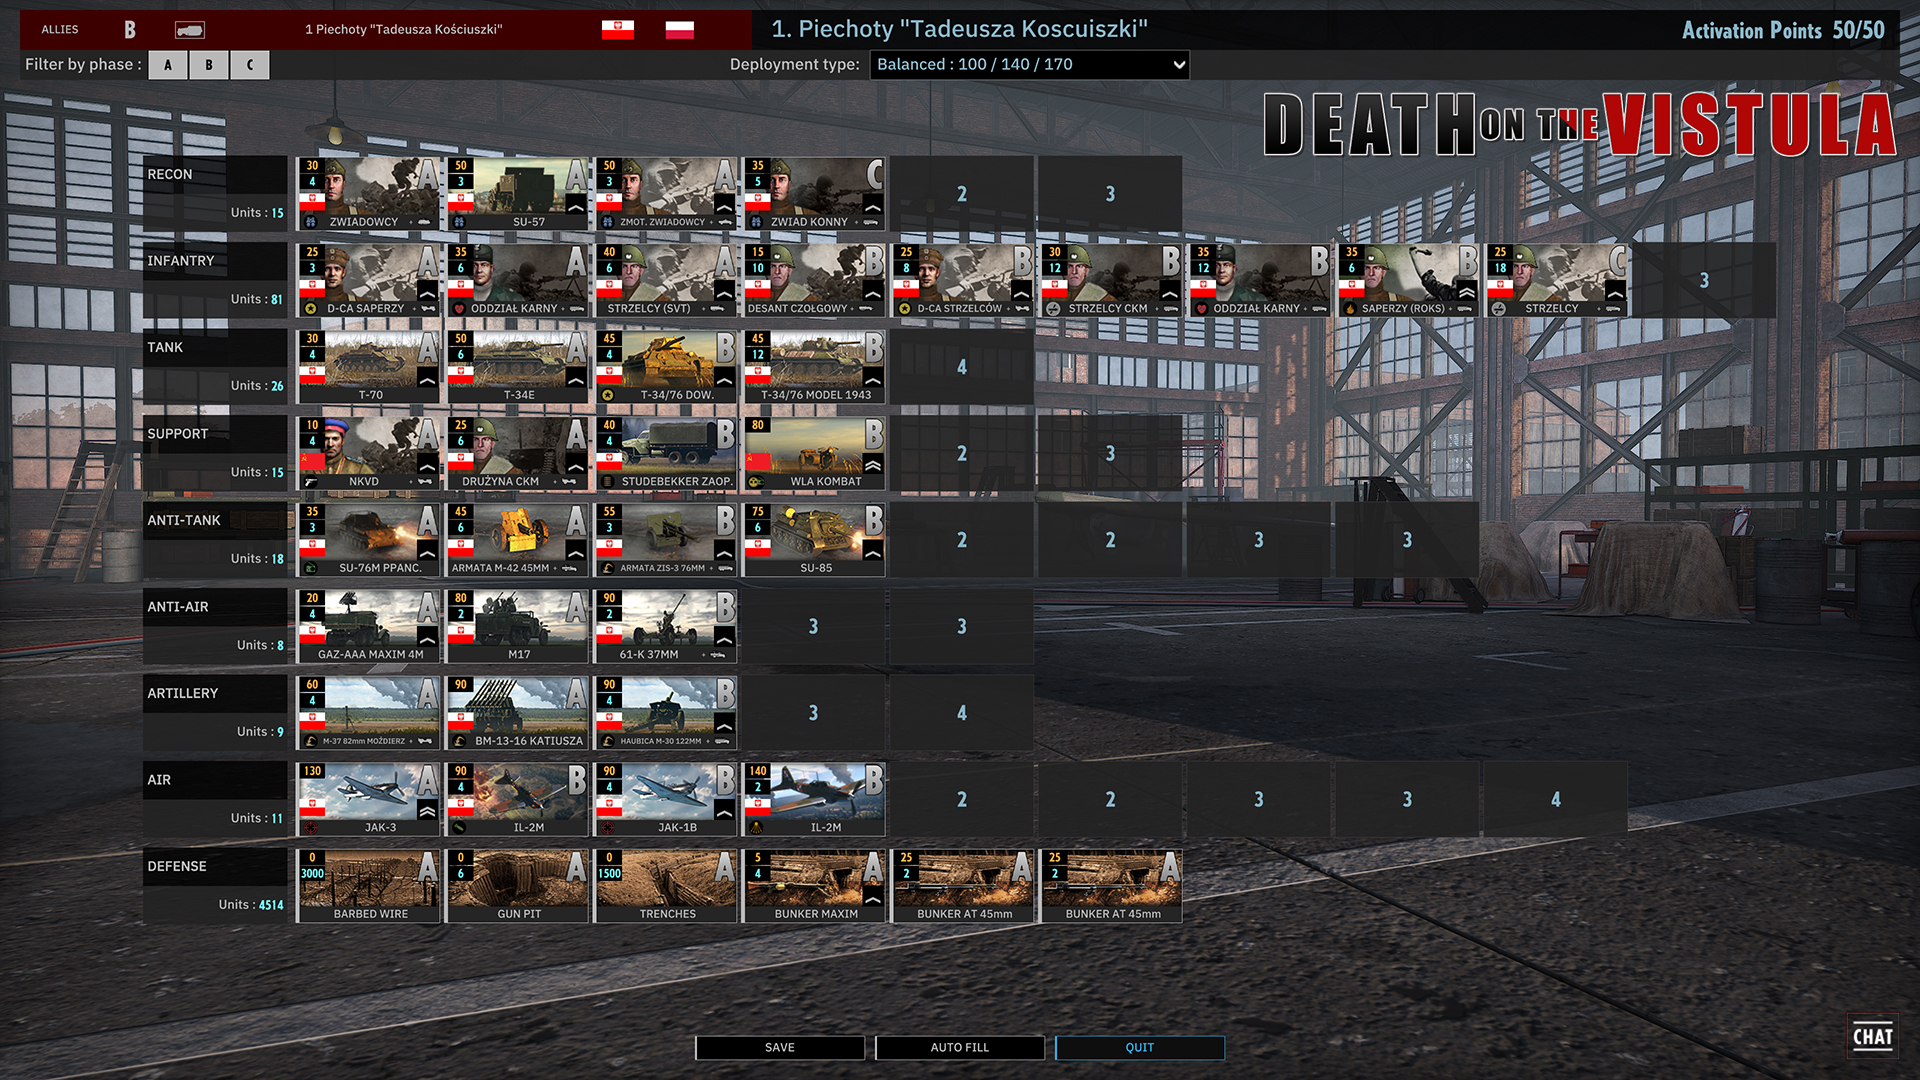
So exciting! The release of our very-first Steel Division 2 History DLC, Death on the Vistula, is just around the corner. This coming Thursday, October 17th, you can get your hands on four new divisions, a gigantic new Army General campaign, four new Historical Battles, two new Aces, and over 200 new units. If you haven’t, get the Death on the Vistula DLC now!

https://store.steampowered.com/app/988171/Steel_Division_2__History_Pass/
As part of this DLC, together with the new units, we’ll also be releasing two new Aces. In today’s article, we’ll take a closer look at these historical figures (and vehicles).
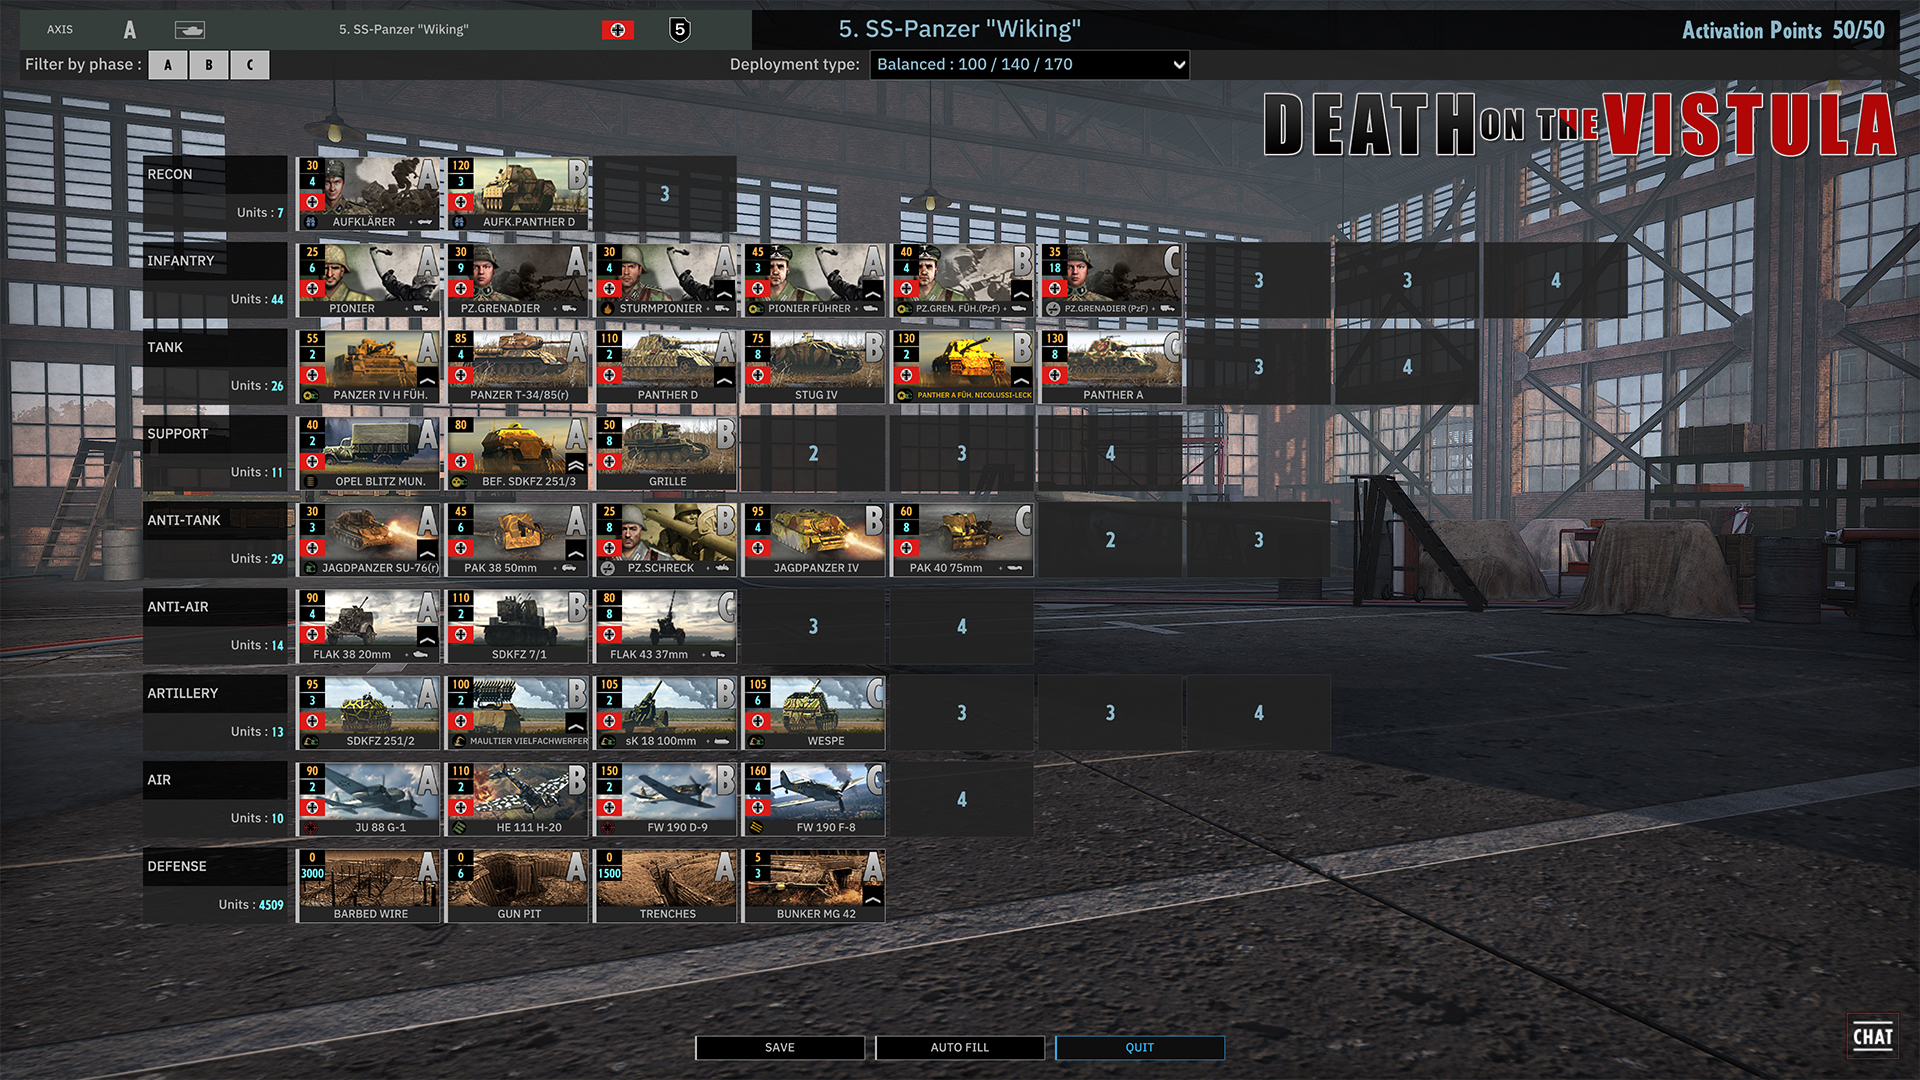
New Aces
In case you forgot: Aces are unique units that don’t feature any kind of gameplay or statistical advantage. They look badass, but play exactly the same!

Karl Nicolussi-Leck
The new Axis Ace is the tank commander Karl Nicolussi-Leck with his Panther A. He managed to single-handedly break through an enemy encirclement during the battle of Kovel as part of the 5. SS-Panzerdivision “Wiking”. Disregarding a direct order to withdraw, Nicolussi-Leck kept up the attack, destroying several Soviet tanks, and ultimately reached the besieged troops. The trapped forces escaped with most of their heavy equipment intact, which later earned Nicolussi-Leck the Knight's Cross of the Iron Cross for his actions.


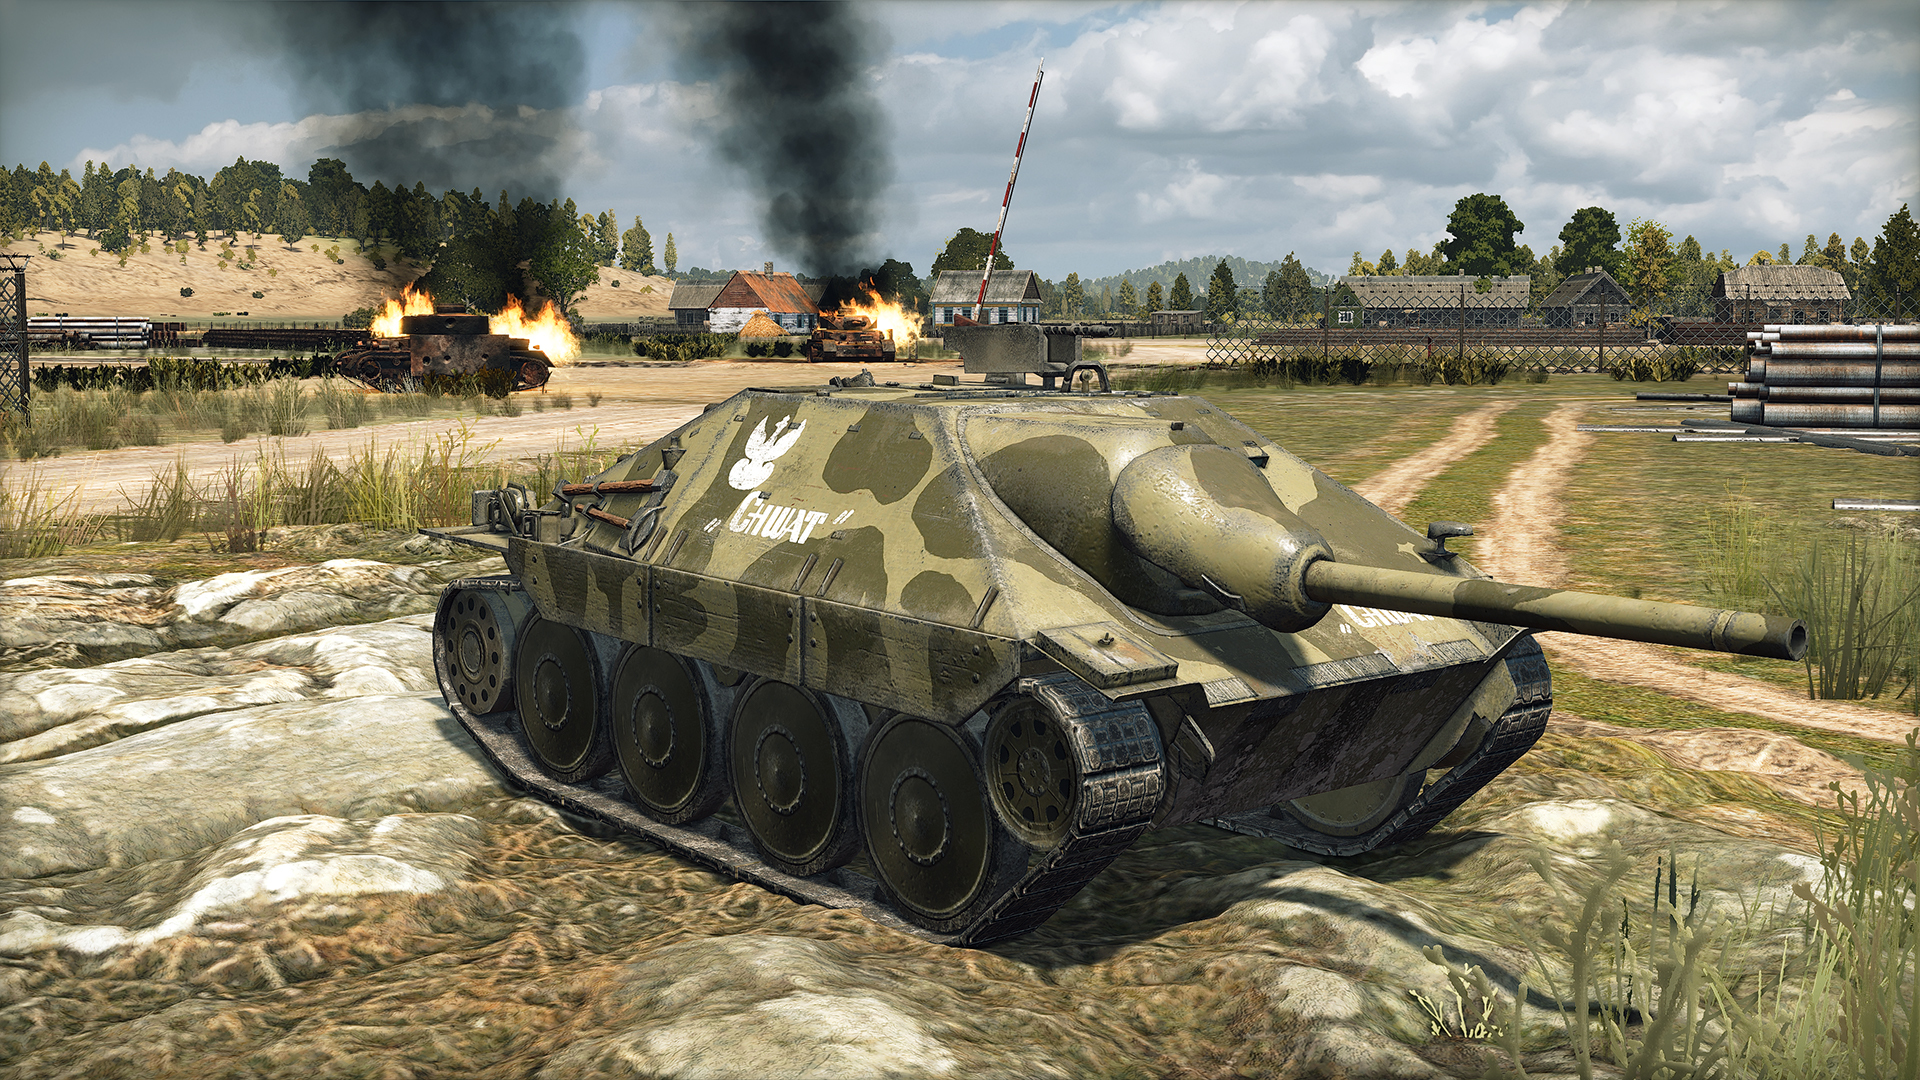
The “Chwat” Jagdpanzer 38(t)
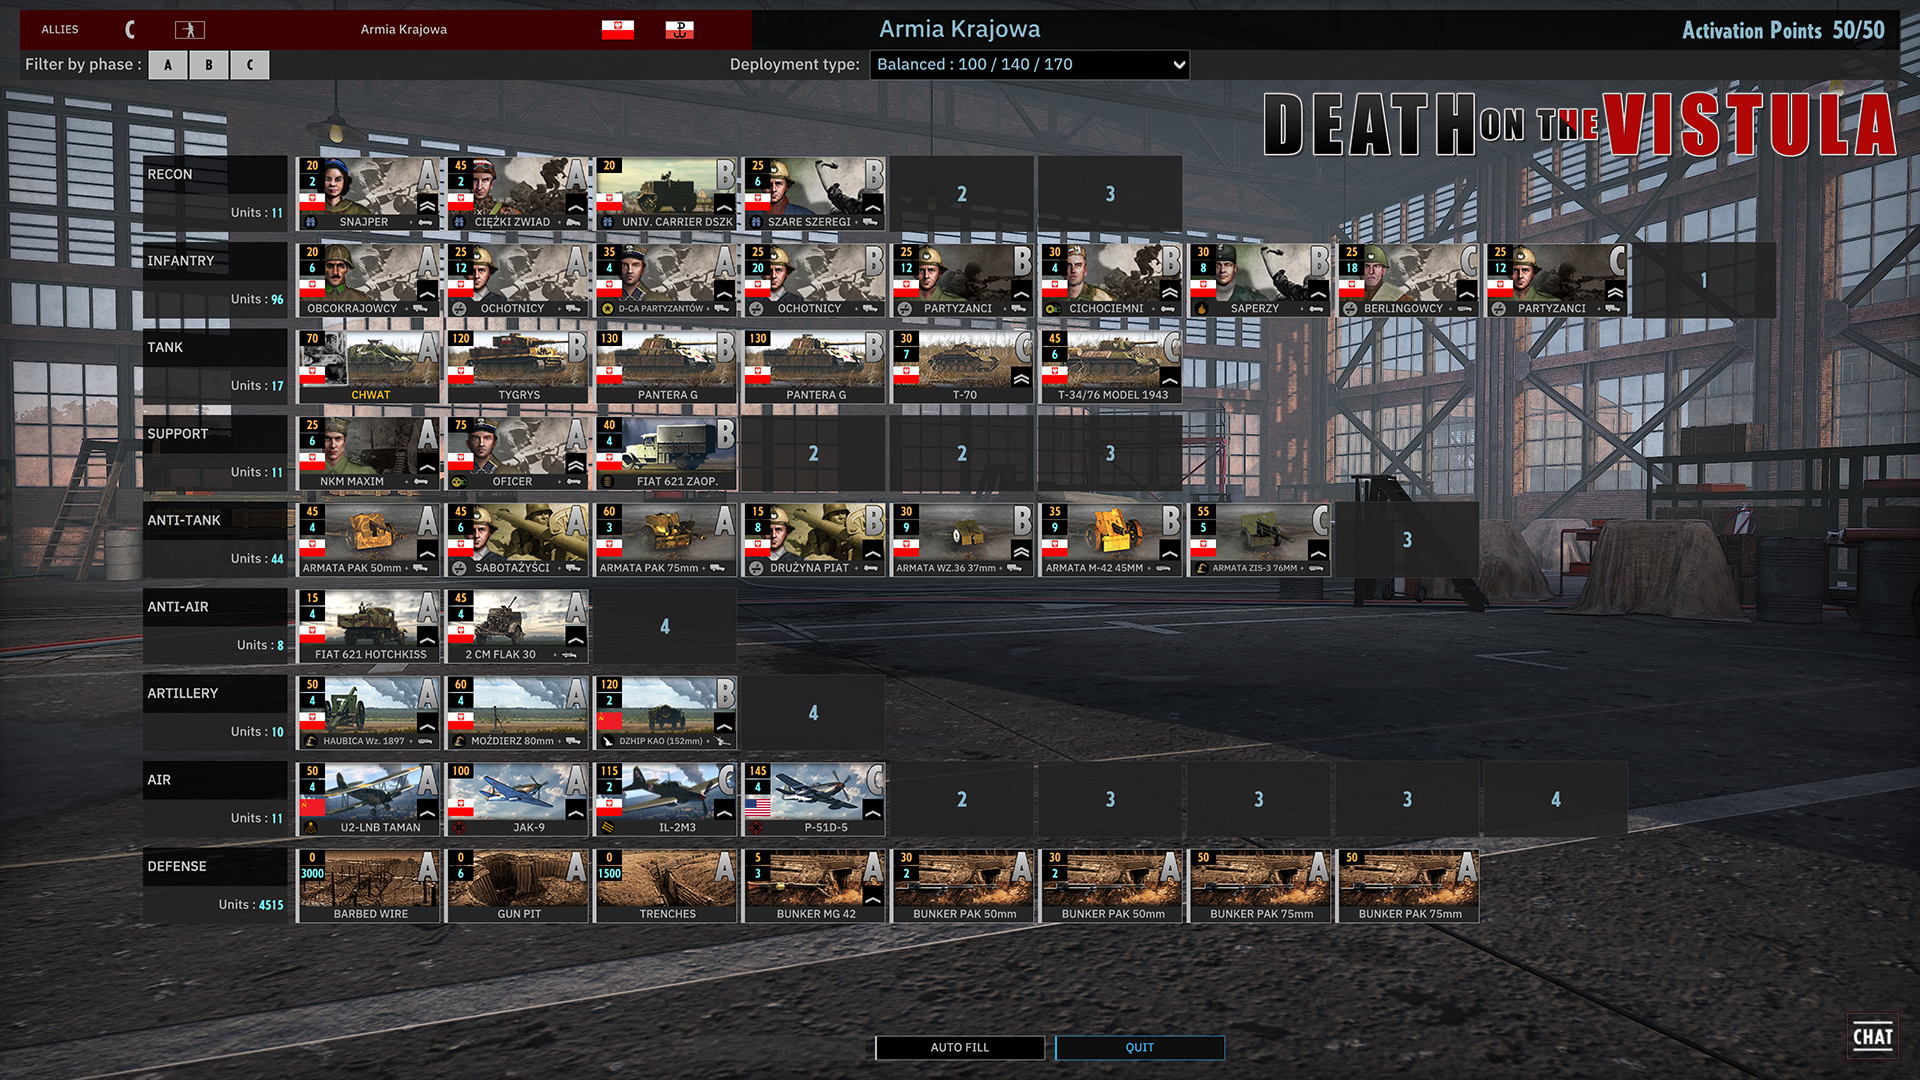
The Allied Ace is not a person but a tank! The “Chwat”, which means “Daredevil” in Polish, was a Jagdpanzer 38(t) Hetzer tank captured by the Armia Krajowa - the Home Army - during the opening days of the Warsaw Uprising. After some hasty repairs, they used the diminutive tank destroyer against the German forces in the ensuing street battles. It did not survive the war - save for a discarded road wheel - but proved its value for the brief time it served the brave fighting Poles.
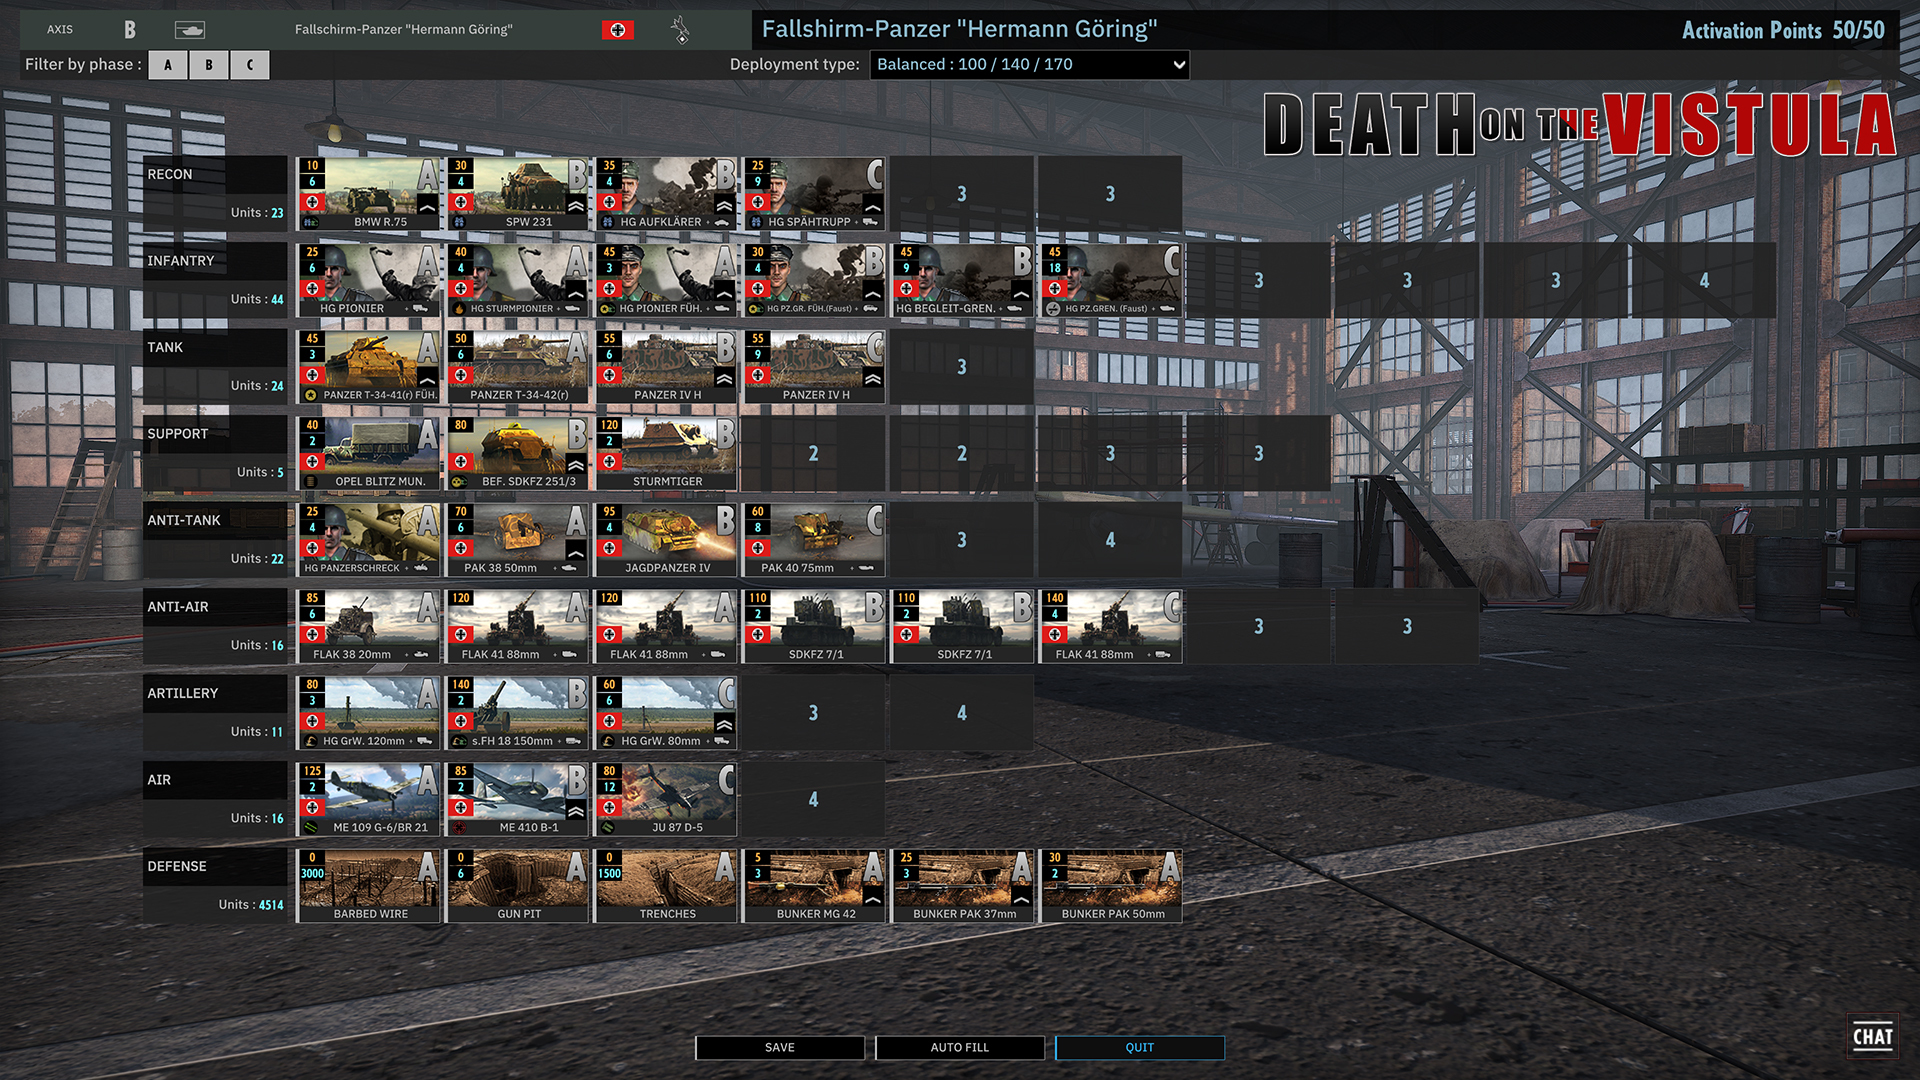


Over 200 new units
The Death on the Vistula DLC will also bring over 200 new units. We want to highlight several of the more unique vehicles you’ll be able to command.

Sturmtiger
The mighty Sturmtiger, a beast of a machine firing 380mm rocket-propelled rounds, was a rare heavy assault gun designed to provide offensive fire support in built-up areas. Only during the Warsaw Uprising was this vehicle actual employed as intended, when a handful of Sturmtiger, including the original prototype, attacked urban fortifications. The Sturmtiger can be found with the new Fallschirm-Panzerdivision “Hermann Göring”.
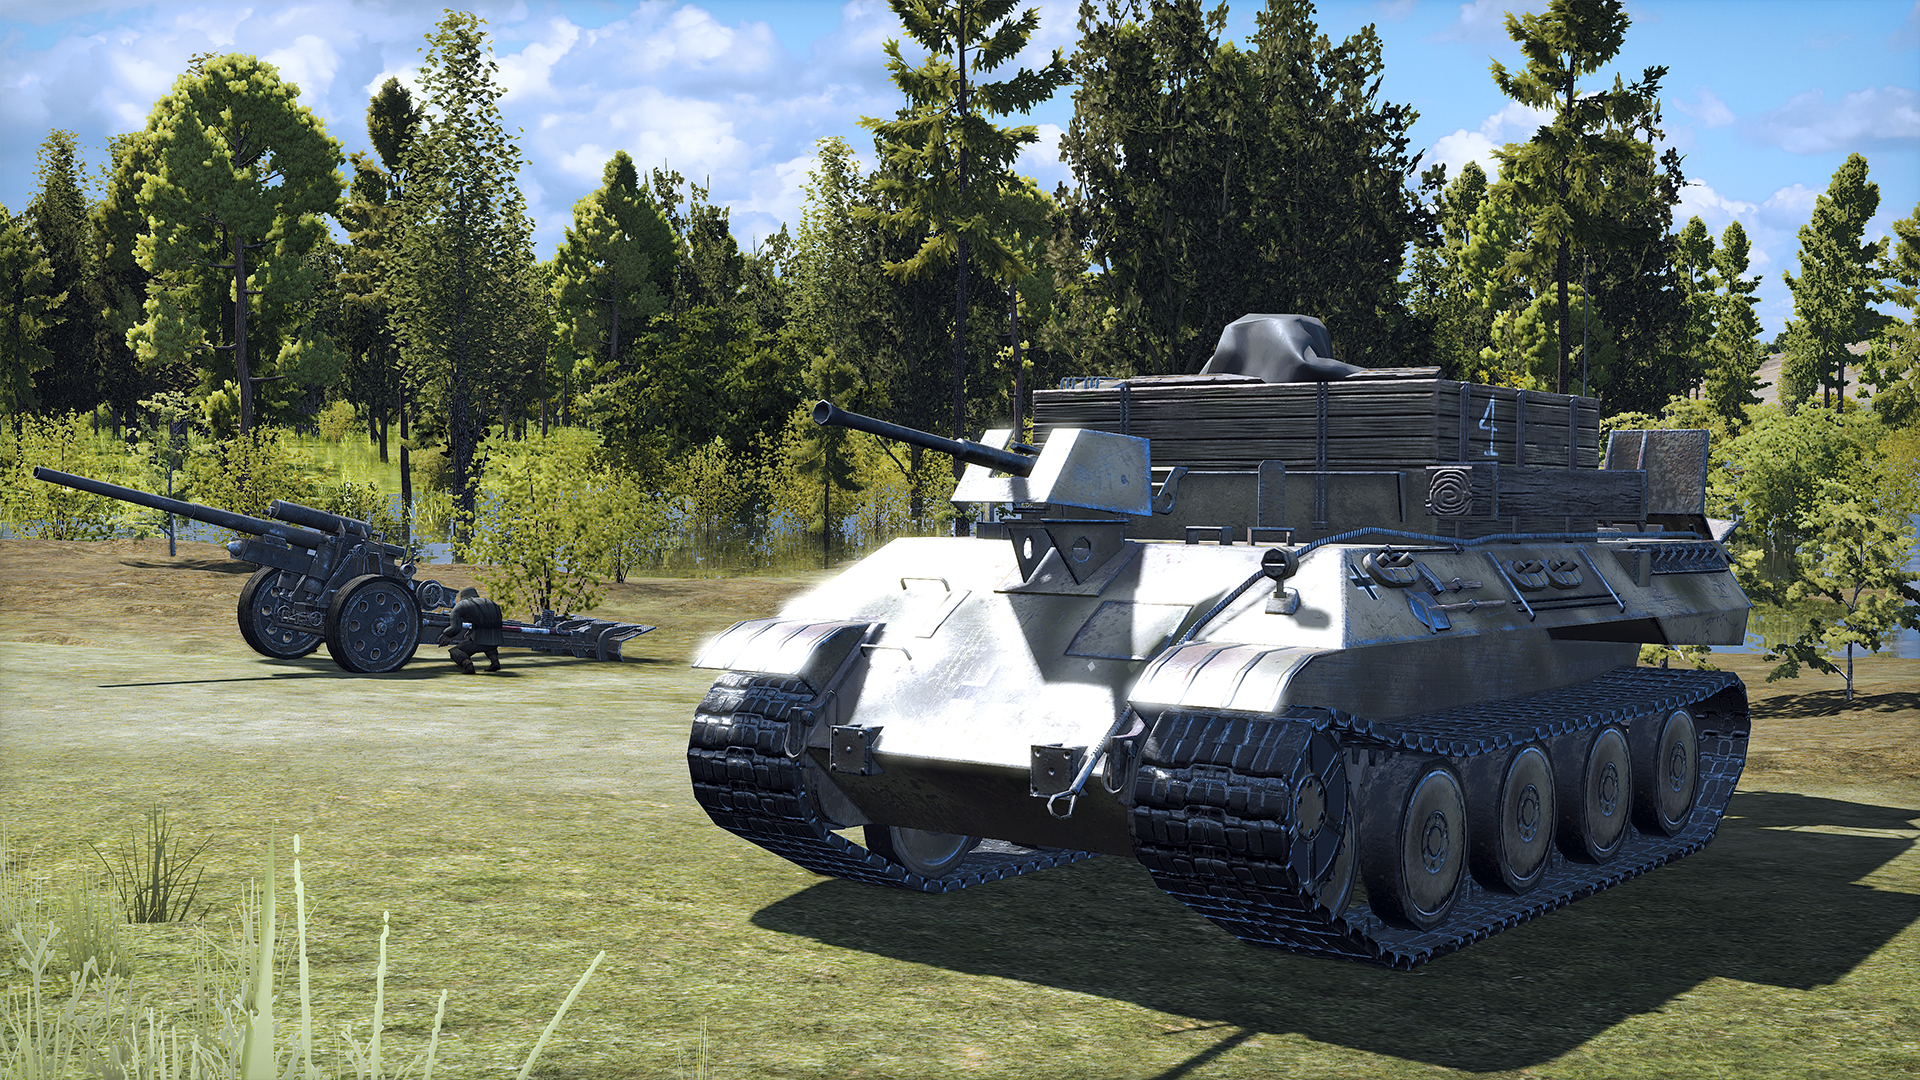


Bergepanther
The Bergepanther, an armored recovery vehicle based on the Panther medium tank, was used to retrieve disabled tanks on the battlefield. As the war progressed, the German High Command realized they needed a new vehicle powerful enough to recover the heavy tanks (Tiger, Panther, etc.) still salvageable after a battle. Lacking a turret, the box-topped Bergepanther was equipped with a winch and cable system and had only limited defensive armaments. The Bergepanther can be deployed as a heavy prime mover with the new 5. SS-Panzerdivision “Wiking”.


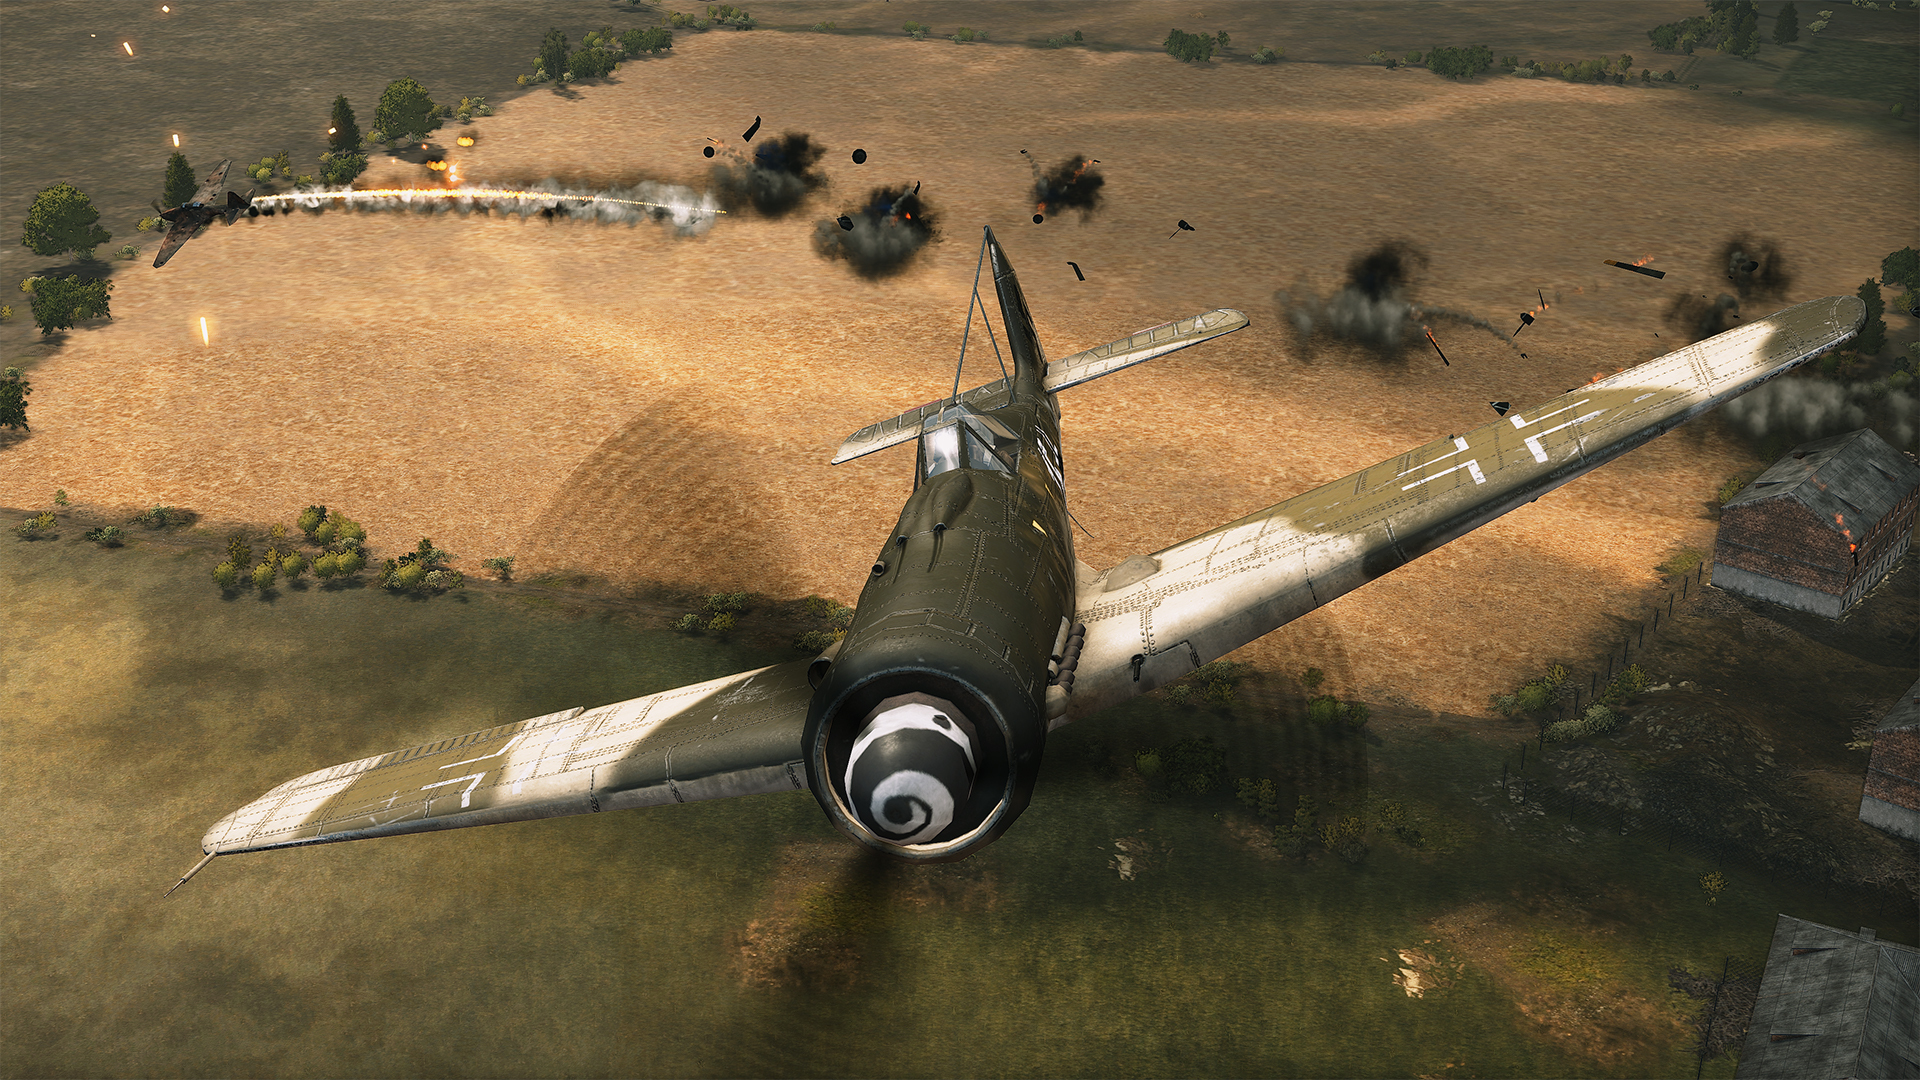
Fw 190 D-9 "Long Nose"
One of the many variants of the successful Focke-Wulf 190, the “Long Nose” D-9 single-seat fighter was originally designed for attacking high-flying Allied heavy bombers. The realities of the war forced the Luftwaffe to use the D-9, nicknamed “Dora”, as an anti-fighter and in ground-attack missions instead. The capable Fw 190 D-9 Dora is featured with the 5. SS-Panzerdivision “Wiking”.


JU 88 G1
The venerable twin-engined Junkers Ju 88 was used by the Luftwaffe from the very beginning of World War 2. This multi-role combat aircraft saw many uses: as a dive bomber, a photo-reconnaissance plane, a night fighter, in a ground-attack role. The JU 88 G1 took on the mantle as a capable heavy fighter, being able to bring a large amount of firepower to bear. The JU 88 G1 is featured with the Fallschirm-Panzerdivision “Hermann Göring”.


Kubus
The scratch-built Kubus was an armored personnel carrier made by the Armia Krajowa during the Warsaw Uprising. A truly unique vehicle (only one was ever made), the improvised Kubus carried a machine-gun and flamethrower spearheaded several assaults. The original armored car survived the war and is now on display. In Steel Division 2, a small number of Kubus fighting vehicles can be found as part of the Armia Krajowa division.
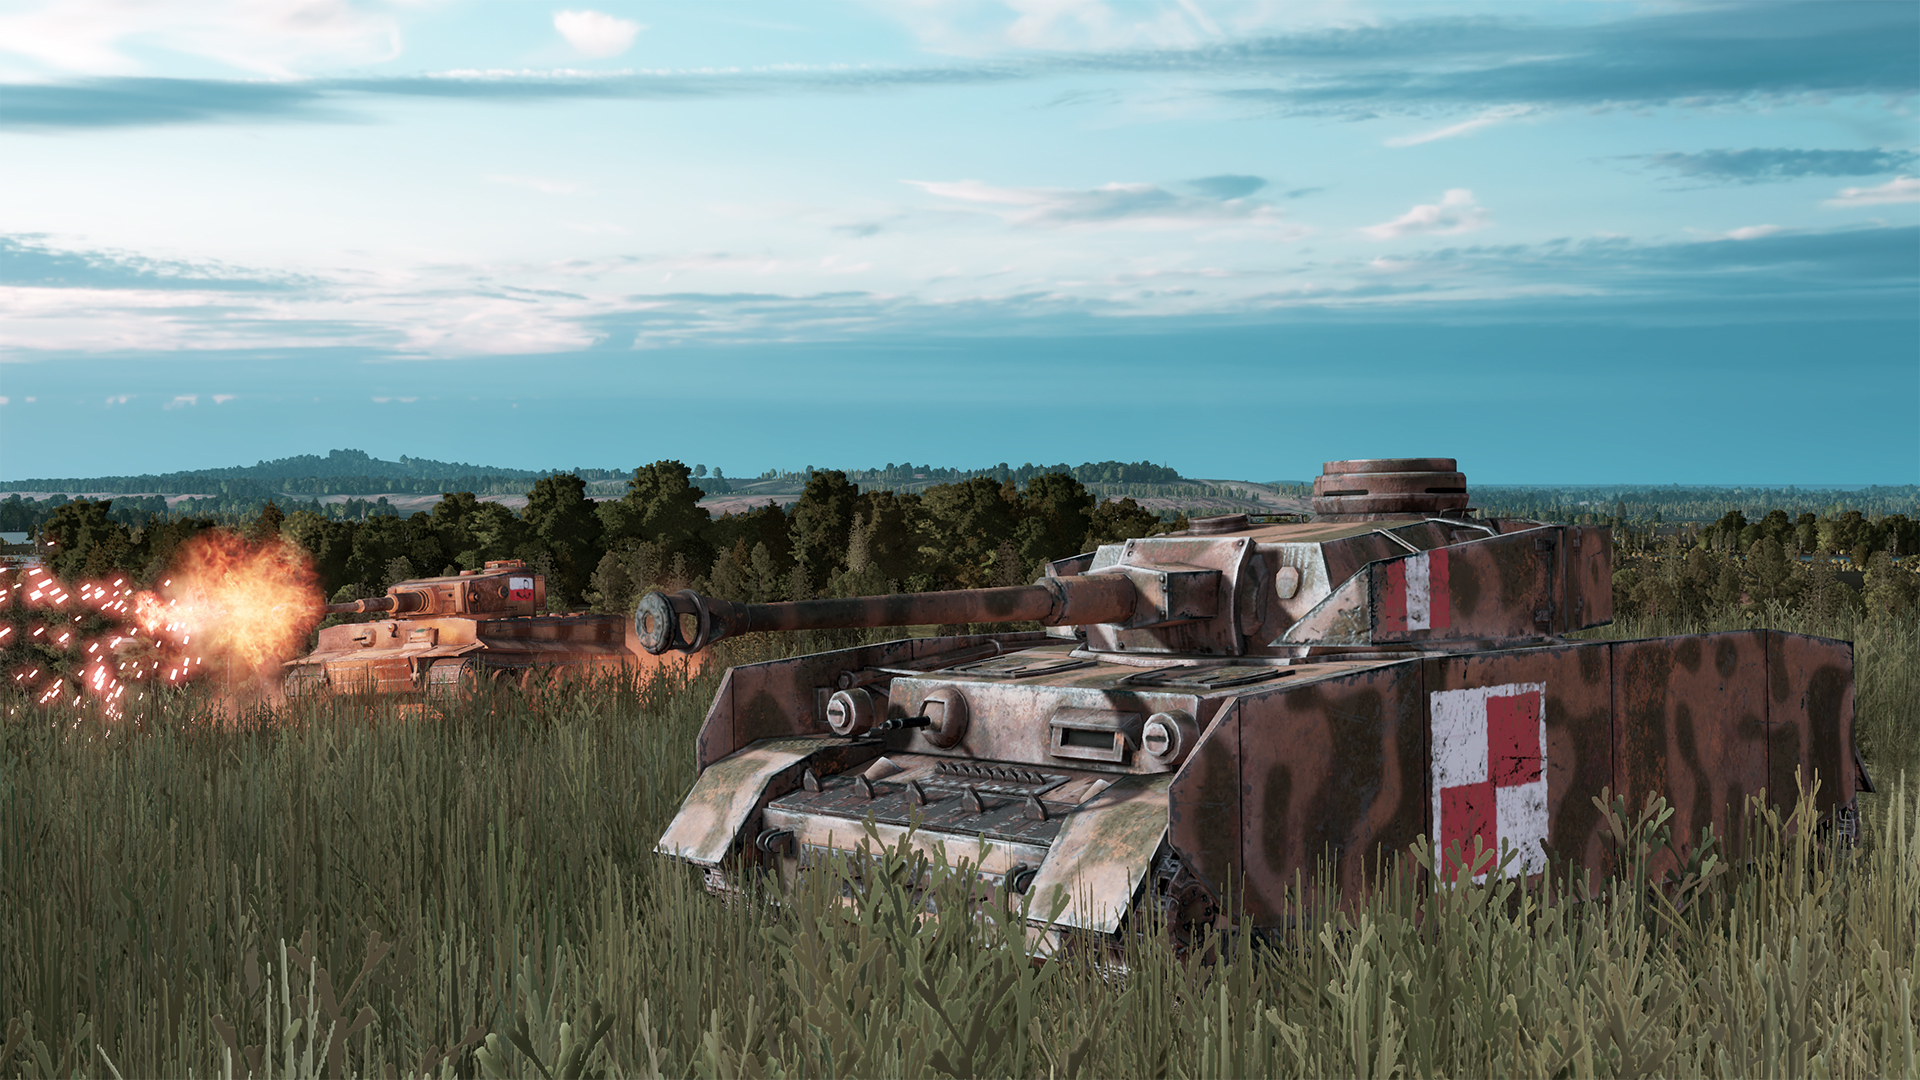
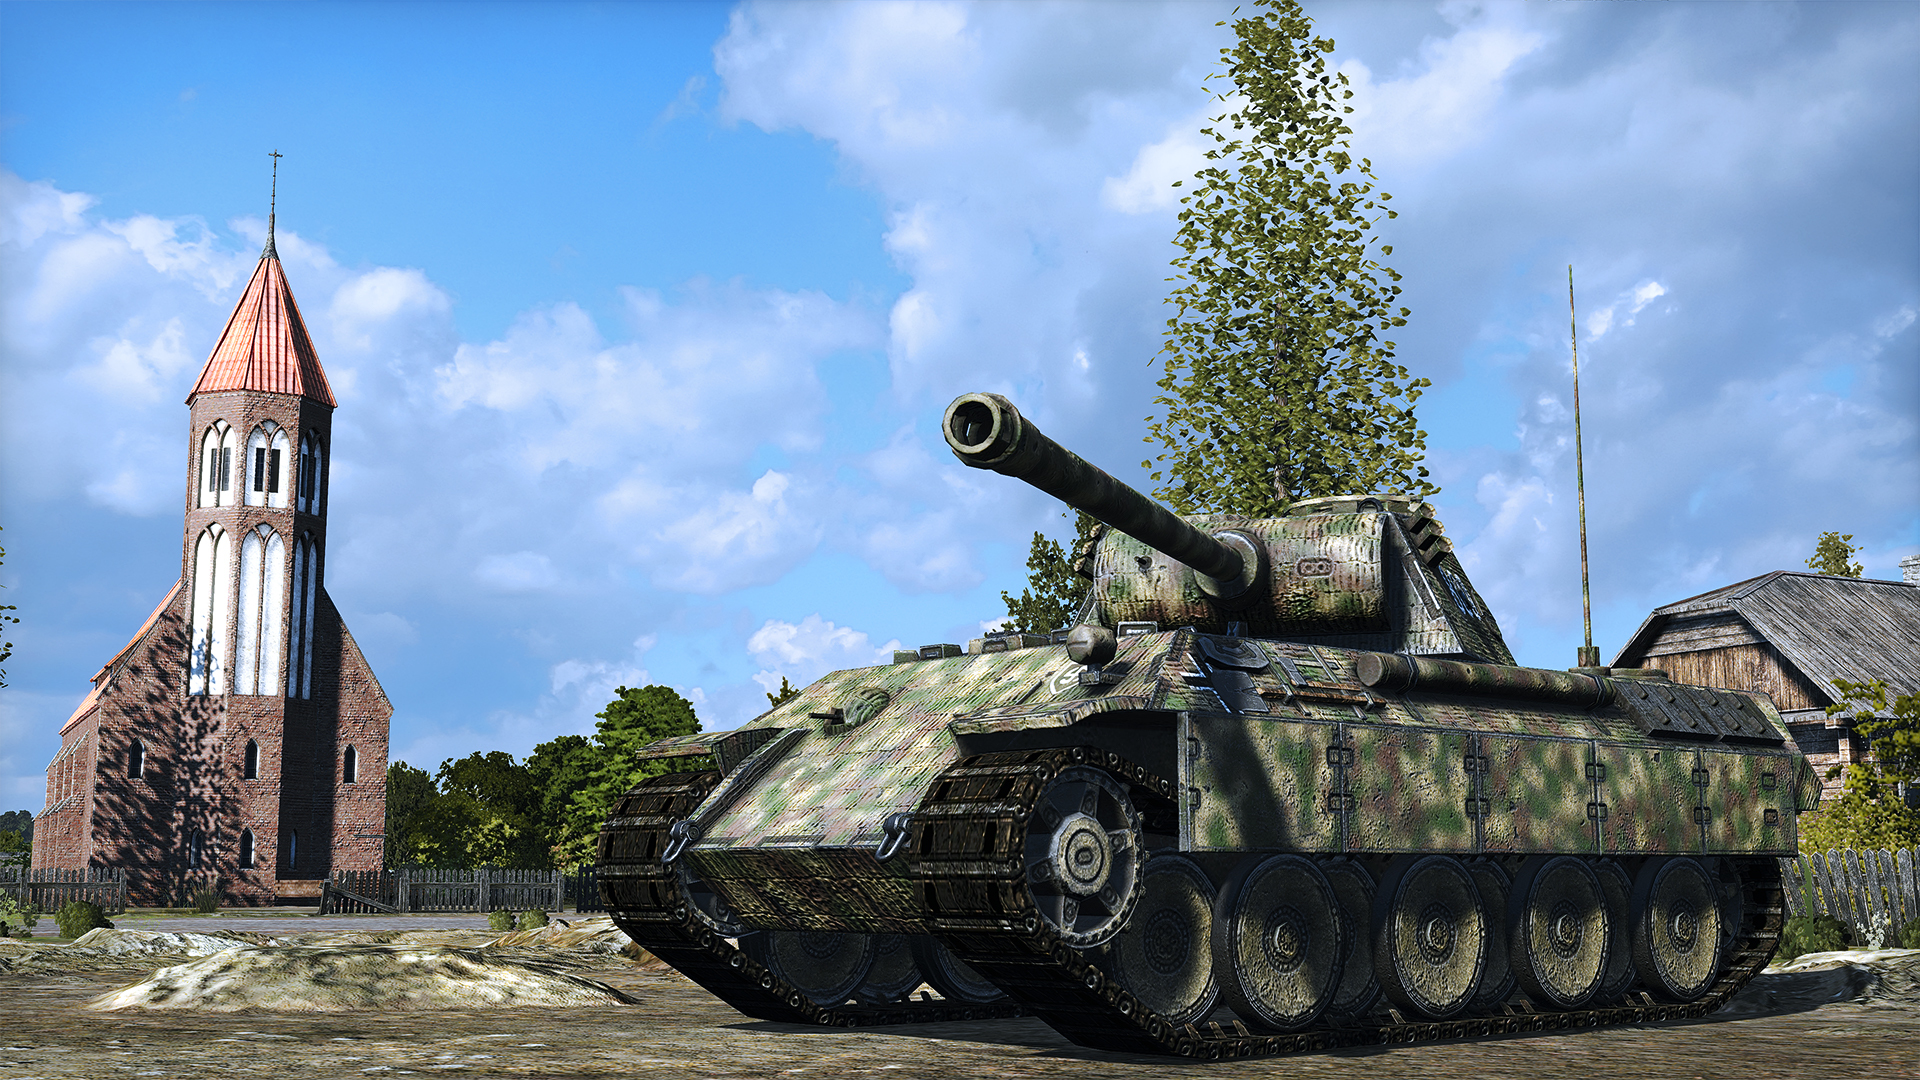


Captured Panthers
During the Warsaw Uprising, the Home Army managed to capture a handful of German vehicles. Among these, two Panther A medium tanks were recovered almost completely intact. They were quickly used with devastating effect against their original owners. The Panther is not the only captured tank that can be deployed by the Armia Krowjawa: they also have access to the Jagdpanzer 38(t), Panzer IV, Tiger, and even an Italian M14/41.


Get ready!
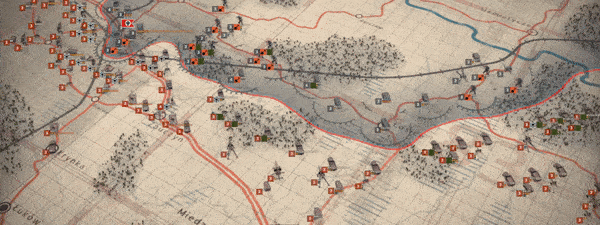
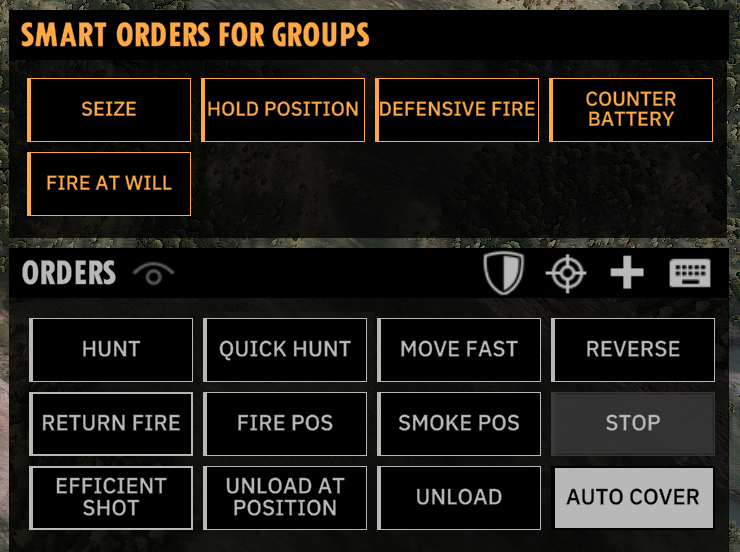
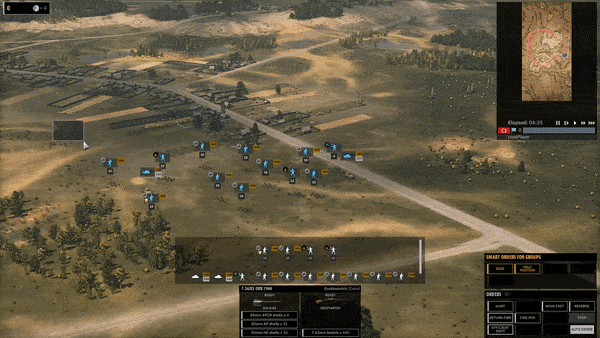
This Thursday, October 17th, we won’t only be releasing the Death on the Vistula DLC but also a number of Reinforcement Packs, which will be available for free to all our Steel Division 2 players. These packs will bring three new maps (read more about them here), the new Smart Orders (read about this new feature here), two new soundtracks, and new in-depth tutorials for the Army General and the tactical game.

https://store.steampowered.com/app/988171/Steel_Division_2__History_Pass/

You can always check out our Steam and Eugen forums and social channels (Facebook and Twitter).

See you on the battlefield, commander!

Steel Division 2: Upcoming Free Reinforcement Pack Maps Detailed

Hello commander!

Alongside the launch of the Death on the Vistula DLC on the 17th of October, we’ll also be releasing free Reinforcement Pack for all our Steel Division 2 players. These packs will individually contain a bunch of shiny new things, foremost the new Smart Orders mechanic, as well as in-depth tutorials for both the Army General and the tactical game and two new soundtracks.


But that’s not all: the Reinforcement Packs will also contain three new maps. They come in different sizes and allow for 1v1, 2v2, and 4v4 player counts (solo, cooperative and online multiplayer). All three take place in the eastern territories of occupied Poland, and will feature in the new Historical Battles of the Death on the Vistula DLC.

In today’s article, we’ll look at the new maps in detail: Brest West, Zbuczy and Gora Kalwaria.

Brest West

As the name implies, this map represents the countryside to the west of Brest, a former Polish city close to the Belarussian border. Most history buffs might recognize Brest as the place where the Treaty of Brest-Litowsk was signed, which signaled the end of Russia’s participation in World War 1. Also well-known is the 19th-century fortress located nearby, which under Soviet control held out against the Wehrmacht for six days at the start of Operation Barbarossa.

Steel Division 2 focuses on the Red Army’s massive strategic campaign, Operation Bagration, which took hold of the region three years later. Brest lay right on the path of the 1st Belorussian front as they advanced towards Warsaw and the Vistula river.


Brest West is a 2v2 map which can also be played in 1v1 mode. A river crosses the battlefield with large plateaus influencing the waterway’s course. There are two distinct environments that will influence a player’s style of fighting. Running the length of the river, a village provides a welcome level of cover for your infantry and allows for some intense close combat assaults. The second environment comprises of various low-level plateaus that rise above several open plains. This terrain supports long-range engagements. The hills provide plenty of cover, obstructing sightlines, and allow a player to sneak up vehicles and tanks using the ridges and hillsides.


Battlegroups based on mechanized and armored divisions will find themselves most at ease on Brest West. Infantry needs to watch out - charging across the open terrain on this map is not recommendable!

Zbuczy

The second map carries the name Zbuczyn and will be playable both in 2v2 mode and 1v1. As an asymmetrical map, dense forests and various hills surround a small village at the heart of the battlefield.


While we usually balance a map between the two opposing sides, which frequently results in some kind of mirroring, in the case of Zbuczy we opted to go for something different.


Depending on their deployment, a player will either have the advantage of being closer to the lines of reinforcements off-map or a quicker route to capture the forested plateau and railway station at the center. This gives an unprecedented dynamic as it allows for one side to push the middle of the map, while the other has the opportunity to flank and encircle the enemy player.

To capture the town in the middle of Zbuczyn, infantry and mechanized divisions are best used. However, long-range artillery should be employed to besiege and harass any enemy troops in the vast woodlands that make up most of the environment.

Gora Kalwaria

The Gora Kalwaria map is our special effort in recreating on a 1:1 scale a part of the major Polish river, the Vistula. As you might know, the Vistula was a significant objective of Operation Bagration: establishing bridgeheads on the western banks would significantly help the Red Army liberate Poland. Likewise, crossing the Vistula would be of immense value in any subsequent offensive aimed at Germany itself.


As a large 4v4 map, Gora Kalwaria is also available in 1v1 mode. We designed this map to recreate the violent battles that occurred when the Soviets crossed the Vistula. The battlefield is split into three distinct areas. One sector features two villages that run in parallel to each other, as well as an extensive forest. The second area is swampy, making it difficult for vehicles to maneuver and likely location of long-range engagements. The third is the mighty Vistula itself, a large river that also sees some built-up areas, including factory buildings.


In the 1v1 variant of the map, the Vistula is the centerpiece. There are several shallow river crossings, which are visible thanks to a different shader used. Infantry and amphibious vehicles can use these fords to creep into an opponent's rear and surprise the enemy player with well-placed ambushes.

Any kind of battlegroup, from close combat infantry to hard-hitting armored, can be used on the map the size of Gora Kalwaria.

Death on the Vistula DLC coming soon
The free Reinforcement Packs will launch with the Death on the Vistula DLC on the 17th of October. In total, we’ll release four Reinforcement Packs.

https://store.steampowered.com/app/988171/Steel_Division_2__History_Pass/

Don’t forget to get your hands on the Steel Division 2 History Pass. By getting this Pass you’ll receive access to all three History DLC’s, including the upcoming Death on the Vistula. The first History DLC will feature a massive new Army General campaign centered on the Red Army’s advance on the Vistula and Warsaw, four new Historical Battles, over 200 new units, new Aces, and much more!

Keep an eye out on our Steam and Eugen forums and social channels (Facebook and Twitter).

See you soon, commander!

Death on the Vistula: New Army General Campaign and Historical Battles Detailed

Well, hello there!

Glad to have you back so soon. You might have noticed, but we are dropping these articles hard and fast, and we are not letting up until our first History DLC, Death on the Vistula, launches on October 17th. Hoorah!

https://store.steampowered.com/app/988171/Steel_Division_2__History_Pass/

In today’s post, we’ll shine a light on the Army General campaign and the four Historical Battles which will be included in the new DLC.


Get ready to recreate some of the most challenging and nail-bitingly intense battles witnessed on the Eastern Front during Operation Bagration.
But before we continue: a little bit of background information.

The History
It is the end of July 1944. Operation Bagration has already been a resounding success for the Soviets. The Eastern Front is in flux; the German lines have been broken. A whole Army Group has been destroyed, and the Wehrmacht is reeling from the loss of hundreds of thousands of soldiers and countless tanks, artillery, and planes.

An overconfident Red Army, tired but with high morale after their impressive successes in the preceding weeks, crosses the river Bug into occupied Poland. The Soviets prepare to assault Warsaw and to force the Vistula, aiming to establish vital bridgeheads on its western banks - getting them one step closer to the ultimate prize: Berlin.


However, the Wehrmacht is far from defeated. The Germans are finally able to muster enough reinforcements from across the Third Reich to set up a more coherent defensive line. Five elite Panzerdivisions are hurried towards Poland and, seeing the Red Army overextending themselves, are ordered to prepare for an immediate counter-attack.

At the same time, the Polish government-in-exile and the underground Armia Krajowa believe that the moment has come to launch a general uprising. Several towns are liberated, but the insurrection is only partially successful, as bitter fighting erupts in Warsaw. Essential support from the nearby Soviet formations never materializes.

This explosive cocktail of events is the setting for the Death on the Vistula DLC.

The Army General Campaign
Our new Army General campaign centers on the Red Army’s attempt at liberating Warsaw while at the same time establishing a secure foothold on the western banks of the Vistula river. The Germans, freshly reinforced, actually have an opportunity to halt and maybe even inflict severe damage on the Soviets, if they counter-attack in the right place.


However, the pressure is on for both sides: the Germans cannot let Warsaw fall, not only as one of Hitler’s symbolical “last stand” cities but also as it serves as a major logistical hub. The Soviets aim to defeat a still capable Wehrmacht, and while the Polish capital is a critical objective, encircling enemy troops to the east of Warsaw and establishing a foothold on the other side of the Vistula to the west, are deemed equally important.

As always, all the military formations in this Army General campaign, down to the last soldier and tank, are historically correct. On the Axis side, you’ll be able to play with well-known divisions such as the Fallschirm-Panzerdivision “Hermann Göring”, 3. SS-Panzerdivision “Totenkopf” and the 5. SS-Panzerdivision “Wiking”, as well as elements from 4. and 19. Panzerdivision.


On the Soviet side, you get your hands on the 8th Guards Tank Corps, 3rd Tank Corps and 16th Tank Corps (all part of the 2nd Tank Army), 2nd Guards Corps and
11th Tank Corps (both from the Mobile Group), and the Poles of the 1st Infantry Division “Tadeusza Kościuszki” (Polish People’s Army).

The occupied Polish capital is the centerpiece on the new Army General map and will allow you to recreate some of the actual major battles fought during this time: Praga (eastern suburbs of Warsaw), Siedlce, and of course the massive armored confrontation at Radzymin.

The Historical Battles
The Death on the Vistula DLC also contains four new Historical Battles, each covering a different engagement. They will be playable up to 3v3, either solo or cooperatively.

  • MEMENTO MORI This Historical Battle sees a small battlegroup from the 3. SS-Panzerdivision “Totenkopf” trying to beat back a ferocious attempt of the Soviet 11th Tank Corps to encircle the German garrison at Siedlce.
  • ESCAPE FROM BREST An ad-hoc Kampfgruppe tries to break out of the “Fortress Brest-Litovsk” and in the process is left stranded behind enemy lines. This Historical Battle has a special rule that to make the Soviets lose, the German side needs to control ALL the flags on the map.
  • FIGHTING RETREAT The Siedlce pocket is in danger of being overrun, and while the Germans try to cover the withdrawal, the Soviets try to stop the escape at any cost. Both sides will depend on cavalry troops to achieve their goals in this Historical Battle.
  • RIVER OF BLOODCrossing the Vistula and establishing a bridgehead on the other bank is the key objective in this scenario. Taking place a couple of kilometers south of Warsaw, the Soviet-controlled Polish People’s Army will have to breach tough defenses in order to reach the other side of the river.


What’s Next?
If you thought that was all - you are dead wrong! We have plenty of new Death on the Vistula content to highlight in the coming days. So, keep on holding tight and watch out for the next post - which should come in the not too distant future.

Don’t forget to get your hands on the History Pass Season. With this pass, you’ll receive access to all three History DLC’s, with Death on the Vistula being the first, which are planned for Steel Division 2. These will be released in the 12 months after the launch of the game.

https://store.steampowered.com/app/988171/Steel_Division_2__History_Pass/

You can always check out our Steam and Eugen forums and social channels (Facebook and Twitter).

See you soon, commander!

Death on the Vistula: New Axis and Allied Divisions Detailed

Hello there! In today’s post, we’ll be taking an in-depth look at the four new divisions which will launch with the first History Pack, the Death on the Vistula DLC, on October 17th.

https://store.steampowered.com/app/988171/Steel_Division_2__History_Pass/

On the Axis side, let’s welcome to the stage the veteran foreign volunteers of the 5. SS-Panzerdivision “Wiking” and the experienced Luftwaffe soldiers of the Fallschirm-Panzerdivision “Hermann Göring”.


On the Allied side, we have the brave fighting Poles of the Armia Krajowa, the clandestine military army in occupied Poland, as well as the Soviet-controlled 1st Polish “Tadeusza Kościuszki” Infantry Division.


The two Axis and two Allied divisions are unlike anything you’ve seen in Steel Division 2 so far, bringing over 200 new units to the battlefield.

The Axis

The 5. SS-Panzerdivision “Wiking”
A powerful armored formation, the 5. SS-Panzerdivision “Wiking” was one of the first major reinforcements to arrive on the Polish front. It lacks the state-of-the-art tanks (Tiger E’s and Panther G’s) from its Heer counterpart, the 5. Panzer, but makes up this disadvantage by the large amount of infantry and a substantial number of medium tanks at the player’s disposal, including StuG IV’s and Beute T-34/85’s.


An interesting new unit available to the “Wiking” is the Bergepanther, which can be deployed on the battlefield as a heavy prime mover. The division also features one of the newest variants of the Fw 190 fighter: the capable, long-nosed Fw 190 D-9.


The 5. SS-Panzerdivision “Wiking” allows you to create a very resilient battlegroup, with enough offensive power to lead on the attack, while being equally effective in defensive situations.

Fallschirm-Panzerdivision “Hermann Göring”
As a military formation, the Fallschirm-Panzerdivision “Hermann Göring” occupied a rather unusual place, being an armored paratroop division of the aerial warfare branch, the Luftwaffe. This elite division fought well on various fronts before being ordered with haste to reestablish a coherent frontline around Warsaw. Once in Poland, the “Hermann Göring” took control of various subordinate formations and troops already present. This is represented in Steel Division 2 by the division’s ability to deploy some rather special units.


For instance, while lacking newer tanks, the “Hermann Göring” fields not only a large number of armored personnel carriers compared to a regular German division, but also features a sizable number of anti-aircraft guns, either stationary or self-propelled. Some more peculiar vehicles available in this division are the prototype Sturmtiger, the 600mm off-map artillery, and the Walküre.


Any battlegroup made with the Fallschirm-Panzerdivision “Hermann Göring” benefits from the variety and flexibility of the support, artillery and AA units on offer. This makes it an adaptable division in both offensive and defensive situations.

The Allied
Armia Krajowa
The Armia Krajowa, also known as the Home Army, was the underground military branch of the Polish government-in-exile that, after many years of hit-and-run attacks, sprung fully into action during the Warsaw Uprising. In Steel Division 2, the Armia Krajowa is an unconventional division, fielding a broad array of weapons including a handful of captured German tanks. You will have access to Panzer IV’s, Hetzer’s, Panthers, and even Tiger heavy tanks, but as an infantry-centric force, the Armia Krajowa is best used in close combat situations.


It excels in these types of up-close-and-personal battles, even against armored opponents, and is very reliable when used on the defense. It fares less well on the attack, and a battlegroup formed from the Armia Krajowa division depends on friendly support to accomplish an offensive mission.

1st Polish “Tadeusza Kościuszki” Division
The second Polish fighting force including in the Death on the Vistula DLC is the 1st Polish “Tadeusza Kościuszki” Infantry Division. This Soviet-controlled formation was formed from Polish exiles, POWs and civilians from liberated territories. Being part of the Red Army, it was kept in reserve until combat moved to Poland and the liberation of Warsaw seemed imminent.


Modeled after a typical Soviet rifle division means that the 1st Polish “Tadeusza Kościuszki” Infantry Division is able to field a lot of infantry and is well supported by tanks and armored reconnaissance troops. The Polish soldiers of this formation were known to use scavenged German weapons, so plenty of MG-42 machine guns and Panzerfäuste can be found within its ranks.

The 1st Polish “Tadeusza Kościuszki” provides a strong backbone to any battlegroup, thanks to the various powerful units the division can deploy, and allowing it to hold its own in any combat situation.

What’s next?
The launch of the Death on the Vistula DLC is just around the corner, releasing on October 17th. With the four new divisions, you’ll be able to get your hands on 200+ new units, experience new Historical Battles and one massive new Army General Campaign, use new Aces, and play with much more exciting Steel Division 2 good stuff.

Alongside the DLC, we’ll also be launching the free Reinforcement Packs to everyone who owns Steel Division 2, and which will come with a host of improvements and new features, including Smart Orders, three new maps, tutorials, and more!

Until then, don’t forget to check out our Steam and Eugen forums and social channels (Facebook and Twitter).

Steel Division 2 - Smart Orders Explained

Welcome back! Today we will be diving deep into an exciting new Steel Division 2 feature the Eugen team has been working on during the summer: Smart Orders.

Smart Orders will be made available to all players and launch alongside the upcoming Death on the Vistula DLC on the 17th of October.

https://store.steampowered.com/app/988171/Steel_Division_2__History_Pass/

Smart Orders is a new tactical player tool in Steel Division 2 which offloads certain aspects of unit micromanagement to the computer. It means that you can select a group of units, give them a Smart Order, and watch as the AI takes over and, while taking into account various tactical elements, execute the order. A neat new feature, no?

Of course, there is a whole lot more to it. So, without further ado, let’s take a closer look at what Smart Orders are, and how they can help you command your troops more efficiently on the battlefield.

How does it work?
Smart Orders come as a new information panel in the tactical interface, above the standard unit controls. They are essentially automated commands you can give to a group of units, such as “take this hill” or “defend this position”, which they will then try to follow on their own initiative. Smart Orders can be used (or not) in perfect harmony with the more detailed and precise unit controls already available in Steel Division 2.


It is an excellent way to have the computer take control over a part of the battlefield, such as a flank or providing counter-battery fire, while you are concentrating on more important sectors of the frontline.

You pick the units, give them a Smart Order, and let the AI do the rest. The computer will carry out the command, stringing together various tactical considerations into one overarching automated order that is continuously updated until the objective is reached. For instance, the AI will take into account the group’s composition and number of units, the surrounding terrain, the cover available, if there are roads which can be used for fast movement, visible enemy units, their relative strength, and more. You can check which orders a unit is following by selecting them and holding Shift.


The units under a Smart Order will be highlighted in a different color. If you want, at any moment, you can take back control of a unit under a Smart Order by giving it another order.

Different types of Smart Orders
We were not happy with designing just a general offensive or defensive order; we wanted to make sure to reflect the realities of Steel Division 2 combat in the best possible way. This means you can give different types of automated orders to your units, which they will try to follow on their own initiative.

Which Smart Orders can you give?
  • SEIZE: Give the “Seize” order to a selected group of units and they will automatically try to capture the targeted location, engaging any enemy near their objective. Having dealt with their threats, the selected units will automatically switch to the “Hold Position” stance.
  • HOLD POSITION: Give the “Hold Position” order to a selected group of units and they will defend their current position to the best of their abilities, using the surrounding environment and available cover. They will relocate depending on the tactical situation, for instance, move around to face an enemy flanking attack.
  • FIRE AT WILL: The “Fire at Will” order gives a selected group of units the freedom to target and engage any spotted enemy within their range of fire.
  • COUNTER BATTERY: Give the “Counter Battery” to a selected group of artillery units, and on their own initiative will fire at enemy artillery pieces - but strictly in a counter-battery role. This means that your artillery units, mortars and howitzers will only target known or detected enemy artillery positions. No more idle time for your howitzers and mortar crews!
  • DEFENSIVE FIRE:The “Defensive Fire” is the second Smart Order focused on helping you manage your artillery forces better. This command gives your artillery the freedom to fire at any target spotted close to the designated position. A great way to support your offensive operations!


Why did we create Smart Orders?
When creating Smart Orders we wanted to make sure that the new mechanic would appeal to all our players, from first-timers to experienced veterans.

It might look like a simple addition on the surface, but we made sure that everyone would enjoy it in their own particular way. Smart Orders fit into our game design ethos of Steel Division 2: you can either keep a strategic bird's-eye view of the battlefield or zoom in all the way to watch your tanks and soldiers do the fighting up close.


Smart Orders work in the same way. As a veteran, you can safely ignore issuing any Smart Orders if you are comfortable in micromanaging your units against the toughest of opponents. If you feel that a tactical battle goes too fast, however, you can subordinate certain sectors of the front to the computer. For new players getting into Steel Division 2, Smart Orders is a great management tool, giving them more control over their units on a battlefield that at times might feel too chaotic.

What’s coming next?
We are always very curious to hear what you, our players, think of our plans. As we talked about in our previous post, Smart Orders are just one of the many new features that will be coming to Steel Division 2 in the near future.


We have mod tools coming, new tutorials, the first Historical DLC bringing new divisions, new units, new maps, new Historical Battles and a new Army General Campaign, and much more. Hang on, as we will be ramping up the frequency of our blog posts, revealing all the good stuff in the lead up to the launch of the Death on the Vistula DLC on the 17th of October.

Keep an eye on our Steam and Eugen forums and social channels (Facebook and Twitter).

Leave your comments, suggestions, feedback! We’d love to hear what you think.

See you on the battlefield!