Greetings, designers! Recently we saw the release of a new game to the Endless Mission Content Portal:
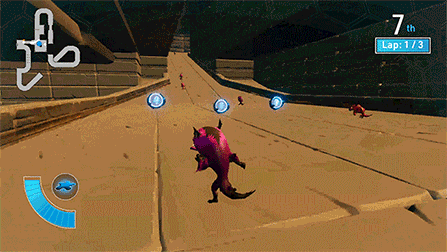
Weasel Raceway. This game takes the gameplay seen in the Racer, but swaps out the cars for weasels racing on foot and sets the action on a whole new track themed around a tropical temple.
 Oh, and did I mention it’s a foot race? Those little buggers can run fast.
Now, what if I told you that
I was the one who created this game? Totally awesome, right
(don’t answer that)? With the game out now, I decided it’d be cool to write up a little postmortem about this project. Where did the idea come from? What is my design process like? What challenges did I face while making this game, and how did I overcome them? How much of my blood was replaced with caffeine by the time I was done with this project? All these questions and more will be answered in this article!
 It’s fine, I can stop at any time. Honest.
[h3]Humble Beginnings[/h3]
Every game begins with an idea. They can be a specific game mechanic you want to work around or a thematic element or message you want to express or even just “hey, wouldn’t it look really goofy if we did
this?” The main thing to remember with ideas, though, is that they can come from
anywhere. Legendary game designer Shigeru Miyamoto has spoken at great length about this, citing how even the most random parts of everyday life have served as inspiration when creating games. Forging through the woods in his backyard as a kid? The kind of open-world exploration he wanted to capture when creating the original Legend of Zelda. A nasty encounter with an angry dog that was tied to a post? The inspiration for the behavior and attack patterns of the Chain Chomp enemies in the Mario games. Watching ants work together to move stuff around while gardening? The origin of Pikmin. Miyamoto has always had a knack for finding game ideas in the most unlikely places, and it’s a skill that any budding designer should take the time to develop.
 Still no word on what kind of horrific childhood trauma led to him creating this, however.
That’s not to say that every game idea has to have some sort of esoteric origin story, however. Sometimes, the inspiration for a game can simply come from another game. This was the case for Weasel Raceway, as the idea for this game came from… watching a livestream my coworkers did for The Endless Mission.
How meta.
[previewyoutube][/previewyoutube]
Wait a sec… That punk on the right owes me five bucks!The stream is very informative and worth a full viewing, of course, but for the sake of this article, the highlight is at the two hour, ten minute mark: While experimenting with putting different visuals on the race car AI, they decide to plop in the weasel enemy from the platformer game. The end result?
Absolutely friggin’ hilarious. A cartoony rodent flailing around frantically as he runs way faster than he has any right to, the nitro exhaust while boosting being lined up
perfectly with his armpits… It left the entire stream in stitches.
It was upon seeing this that I realized: There’s potential here. Why leave it as a single character option when this could be the basis for an
entire game? Could the inherent hilarity of this be enough to carry a whole game by itself?
I had to find out.
[h3]Laying the Groundwork[/h3]
So I had the basic idea: Racing game, but with weasels instead of cars. Now the big question was, where do I start? Well, we already have a built-in racing game template included with the game, and half of what made the idea so hilarious was that it involved swapping out models and literally nothing else so… why not just start with that?
Now, I know what some of you are already thinking: Isn’t that kinda cheating? I’m just taking the groundwork someone else laid out and using it for myself. Don’t “real” designers build everything from the ground up? And to this I say:
 And speaking as both a designer and as someone who played Resident Evil 4, I can vouch that fighting the Regeneradors is less frightening than even the prospect of writing code.
Here’s the thing - There is zero shame in using someone else’s work as a starting point for your own. Video game designers will frequently reuse and share their resources so they don’t have to build everything from scratch every time. In fact, the
entire point of game engines and game-making toolkits, from the Unreal Engine to Super Mario Maker, is to handle all the redundant busywork for designers so they can focus on the stuff that makes their creations unique. I could spend a month or two writing all the code necessary to even begin creating a racing game - avatar control, win/lose conditions, racing physics, AI behavior, etc. - or I could use the template that was already provided for anyone to use so I can instead spend my time creating new components that only my game will have. Why reinvent the wheel when I don’t have to?
Now, there are limits to this, of course. If someone hasn’t given you permission to use their stuff in your game, then yoinking it anyway is a pretty lousy thing to do (not to mention… ya know… usually illegal). Plus, sometimes it’s worth questioning the things that you’re borrowing to use in your game because they “have” to be there and this will save you time creating it yourself - trying to build a game without relying on an essential component of the genre can be a fascinating design challenge! But with all that said, if it’s an available resource for you to use that makes building your game easier, then there is nothing wrong or lazy about using it.
With that all out of the way… As I mentioned, The Endless Mission comes with a prebuilt racing game template for people to get started with. It has all the assets needed for a bare minimum racing game: Three selectable car types, a simple oval track (with boost pads), AI racers, power-ups, some basic sci-fi scenery, UI, and all the under-the-hood gameplay code needed for it to all work. Once I had this all out in my editor, I asked myself the first two questions anyone should ask when using prebuilt assets as a starting point:
“What components do I absolutely have to keep in order for the game to function the way I want it to?”And
“What do I want to add or change to make this game uniquely my own?”For the first question, I knew I wanted to keep the ability to select car types (even if they wouldn’t be “cars” per se), the AI racers, power-ups, UI, and code. As for the second, beyond the initial idea of swapping out cars for weasels, I wanted to create an original track for them to run around on and brand new scenery that would be more fitting for the weasels than flying ships and skyscrapers. The specifics of these answers would change over time (I discovered there were certain components of the UI I didn’t need to keep, and “new track and scenery” ended up being way more complex than it sounds), but this gave me the starting point I needed to begin working.
[h3]Swap and Go[/h3]
Given that it was the initial inspiration for the whole thing, the first thing I did was get to work swapping out the cars for weasels. In the livestream, they only gave the player an option to be a weasel while leaving the AI cars alone, but I knew I wanted to go all-in here. Everyone is weasels now!
 “You always give us the strangest requests…” - Our Graphics Design Team
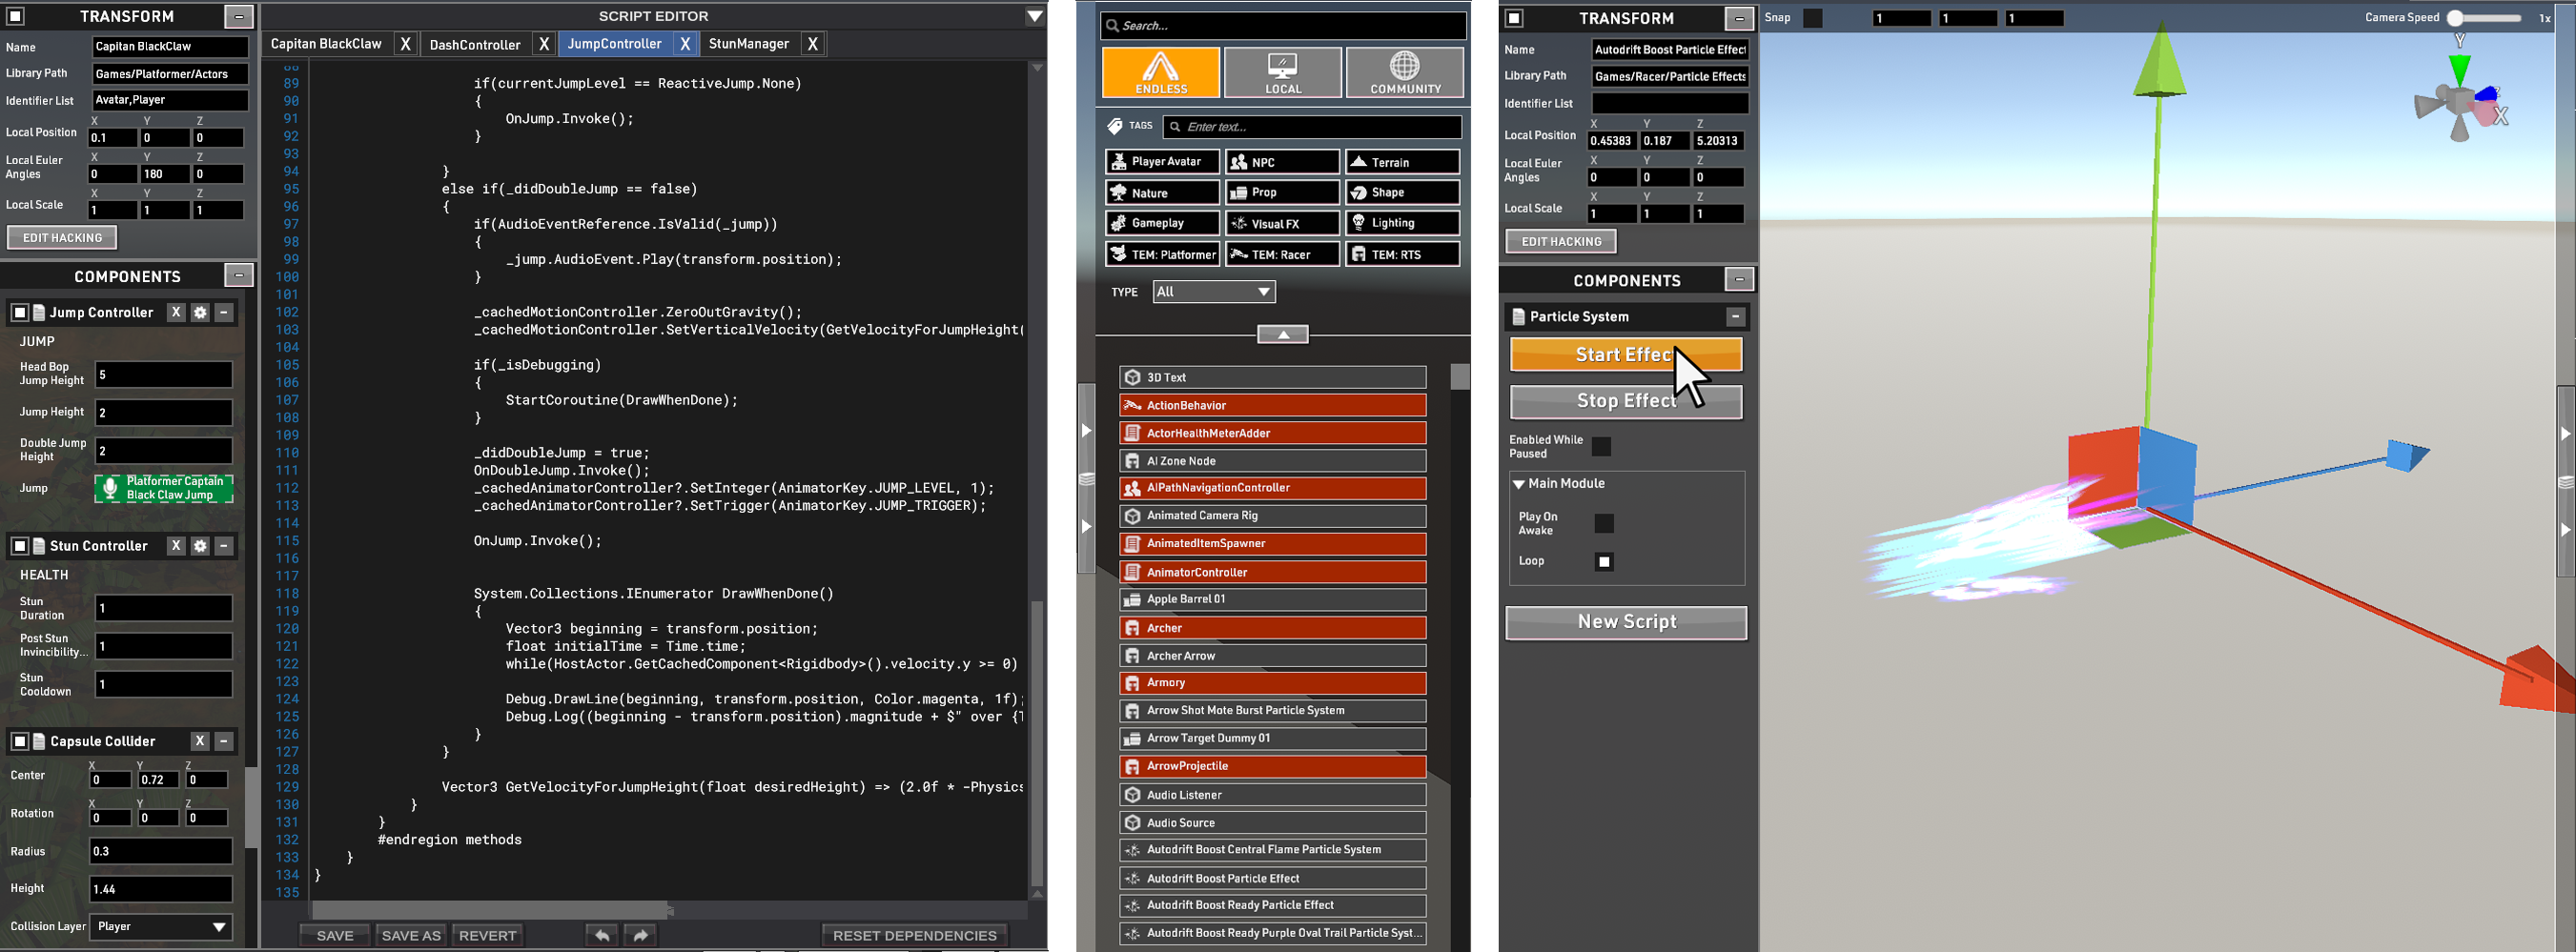
There are three different kinds of cars that both the player and the AI can use: Lightweight, Heavyweight, and Balanced. Conveniently, there are three versions of the weasel enemy as well: Bully, Guard, and Rabid. Now it was just a matter of figuring out which weasel should represent which car type. Bullies are the “default” weasel type, so it made sense to make them the Balanced racer. Guards have huge helmets that make them tougher - that felt pretty Heavyweight-ish. Rabid weasels are quick and jittery-looking, so they fit right into the zippy, Lightweight car type. The racing game template was built so that each AI (and the player) stored the coded behavior and model they use in completely separate fields, so removing just the physical appearance of each car and replacing it with a weasel while keeping all the code untouched and still fully-functional, was a trivial affair. Within five minutes, I had an army of weasels running around an oval racetrack. That was quick! Building this game was going to be easy!
[h3]Tracking Progress[/h3]
… Well, okay, maybe not that easy. Even with a powerful toolset like the Endless Mission, every game presents its own challenges while being created, and as a designer, it’s your job to tackle these challenges head-on.
For this game, the first challenge came in the form of the track itself. The Endless Mission currently uses a spline system for generating racetracks (that’s a fancy way of saying you can plot a line in the game world and the game will build a track for you that follows that line). However, while there are multiple texture/appearance options for tracks generated this way, they’re all sci-fi themed. I wanted something more akin to the tropical setting that the weasels are originally from, but to do that, I would have to forgo using the spline system entirely and instead use individual assets to craft the racetrack.
From scratch.
Piece by piece.
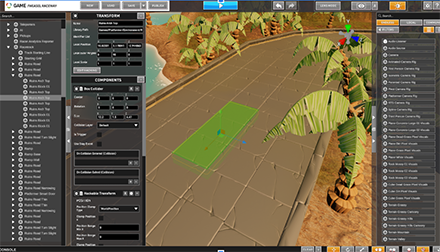 That highlighted asset? One asset out of nine that make up a single piece of custom-built track. There are seventy-five pieces like this that make up the entire track, and that’s not even counting ramps, boost pads, and the like.
It took a little while, but I was committed to the idea of making a custom track for this game. Thankfully, the use of grouping and saving my own assets locally helped out a lot here. Once I created one bit of track and saved it as a single asset, I could create as many copies of that as I liked to build the entire course. There were still plenty of challenges - making sure each piece of track lined up perfectly, realizing that I’d need to create a brand new type of track for something new I wanted to do, etc. - but once I had created enough assets, it felt a lot like a lot of track editors in older racing games where you plopped down track pieces one at a time to create a course.
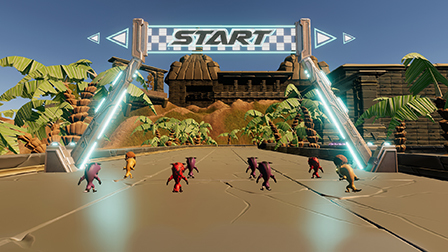
Of course, this leads into the next question: What kind of course did I want to create? With the theme and the assets I was going with, the concept of racing through an ancient temple immediately sprang to mind. It’s a concept that’s seen many different interpretations in other racing games, so it would be fun to see what my own take on it could be.
 If it’s good enough for both Mario Kart and Crash Team Racing, then it’s good enough for me.
That said, while I knew I wanted a track that would weave in and out of ruins, I decided to focus purely on the track first before worrying about any kind of buildings or props. Having the gameplay be fun and fair is a much higher priority than making sure the environment looks good, and it’s a lot easier to edit the theming to fit the track than it is to force the track to fit around the theming. As for how I designed the track, I just… built whatever came to mind. I had a few aspects I wanted to make sure were definitely included - the big jump at the very end was something I knew I had to have - but otherwise, I just experimented with whatever I thought would be an interesting piece of track to have next while making sure to not get too far away from the starting line (I’d have to make my way back there eventually, after all). I also considered what kind of interesting track elements I saw in other games that would fit well here - the series of 90 degree turns while going upward about halfway through the course is lifted directly from Papu’s Pyramid in Crash Team Racing, for instance.
It took some time, but after a whole lot of blood, sweat, and tears (well, okay, maybe just tears), I found myself looking at a fully crafted racetrack. That means it was time to start doing all the decorating, right? Well… Not quite.
ConclusionUnfortunately, that’s all the time I have to ramble this week on the subject, but we’re far from done! Getting the track placed down is just the beginning of what I had to do to bring this game to life. Be sure to come back next week for the epic(?) finale!
Click here to read Part Two--
Image Credits:
gifimage.net, mariowiki.com, knowyourmeme, thenintendovillage.com, Jungle Jim Sorry kids, you’ll still be doing a lot of tests even after you leave school.
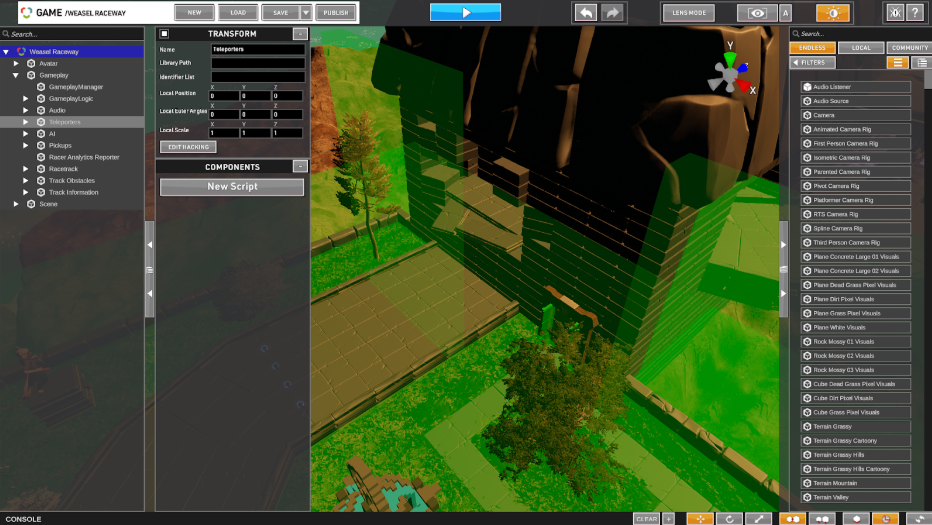 The green boxes are the trigger volumes for the teleporter. Note the ones behind the hole racers jump out of on either side. They’re there because you can midair turn hard enough to reach them. Completely absurd? Yes. Will someone try it anyway? Also yes. Always be prepared, yo.
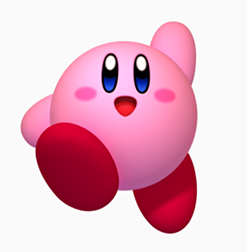 Of course, every once in a while, everyone just falls in love with the placeholder asset so much that they keep it, like Kirby here. Yes, really.
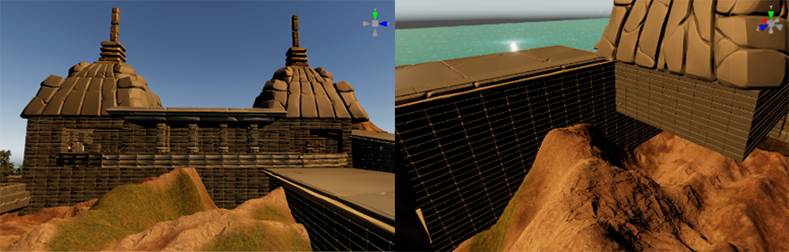 From the Front: A majestic temple. From Behind: Uh… Where’s the back wall? Or foundations?